How to scan a document into multi-page tiff. We combine several documents into one multi-page PDF. When to use JPEG and when to use TIFF
No entries found.
How to make a multi-page pdf document(tiff, jpm)
IN office work(and at home too) quite often there is a need to scan multi-page documents - contracts, commercial proposals, specifications and the like, for subsequent sending of scans to contractors (partners, employees, friends) by e-mail, or for storage on file server organizations.
Let's assume that we already know how to scan and then beautifully and correctly save documents using free program IrfanView.
But imagine a nine-page contract in separate nine jpeg files! We, of course, can name them in the correct order (1, 2, 3...), but it will be extremely inconvenient for the recipient (and ourselves) to work with a document divided into 9 separate files.
Another thing is one multi-page file in which the pages are arranged in order. It is much more convenient to view such a file and move from page to page than to open and view many separate files.
You've probably seen such multi-page pdf or tiff documents more than once, but you didn't know how to make such a document from scanned files yourself. IrfanView can help you.
So, let's look at how to make a multi-page pdf, or multi-page tiff using the IrfanView program
Before creating a multi-page document, you should already have scanned and saved document files (in jpeg format, for example). In this case, it is advisable to save the pages of one document in the same resolution, otherwise the pages of the resulting multi-page document will have different sizes, which, of course, will not decorate it.
Now you can launch your IrfanView.
Select menu item Options->Multipage images->Create Multipage PDF (PlugIn)

In the window that opens for creating a multi-page document, you need to click the top button - Add images and select the scans from which you want to create a multi-page document.

Buttons below Add images, perform functions corresponding to their names:
- Remove images- serves to delete the selected file from a future document
- Sort files- allows you to select a method for sorting downloaded files
- Move files up- swaps the file with the parent one (one click = one replacement)
- Move files down- swaps the file with the underlying one (one click = one replacement)
- Compression- allows you to select the compression amount (in relation to png files)
- Browse- allows you to select a folder to save the result - a pdf file
- Create PDF image- starts the process of creating a multi-page pdf file
- Exit- closes the multi-page file creation window

So, we have loaded the files into the future document, distributed them in the correct sequence, it’s time to press the button Create PDF image. Click and see a new window with many tabs in which you can select a page format (for example, corresponding to scans, or certain formats - A4, A5, etc.), add fields, add information about the document (author, title, keywords... .), select the window size when opening a document, compression, determine the protection method (encrypt, not encrypt, encryption bit depth), view how the future document will look.
After making all the amendments, you can press the button Save. After this, the program will prompt us to enter a password (if we have chosen encryption), enter the password, the program within a few seconds performs the actions of generating and saving a multi-page document, after which it displays modal window with the result of the operation, the result is usually positive, like all IrfanView results.
Hooray! We have created a multi-page document that can be found in the folder we specified when creating it.
In addition to the usual graphic file formats (with the extension jpg, png, bmp, etc.), which usually contain one page of a graphic file, there are also graphic file formats that support multi-page images. One of them is the format with the tiff extension ( TaggedImageFileFormat). Exists as a three-letter extension of this format file tif, and four-letter tiff. In fact, this is the same file format, which, being four-letter in the original, became three-letter because the early Windows versions It was a mandatory requirement that all file extensions of this operating system were three digits.
At work, I sometimes need to collect several graphic files into one file, for example, when I scan several pages of one common document(protocols, acts, etc.). In this case, you need to combine these scanned pages into one multi-page graphic file, and then send this file to all protocol participants for review and work. And sending them many files of individual protocol pages is not the best solution.
Also, sometimes it is necessary to scan a few pages of a book, or a small brochure, and then combine all these separate files pages into one file on your computer. To solve such problems, I usually use a small but very powerful and convenient program IrfanView. I have already briefly described its capabilities in the article
Downloading and installing IrfanView
IrfanView is free graphics program, small in size but with very powerful functionality. Considering that it also supports the Russian language, it has become for me one of the most necessary on the computer for viewing and editing photos. In fact, in symbiosis with the built-in Windows Paint, this is a small analogue of Photoshop.
You can download IrfanView from the official website of this program, or you can download version 4.38 from the direct link:
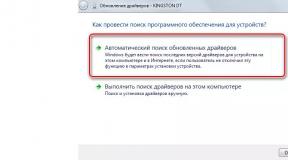
If you chose the first method, then on the official website click on the link indicated in the screenshot below (the site is in English, so I showed below how to download the latest version of the program):

You will be taken to the program download page, where you need to click the big green “Download Now” button.

After downloading, install the program (just click “Next” or “Next” when prompted to install the program). The program icon resembles a red, sprawled cat:
![]()
Russification of the IrfanView program
The Russian language for the program interface can be downloaded from the same site, in the left menu “IrfanView languages”

Then we find the Russian language in the list and download Installer:

Then we install the downloaded file, and IrfanView becomes a program in Russian, as shown below.
If for some reason the program does not switch to Russian automatically, then go to the “Options” menu, then “Change language”, and then select the Russian language, and click “OK”:

Creating a multi-page tif file
So, the program is installed, Russified, and now you can proceed directly to creating a multi-page tif file consisting of several consecutive images.
I have seven pages of a freshly scanned brochure that I need to condense into one tif graphic file. For now they are all located separately and look like this:

Open IrfanView, go to the “Tools” menu item, then “Multi-page images”, then “Create a multi-page TIFF file”:

A new window will open in which we will create our multi-page tiff from our individual files.

Click on the top right button “Add images”, find and select with the mouse all the files that we need to combine (in our example these are 7 files), it is advisable to first number these files in the correct sequence so that in the created multi-page file they go in the correct ok. After adding these files, they look like this:


Next, use the “Browse” button to specify the folder to save created file, and below we can immediately set the name of the resulting file (just do not change the tif extension). You can also use the ability to sort the source files, but if you initially numbered them correctly, then this is not necessary.
After all the preparations, click the “Create TIF file” button at the bottom left:

As a result, you create a multi-page tif file (in our example, a seven-page “Brochure.tif” file was created).
We open the resulting file “Brochure.tif”, and see that it contains exactly 7 pages. You can turn the pages of a multi-page file either using the buttons shown in the screenshot below, or using the key combinations “Ctrl” + “Page Down” ( Next page), or “Ctrl” + “Page Up” (previous page).
So, today we downloaded and installed the wonderful IrfanView program, Russified it, and also learned how to create multi-page tiff files. If you have any additional questions, please ask them in the comments.
Post navigationMulti-page scanned documents are often saved to PDF format. Such a document is then difficult to edit, for example, to remove artifacts, adjust the balance of brightness, color, and the like. It is much more practical to store such files in the original graphics file format, such as TIFF. Moreover, instead of dozens of files for each separate page you can also get one single TIFF file. To do this, you need to create a multi-page TIFF file.
To combine many images in one file, it is convenient to use the photo viewer IrfanViewer. Compared to other utilities such as ACDSee, Picasa, FastStone Image Viewer etc., IrfanViewer has many advantages. Firstly, it is very small - less than 10 megabytes. Therefore, it works quickly on any PC. It has rich capabilities - it has almost all the tools graphic editor, except for drawing functions. In it you can edit the color balance, apply effects, change the scale, adjust individual color channels and much more. Automatic image enhancement functions are also available - IrfanViewer will select the desired brightness and contrast. The program can also take screenshots (either by pressing a button or automatically), as well as perform batch actions on many files.

To create a multi-page TIFF, go to the Tools menu and expand the Multi-Page Images submenu. Click on the “Create multi-page TIFF file” button.
In the window that appears, select the files you want to merge and specify Extra options. In this window you can perform basic image processing, for example, convert color scanned copies to grayscale, adjust compression for a smaller source file size, and the like.

The pages in a multipage TIFF are displayed in the same order as they appear in the Create Multipage TIFF window. You can choose standard sorting - by date, by name, by size, and the like. And then manually move files using the “Above” and “Below” buttons.
TIFF (Tagged Image File Format) is a format for storing images with high color depth. Mainly used in scanning, faxing, text recognition, printing, and widely supported by graphics applications.
Using free online converter images, you can achieve the desired result using the available settings available in the TIFF format, you can specify the color depth from 1 to 64 bits, depending on the color depth, specify the type of compression - lossless (LZW, FLATE) or lossy, but with maximum compression capabilities (JPEG). Use advanced conversion options for more fine tuning TIFF format.
With TIFF converter you can convert various graphic formats, for example: JPG to TIFF, GIF to TIFF, BMP to TIFF and other options.
Note! In the "Settings for TIFF format" field you do not see some of the settings, this is due to the fact that they are not available with the specified combination. By changing the color depth and compression type, you will have access to the allowed settings in the selected combination.
What is TIFF format
TIFF stands for Tagged File Format and is a specification for storing images in in electronic format. Unlike its more popular brother, JPEG, TIFF is “lossless,” meaning that every pixel in the original (before it is converted) is preserved exactly. As a result, the files are relatively large. In our converter you can enable "LZW" compression, which will reduce the file size, but not as much as in JPEG, since this compression is lossless.
The format is used for many things (photos, scans, satellite images). In general, think of it as a large, high-quality image where most of the work involves multiple edits. The format we describe is great for this because it allows you to save the data over and over again and every time you change something and the unchangeable pixels remain unchanged.
In our converter you can see a lot of format settings, ranging from color depth and choice of compression method to byte counting. All this allows you to use a large number of compression options and functions. This wide range of possible features has led to the joke that TIFF actually stands for Thousands of Incompatible File Formats.
When is JPEG used and when is TIFF used?
- JPEG for Web
- TIFF for print, offset printing, magazine offset printing.
The TIFF format (.tiff) preserves all image and color data. The result will be very big file. While all the original data is preserved, the integrity of the image is ensured point by point.
There is something else to remember, TIFF cannot be viewed in a web browser.
The JPEG (.jpg) format compresses image and color data. Compression makes the file smaller, ideal for the web. However, the more you compress, the more the quality degrades.
The trade-off between a small file size and a bad-looking image is always a trade-off; few people will like it if a web page takes a couple of minutes to load.
What should I save as JPEG, TIFF or RAW on my digital camera?
When it comes to digital photography, depending on the camera you're using, you can choose one of these three formats. They're basically the same, but the way your camera saves is a little different.
In this case, the best option will shoot in two formats at once: JPEG and RAW. In this case, one camera shot creates two duplicate files. JPEG is intended for quick viewing, Email, Internet, etc. The RAW file is a "digital negative" (not *processed* by the camera), it retains all the settings at the time of shooting and can be updated/remastered later.
What are the advantages and disadvantages of TIFF?
One of the advantages is that a large number of images can be neatly stored and saved in this format. And maintain their integrity enough to be useful for printing and confirming (if necessary) documents.
Try scanning documents using a scanner and then copying them into an image editor. Then save it as PNG, GIF and JPG as a test.
How to display an image in TIFF format?
This is a fairly complex file format for storing raster data, you can read the specification here: https://www.adobe.io/open/standards/TIFF.html
In answer to the question: if we assume that raster image inside the file has sufficient resolution, the difference between views may be the number of pixels displayed. For a quick preview, you usually don't read all of the data, but only some of the data, thereby creating a low-resolution image. Often images actually contain a 72PPI version of the image in the file, and most in a fast way preview is to retrieve them and display them in the application. For the best preview, the application should read all the data from the file. The trick to speed up scaling is to display the image first with low resolution, and when zoomed in the user only reads the pixels that are inside the region you see. This way, the number of pixels the application reads is at least constant at each zoom level.
Today, most applications use libTIFF, an open-source C library source code, which allows you to decode a TIFF file.
The tiff format supports multi-page images. It is optimal when you need to create several graphic documents and combine them into one file. For example, when you make scanned copies of several pages of one voluminous document at once - protocols, acts, books. In this article we will tell you how to use tiff format quickly and easily.
Scanning with IrfanView program
This software It is completely free, yet has rich functionality and is light weight. Another plus is support for the Russian language. Using this program it is convenient to view and edit graphic files any level of difficulty. all you need is to download and install IrfanView on your computer. In tandem with standard Paint, it can easily cope with all the functions of Photoshop.
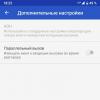
Before you start scanning using IrfanView, you need to Russify the downloaded version. To do this, you need to additionally download the Russian language:
If the program does not switch to the Russian-language format, then go to the “Options” menu, then to “Change language” and set the Russian language there.
Let's start scanning
- Open the scanner settings - Start - “Devices and Printers” - an icon with connected scanning equipment.
- Place the document face down so that the edges do not extend beyond the scanner's working area.
- Press the scanner lid firmly against the document, click “Scan” and indicate the location where to save the finished file.
- You also need to change the settings. Specify the file resolution, the image quality depends on it.
Create a multi-page file in tiff format
The finished scanned copies must be combined into one graphic tiff document. For example, there will be seven of them:


Select “Add images”, then select all the files that we will combine into a single document (number them in the correct sequence - this is important). It will look like this:

Go to the “Save Options” menu and select JPEG or zip compression to ensure the final file is of normal size.