How to connect a tp link router yourself at home. How to set up a TP-Link router. Instructions using the example of the WR841 N modification. Checking the connection of devices to the Wi-Fi repeater
Recently, Wi-Fi has become an integral part of the user’s life and is gaining momentum at an ever faster pace, since it is a very convenient thing. Wi-Fi made it possible to use one Internet connection for several devices such as a laptop, tablet or smartphone, and also eliminated unnecessary wires in the apartment.
This article will talk about how to set up Wi-Fi at home. Namely, we will analyze how to connect and configure the router or how it is called R12 correctly; router.
What is a router for?
Many users are mistaken and initially think that the router itself is the Internet and that when you buy it, your home will immediately appear. wireless Internet. But this is not true at all. If in simple words, then the Router is actually a “tee”, then the father-in-law divides one connection into several, this is its fundamental function. That is, you should at least have wired Internet in your apartment. It connects to the router, and it, in turn, distributes it to other devices according to its means wireless communication Wi-Fi.
So let's assume that you bought a router. Now you need to connect it to your computer. I will look at TP-LINK as an example, although they all connect in the same way. All routers with back side There are LAN sockets. This is where all the wires need to be connected.
As a rule, the wire through which the Internet comes is connected to a separate socket. It is always highlighted in a separate color. It may be blue, grey, white or yellow depending on the manufacturer, but it is always a different color from other sockets. The remaining sockets are intended for connecting other devices via wire that do not have Wi-Fi.
In our case, we connect the Internet wire to the blue connector and plug the separate wire included with the router into a laptop or computer and insert its other end into the yellow socket, preferably number 1.
So the router is connected, now let’s start setting it up.
WiFi setup
Almost all routers in included installation disk. We will use it to make the settings. So, insert the disk into the drive and wait for the installation wizard to launch. If the Wi-Fi setup wizard does not start, then open “My Computer” on the desktop, find the DVD-ROM and launch it manually by double-clicking the left mouse button.

So the wizard has started. Select the model of our router (you can see it on the box or on the bottom wall of the device) and run the “Quick Installation Assistant”


In this window we check the indicator readings. It is necessary that the indicator signals correspond to the actual readings of the router. If everything matches, then we continue setting up further.


After this, a message indicating successful verification will appear. Click the “Next” button

Here we select the router connection type. We choose the most common option R12; Dynamic IP, it suits any connection.

Here we select the second item. Nowadays, connection via MAC address. This can be checked at home. But for this you need to have at least two devices, for example two laptops (in extreme cases, you can ask your friends). We simply connect another laptop directly to the Internet. If the Internet is working, then your connection is not to the MAC address and accordingly we need to select the second item.

In this window we need to come up with a name for our network. Enter on English language. These names will be displayed in detected wireless networks on a laptop, tablet or smartphone.

Here we select the level Wi-Fi protection. Select WPA2-PSK R12; this is the most reliable protection. After that, set a password. The password must be entered in English, you can also add numbers. I advise you to make the password length at least 10 characters. This password is needed for wireless connection Your devices. That is, until you enter the password on the device, you will not be able to connect to the network, so no one will be able to connect to your Internet without knowing the password. This way we will protect ourselves from your neighbors using your Wi-Fi.

In this window we confirm the settings. Check the “Save settings in a text file” checkbox. Thus, on the desktop it will be created text file with the settings of your Wi-Fi, namely there will be the name of the network and the password for it so that you do not forget it.

Wireless base stations TP-Link series are one of the most common Wi-Fi routers in Russia. For settings wireless access When using the Internet, certain rules must be followed simple steps. This will ensure an uninterrupted and high-quality connection to the network. Moreover, the algorithm of actions will not differ depending on the operating system installed on the computer. The settings are similar for Windows, Linux and MacOS.
How to set up a TP-Link Wi-Fi router
After purchase Wi-Fi router TP-Link line in the store, customers become the owners of a kit that includes a number of components:
- Router case.
- Network cable to connect the device to a computer.
- Instructions that describe how to troubleshoot any problems.
- Power unit.
- Documentation with technical characteristics goods.
- CD with materials.

First you need to connect it to your computer. In frequent cases, the cable that comes with the router is not long. Therefore, you should place the router close to the computer. Insert one side of the cable into the connector for connecting to the Internet, the other into one of several LAN connectors router, which are usually highlighted in yellow and have a corresponding inscription next to them.

The Ethernet vendor cable connects to the WAN port marked in blue.

Router Compounds
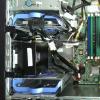
The back panel of the device is a set of a couple of buttons and holes. Each element is best labeled in order from left to right:
- The first is the OFF/ON button, which accordingly turns off the router and puts it into operation.
- The next one is the power cable connector with the word “power” underneath it, to which the power supply is connected.
- Next is the blue WAN connector described above.
- The yellow panel shows several LAN holes.
- A small button that enables QSS technology to function.
- The last one is the reset button.

On the front panel of the router there are indicator lights, which are also important when monitoring the proper operation of the router.
| Indicator | State | Meaning |
|---|---|---|
| 1. Food | On Off | Indicates that the power supply is properly connected |
| 2. WLAN (Wireless Local Area Network) | Off/Flashing | Demonstrates the state of functioning wireless technologies on data transfer. A flashing position indicates that this property is active |
| 3. LAN (local computer network) 1-4 | On/off/flashing | Indicates whether additional devices are directly connected to the router. A flashing state confirms that such stationary elements are connected and are performing active work. A steady light indicates that the device is connected but not active |
| 4. WAN (Wide Area Network) | Flashing/off | This indicator displays the functioning of the Internet. If any malfunctions are detected, the WAN will not emit light |
| 5. WPS (Wi-Fi Protected Setup) - secure installation | Moderate flashing | Indicates that the router is in the process of enabling the secure installation feature. It will take about eighty seconds |
| Included | The router started working safely using the Wi-Fi Protected Setup function. The pointer will be active for approximately five minutes |
|
| Fast flashing | No connection was made |

Getting started with the router
After connecting all the components, the power, WLAN and WAN indicators should light up and the device is operating correctly. The presence of this fact indicates that you can start setting up the router. To enter the section on establishing the required characteristics, you should:

Configuration using the web utility
There are several ways to make final and detailed adjustments wireless connection. Internet method is suitable for users operating systems Windows, Mac OS, Linux, which are not able to use the included CD.
After completing the above described manipulations, the subscriber will be taken to the web utility page. One of the most effective and time-saving methods is “ quick setup", which will be located on the left panel. A number of steps for its operation are very simple:

Thus, by gradually following a simple algorithm, you can prepare the router for operation in a fairly short time - 5-7 minutes.
Types of Wide Area Network connections
It is worth considering this point more carefully, since further configuration of the router may differ markedly depending on the type of WAN.
- If you select a dynamically assigned IP address identifier, you will need to click the “Save” or “Save” line. This will allow you to clone MAC addresses and successfully access the network.

- Using Static Internet Protocol requires the user to specify an IP address, subnet mask, gateway and DNS. This information may be obtained from the provider.

- The PPPoE/PPPoE Russia option will prompt you to enter a Username and Password provided by .

- The L2TP method will require a Name VPN servers and password also provided to you by your service provider.

- The PPTP/PPTP Russia connection function, similarly to L2TP, will ask you to provide the same data.

Setup using CD
When fully equipped, buyers should find a special information medium in the box with the device. It greatly simplifies setup if your computer has a CD drive and has a function for reading it.

note that this method is only suitable for Windows users, in the event that they are able to run the CD.

Something to keep in mind that in this way they will be attached to your router. For additional extensions, the utility suggests going to the “WEB settings interface” item and installing them to suit your specific needs.
Video - Setting up a Wi-Fi router TP-LINK TL-WR740N
Good afternoon, dear readers. In recent years, the population of our country has widely surrounded itself the latest laptops, portable tablets and mobile phones, having a built-in Wi-fi module who does possible connection to wireless networks anywhere.
Wi-fi solves the long-standing question of “how to do without wires” and allows you to distribute the Internet throughout your entire house or apartment. Today we will figure out how to set up a tp link router while gaining access to Wi-Fi in your home. And at the same time we will consider other related problems.
Questions that we will address in this article:
How to connect a router to a PC;
How to set up an Internet connection;
Setting up a Wi-fi network, setting a password;
And much more.
Before starting the instructions, I would like to remind you that Wi-Fi is absolutely harmless to health. I am writing about this because I have often heard the opposite from my interlocutors. Yes, and more. TP-Link TL-WR841N router is the ideal solution for connecting home internet in terms of price/quality ratio.
Connecting TP-Link TL-WR841N
In total, there are 6 buttons and connectors on the back panel of the TP-Link TL-WR841N:
1. On/off;
2. Input for power cable;
3. WAN input for connecting to the Internet;
4. LAN inputs for connecting the router and PC;
5. QSS button;
6. Reset button.
The first step is to connect the router to your computer or laptop. To connect the router, you need to plug an Internet cable from your provider with an RJ-45 connector into the blue WAN input, and plug a twisted pair cable from your computer into one of the yellow LAN connectors.
After this, you need to connect the power cable and make sure that the router turns on.
Entering the settings of TP-Link TL-WR841N
After this, you need to log in to the router control panel. Open any browser (Opera, Mozilla, Google Chrome or Internet Explorer). IN top line enter the following address: “192.168.1.1” or “192.168.0.1”.
An identification window will pop up. It requires you to fill in the fields “User name” - admin, “password” - admin. Having completed all this, we will go to the main window in which you can change the settings of the tp-link tl-wr841n.
The username admin and password admin are the default settings. If it says to you that “the login or password is incorrect,” then most likely the router has already been configured earlier and you need to reset the settings to the factory settings by pressing the Reset button.
Setting a password
The first necessary procedure is to change the standard login and password to a unique one. Nobody forces you to do it, however, by following a number of simple procedures you will be completely confident that your router is reliably protected. There will be no incomprehensible traffic costs due to neighbors stealing it.
Do not forget that after changing your login and password and connecting with personal data, you should write them down in a special notepad. Otherwise, you may subsequently lose the opportunity to access the Internet and then you will have to re-establish the connection.
Go to the menu “System Tools” - “Password”.
Sometimes it happens that Internet providers do not provide such services as automatic setting DNS server addresses.
In this case, they must be entered into the required sections, checking the “Use these DNS servers” checkbox.
2nd option – Static IP address. This setup and installation method is a little more complicated. In this situation, all variables that connect to the Internet are independently registered.
In the “Network” menu - “WAN”. We define the “Static IP” connection option and enter all the relevant values from the agreement with the Internet provider.
3rd option – “PPPoE” - login is carried out by entering your login and password. Some providers use this method in addition to static IP. In this case, you need to enter the “IP” and “Subnet Mask” data.
As a result of these actions, the router’s MAC will be identical to the computer’s and, as a result, the Internet connection will function. You need to pay special attention to the fact that if you are setting up a Wi-Fi router from another PC, you must fill out the MAC yourself in a specially designated field.
Setting up a Wi-Fi network
In our instructions this is the most important place, which must be studied and followed very carefully. The overwhelming group of users purchases and personalizes a router solely for simulation wireless network with the ability to have Internet access.
The process of entering settings will not take too many minutes.
In the “Wireless Mode” menu - “Wireless Settings”. You are required to enter data with the “Network name” and “region” parameters. You must remember to save all your actions.
“Encryption” - select the “Automatic” item.
“PSK Password” - a personal code is filled in that protects accessibility Wi-Fi networks. This is the password that will be required to connect to your wi-fi network.
After all the actions performed, it will be necessary to save the changed settings. After which you will be able to use the Internet.
That's all. As always, I suggest you watch a training video based on the material in the article.
If you have any questions, be sure to write them in the comments.
Requirements for use
Updated 04-06-2016 15:04:11 PM
This article is suitable for:
TL-WR54KIT , TL-WR841N , TL-WDR3500 more
TL-WR54KIT , TL-WR841N , TL-WDR3500 , TL-WR743ND , TL-WR543G , TL-WR2543ND , Archer C50(V1) , TL-WDR4900 , TL-MR3420 , TL-WR941ND , TL-WR843N , TL-WR710N , TL-WDR4300, TL-R402M, TL-WR541G, TL-R860, TL-WR702N, TL-WR802N, TL-WR700N, TL-WR841HP, TL-WR340G, TL-WR1043ND, TL-WR1042ND, TL-WR300KIT, TL- WDR3600 , TL-WR542G , TL-WR842N , TL-WR150KIT , Archer C20(V1) , TL-WR940N , Archer C7(V1 V2 V3) , Archer C20i , TL-WR741ND , TL-WR740N , TL-WR840N , TL-WR841ND , TL-WR810N , TL-WR340GD , TL-WR720N , TL-WR843ND , TL-WR842ND , TL-MR3020 , Archer C5(V1.20) , Archer C2(V1) , TL-R460 , TL-MR3220 , TL-MR3040
Note: This article will not be suitable for you if your connection is made in the following ways:
- You have a cable/fiber modem. Internet access is provided automatically without any settings. However, only one user can access the Internet.
- Before acquisition TP-Link router your ISP has provided you with a static IP address. You need to manually enter an IP address on your computer to access the Internet. In this case, please refer to these instructions.
- Your ADSL modem can provide Internet access to multiple devices. In this case, please refer to these instructions.
Additional preparation:
- Turn off power to your router, modem, and computer.
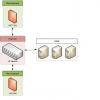
- Connect the modem to WAN port TP-Link router using an Ethernet cable, main computer connect to LAN port router using an Ethernet cable.
- Turn on the power on the router, then on the modem and computer in sequence.
Note: Make sure you can access the Internet via modem, without using a TP-Link router. If the direct connection does not work, contact your Internet access provider.
Step 1: Login to the router's web-based configuration utility.
If you have problems accessing the web-based utility, please refer to these instructions.
Step 2. Configure the WAN connection type.
After logging into the router's web-based configuration utility, go to the " Net", subsection " WAN" In line " Connection typeWAN» select « PPPoE" as shown below. Then click the " Save».
Step 3: Enter the details provided by your Internet Service Provider
Enter the username and password provided to you by your ISP.

Step 4. Save settings.
Step 5: Check the connection.
Wait a few minutes and check the information on the page " State" In chapter " WAN" If the router receives any IP address (similar to the one shown in the image below), then this will mean that the connection between the router and the modem has been established.
Hello! Very often they ask how to connect the router? So we bought a router, brought it home, and how to connect it, and what to do with it next, so that it would distribute the Internet via Wi-Fi and cable. In this article we will talk specifically about TP-Link routers. I'll tell you in detail and even take a photo. TP-Link connection. Where and what cable to connect, how to connect the router to the provider, computer, modem, etc.
In fact, there is nothing complicated about it. You just need a little time and patience :) After purchasing any router, in our case this is a TP-Link device, you will have to connect and configure it correctly. If you connect incorrectly, you will not be able to configure it. The setup process itself is a topic for another article, or for instructions on specific model. Well, in this article we will analyze in detail the process of connecting a TP-Link router.
The article is suitable for all models: TL-WR940N, TL-WR740N, TL-WR841N, TL-WR842ND, TL-WA701ND, TL-WR743ND, etc. I will show it using the TL-MR3220 as an example. I would like to show you how to connect (it's more popular), but now I only have the TL-MR3220 at hand. Well, okay, they are practically no different.
Connecting a computer to TP-Link via a network cable
First of all, we need to connect the power adapter to the router. Just plug it into the POWER connector. You definitely won’t miss there :) Well, plug it into the mains. If the indicators on the router do not light up, then check to see if it has a power button and is turned off.
Further, if you configure (and/or use the Internet via cable) router from a computer? or laptop, then take network cable that comes with the router and connect one end of the cable V network card your computer, and second to the LAN connector of the router. On TP-Link, LAN connectors are usually yellow and there are usually 4 of them.
We connect the TP-Link router to the Internet provider or modem
Everything is clear here. So that the router can distribute the Internet (and this is his main task), you need to connect to the Internet. Most likely, you have a regular network cable installed in your apartment, or your Internet is connected to an ADSL modem.
We need to connect cable from the Internet provider to the WAN connector TP-Link router. The WAN connector is usually blue. Or, connect the cable from the modem to the WAN connector (for connection you can use the cable that comes with the router).
This one looks something like this:

That's all, the Internet is connected, and you can start setting up the router. Go to the settings of your TP-Link (see) and configure the router. You can set it up according to the instructions using the example. The setup will most likely be the same.
It may also happen that immediately after connecting the router, the Internet will work on your computer and other devices that you connect. This is possible if your provider uses a Dynamic IP connection type, or you have a modem connection. In any case, you will need and.
It seems like I haven't forgotten anything. As you can see, the instructions are simple and clear, anyone can connect. If something doesn’t work out, write in the comments, we’ll figure it out.
Read also...