Let's Encrypt - free SSL certificate: how to get it, instructions for installation, configuration and renewal. Free Let’s Encrypt SSL certificate on Beget hosting
Let's Encrypt statistics
On January 4, 2018, the Let's Encrypt certification authority began testing the endpoint of software interfaces for automatically issuing wildcard certificates. These certificates are issued only in new version automated certificate management environment - ACME v2. The public launch of ACME v2 was scheduled for February 27, but at the last moment they decided to postpone it for some time. This is not Let's Encrypt's fault. It was just that on January 8, 2018, it was unexpectedly discovered that one of the TLS-SNI-01 domain validation methods can be used to obtain a certificate for other people's subdomains. The Let's Encrypt certification authority has disabled support for TLS-SNI-01 and delayed the introduction of the ACME v2 protocol, which was going to use the new TLS-SNI-02 check, which is susceptible to the same vulnerability.
Now working group IETF ACME is working on the TLS-SNI-03 standard. The problem must be solved there.
Wildcard certificates are one of the most frequently requested features among users. Such a certificate applies to several subdomains at once, so there is no need to separately register each subdomain separately.
Differences between ACME v2 and ACME v1
The ACME v2 protocol has a number of differences from the first version of the API. Here are some major high-level changes:- The authorization/certificate issuance procedure has changed.
- The JWS authorization request has changed.
- Instead of the resource field, a new url header has appeared in the body of the JWS request.
- Another endpoint/resource address.
- Creating an account and signing the ToS agreement is now a one-step process rather than two.
- A new type of domain ownership check TLS-SNI-02 instead of TLS-SNI-01 (not yet implemented, see above about the vulnerability with subdomain validation).
ACME v2 enabled clients
- ACME4J (acme4j >= 2.0)
- EasyHTTPs * (automatically selects v2 or v1)
https://acme-staging-v02.api.letsencrypt.org/directory
These certificates cannot currently be used in production because the Fake LE Intermediate X1 certificate is not in the browser and client trust stores.
The delay in the implementation of ACME v2 is due to an interesting vulnerability in the subdomain validation mechanism that recently became publicly known. The bottom line is that in some cases, through Let's Encrypt you can get an HTTPS certificate for a subdomain someone else's domain after his hijacking cloud service(DNS hijacking). For more information about this hack, see security consultant Frans Rosen's talk at the OWASP AppSec EU Belfast conference.
Let's Encrypt has absolutely nothing to blame for this vulnerability. Automated issuance of certificates is carried out in full compliance with the ACME standard approved by ISRG. However, the lack of verification and automated issuance of certificates makes it possible for attackers to operate - this trick only works with Let "s Encrypt. Like some other tricks.
Weaknesses of Let's Encrypt certificates
The automated operation of a certification center is both an advantage and a disadvantage. Of course, it is very convenient to do everything via the API (see). This approach quite logically contributed to the massive spread of HTTPS - this is good for everyone: for site owners, for users, and for common system Internet security ecosystems. But there are also disadvantages due to which Let's Encrypt certificates are not suitable for everyone. In addition to some inconvenience with renewing certificates every three months and the lack of guarantees, this is also a problem of trust.Firstly, Let's Encrypt does not issue the most reliable OV (organization validation) and EV (extended validation) certificates at all.
Secondly, security experts have long noticed that Let's Encrypt issues a lot of certificates to malicious sites that are used for phishing. For example, between January 1, 2016 and March 6, 2017, Let's Encrypt issued certificates for 15,720 domains with the word “PayPal” in the name, and the number of such certificates is growing exponentially, increasing by 1.5-2 times every month.

Since then, the problem has only gotten worse, and in fact Let's Encrypt has become a permanent working tool for scammers.
The use of SSL certificates by scammers was one of the main concerns in connection with the launch of Let's Encrypt at the end of 2015. In the old days, with paid certificates, attackers would hardly have been able to afford the purchase of thousands of certificates, especially since the issuance of each of them was accompanied by a certain verification procedure. Now certificates have become free, and their receipt and renewal can be automated.
And no one thinks to fix this problem. The creators of Let's Encrypt logically believe that monitoring cybercrime and catching scammers is not their business. Therefore, they do not moderate sites. And browser developers continue to consider phishing sites that have received a DV certificate “safe.”
1. The free Let's Encrypt certificate is short-term and is designed for a period of no more than 90 days, unlike the paid one, which can be issued for up to 3 years. You can, of course, reissue the certificate every 3 months, but be sure to keep an eye on the deadlines. Re-issuing a certificate can be done in three ways: manually, by setting up the cron task scheduler, or automatically.If you choose the manual update method, then carefully follow the deadlines and reissue the certificate on time. Otherwise, you risk an influx of dissatisfied site users and their subsequent churn.
The cron task scheduler is the way to configure automatic update. The method is good for those who have Linux administration skills and know how to work with crons. It is also necessary to take into account that errors in the operation of the crown are possible that may prevent the re-issuance of the certificate. Conclusion: you will still have to monitor the update.
Automatic update. This method assumes that you accept automatic settings provided by the Certification Authority. And here you need to understand that you thus give your consent that the CA can make changes at its discretion to the software and settings of your server.
2. Not all domains can be protected with free Let's Encrypt. This certificate is designed only to protect one domain without company verification, the so-called DV SSL (Domain Validation).
So, using Let's Encrypt you cannot create the following types of certificates:
- Wildcard certificate to protect subdomains of a specific domain;
- OV SSL (organization validation) certificates, which involve checking not only the domain, but also the company;
- EV SSL (extended validation) certificates. A certificate with the maximum degree of protection and a green browser address bar;
- Multi-Domain certificate UCC type;Important point- there are no financial guarantees for using Let'sEncrypt.
3. If a free certificate is suddenly hacked, no one will provide you with monetary compensation.
To date, Let's Encrypt has provided 67.6 million domains with certificates. All of them received free DV (Domain Validation) certificates through an automated procedure and API. Since the start of full-fledged operation of the service in December 2015, the share of HTTPS traffic on the Internet has increased from 39 % to about 70%, or almost double (based on Firefox page views, 14-day moving average).

Let's Encrypt's desire to transfer 100% of the web to total encryption is excellent. But the automated approach somewhat “devalues” the status of DV certificates. Therefore, it may make sense for commercial companies, e-commerce sites, banks and other serious clients to look away
Hello, dear friends. Today we will talk about connecting and installing a free Lets Encrypt SSL certificate on Beget hosting. As I already mentioned in the article, if your site is hosted by Beget, then you can connect a free Lets Encrypt SSL certificate. This means you can transfer your website to the HTTPS protocol without much effort and at zero cost.
Note: Sprinthost hosting also has the opportunity to install a free SSL certificate. This means that a similar service will appear, if it has not already appeared, at all hosting providers.
The procedure for obtaining and installing a certificate will take approximately 20-30 minutes. This time is required to issue the certificate, and you cannot speed it up.
Before you start obtaining an SSL certificate, you must prepare your website. This must be done, otherwise there will be errors and the certificate will not work properly.
Obtaining and installing a free Lets Encrypt SSL certificate on Beget hosting
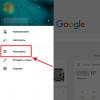
So, go to your hosting control panel and click on the icon "Domains".
Going to the section "Domain Management", there will be an icon opposite your domain « SSL", so you click on it.
![]()

After clicking the button, you will see a message stating that the application for issuing a certificate has been sent.
You need to wait until the center issues the certificate and it will be installed. You will receive an email about the completion of this procedure. And in the section "Domain Management" There will be a message about the installed certificate.
That's it, the whole process of installing a free SSL certificate is over. Next, you need to set up a redirect from HTTP to HTTPS and take care of the search indexing settings. I will show you how to set up a redirect in a video tutorial; see the redirect codes and instructions on what needs to be done for search indexing.
Video tutorial on installing a free Lets Encrypt SSL certificate on Beget hosting
Friends, that's all for me today. If you have any questions, I will be happy to answer them in the comments. And in the next article I will tell you how to install a free SSL certificate on Sprinthost hosting.
I wish you all good luck and good mood!
Best regards, Maxim Zaitsev.
In the article we will look at the pros and cons of the free Let's Encrypt, who is it suitable for, how to get and install it on a website with a Plesk 12.5 panel
Let's Encrypt- a free, automated project, with an open CA (certificate authority).
MAIN ADVANTAGES
for free: any owner of a website (in particular, a domain name) can obtain and install a trusted Let's Encrypt TLS certificate (TLS is the successor to SSL);automation: all installation, configuration and update functions are carried out automatically;
safety: All Let’s Encrypt encryption methods meet current standards;
transparency: public availability of information about the issue and revocation of each certificate for anyone;
free: The open standard principle will be used for protocols for interaction with CA (certificate authority).
SOFTWARE IMPLEMENTATION
The Certification Center issues certificates that are generated on the ACME server using the Boulder protocol, written in the GO language (available in source code under the MPL2 license).This server provides a RESTful protocol that operates over a TLS-encrypted channel.
The client part of the ACME protocol, i.e. certbot written in Python language, also open under the APACHE license. Certbot is installed on the client server to create a certificate request, check the validity of the domain and then installs the certificate and then configures the HTTPS encryption of the web server.
The certbot feature also includes updating the certificate after expiration. The certificate is installed in one command after the license is accepted.
Certbot allows you to install a certificate from additional options-OCSP stapling and HTTP Strict Transport Security
INSTALLING SSL CERTIFICATE LET"S ENCRYPT (INSTRUCTIONS)
Let's consider the use of a certificate in relation to the servers used on our hosting.The vast majority of our servers use Plesk 12.5 version where this module is already included in the Plesk 12.5 distribution and its installation is simple and convenient. Just go to the splash panel in the “Sites and Domains” section, click on the Let's Encrypt module,
Select the necessary options and after clicking the “Install” button, installation will take place in less than a minute.

Since this certificate is designed for a period of no more than 90 days, a corresponding cron task has been created in the splash panel in the Tools and Settings - Task Scheduler section

It is worth noting that there are some restrictions on certificate generation:
- duplicate certificates - no more than 5 per week;
- the number of attempts to generate a certificate is no more than 5 times per hour.
ABOUT THE DISADVANTAGES OF LET'S ENCRYPT
At the end of this article, we would like to note that despite all the advantages of this type certificate, there are disadvantages to consider when choosing an SSL:- The free Let's Encrypt certificate is short-term and is designed for a period of no more than 90 days, unlike the paid one, which can be issued for up to 3 years. You can, of course, reissue the certificate every 3 months, but be sure to keep an eye on the deadlines. The certificate can be reissued three ways: manually, by setting up the cron task scheduler, or automatically.
If you chose the manual update method, then strictly follow the deadlines and reissue the certificate on time. Otherwise, you risk an influx of dissatisfied site users and their subsequent churn.
cron task scheduler is a way to set up automatic updates. The method is good for those who have Linux administration skills and know how to work with crons. It is also necessary to take into account that errors in the operation of the crown are possible that may prevent the re-issuance of the certificate. Conclusion: you will still have to monitor the update.
Automatic update. This method assumes that you accept the automatic settings provided by the Certification Authority. And here you need to understand that you thus agree that the CA can make changes at its discretion to the software and settings of your server.
- Not all domains can be protected with free Let's Encrypt. This certificate is designed only to protect one domain without company verification, the so-called DV SSL (Domain Validation).
So, using Let's Encrypt you cannot create the following types of certificates:
- WildCard certificate to protect subdomains of a specific domain;
- OV SSL (organization validation) certificates, which involve checking not only the domain, but also the company;
- EV SSL (extended validation) certificates. A certificate with the maximum degree of protection and a green browser address bar;
- Multi-Domain certificate UCC type; - An important point is that there are no financial guarantees for using Let'sEncrypt. If a free certificate is suddenly hacked, no one will provide you with monetary compensation.
CONCLUSION
To summarize, we can say that the Let's Encrypt Certification Authority is sufficient successful project, whose popularity is growing every year among network users.And if you need a simple certificate for one domain, you have the appropriate administrative skills, and if there is no need for SSL with company verification (OV-organization validation) or a green address bar and company name in the certificate, then this certificate can be used.
However, we recommend that large companies, online stores, banks and other e-commerce projects install commercial ones from well-known Certification Authorities, such as, for example, GlobalSign, Comodo.
This way you will gain the trust of users and show that you are a serious company that cares about the security of customer data.
- Share:
Good afternoon, dear readers of the site. In previous articles they said. Today we’ll move on to getting to know a specific provider. What does Biget offer users, how can you get free hosting and what restrictions does it have? In addition, we will register users and domains on Beget website hosting. Let's get acquainted with the reviews of the company's clients. First, let's look at what this provider can offer to webmasters and website owners.
Registration on Beget.com
Go to beget.com. Click on the “Order” button. To access all the benefits of hosting, you need to order website hosting. You have a choice of tariffs and their design. As you can see, there is a large selection.

Fill in the required fields:
- Full name – last name, first name, patronymic. We provide only truthful information. Nicky, you should not write nicknames, as in the future there may be problems with the account, its confirmation or restoration of access to it
- Country and contact phone number. The number will be used to contact you in case of unforeseen circumstances, so it must be real
- Email. E-mail address. It will receive news, important messages from the company and warnings about the expiration of the hosting lease, etc.
Select the desired tariff. Each of them differs in the amount of reserved disk space and the number of available sites that can be hosted. It is worth noting that on all tariff plans the number MySQL databases, domains and FTP accounts are unlimited. Only the allowed load on the server is limited. We agree with the public offer and click “Register an account.” Afterwards, you will need to confirm your phone number. You will receive an SMS with a code that you enter in the pop-up window.
Upon completion of registration on Beget hosting, a letter with your login and password will be sent to the specified email address. This is the password you will use to log into your account and can be changed later.
Afterwards you receive a pleasant bonus from the company - a month free hosting, to test the capabilities. If everything is satisfactory, then at the end of the test period you can pay for the tariff. If you pay in one payment for a month, you will receive a discount. In my case, the Start tariff is a discount of 360 rubles and one domain in the RU zone for free.
The next step in hosting a website is domain registration. Let's look at this process in detail.
How to register a domain name
To do this, click on the icon "Domains and subdomains" V personal account. The domain name control panel opens in front of us. Here you can add previously registered ones or create new ones.

Let's look at the panel point by point (marked in red):
- In this tab you can add previously created domains. It contains a list of your domain names and buttons for managing them
- In the specified field, enter the name of the domains and subdomains
- For each added domain, you can reserve space for a website. It must be remembered that for everyone tariff plan a certain number of sites are allowed
- Button to add
- Domain management buttons. They make it possible to edit DNS addresses, transfer the domain name to another person, add a subdomain, renew or install automatic renewal delegation period. You can delete a name you don’t need or transfer it to Beget for maintenance. The latter is necessary so that no one takes this name. You pay money and the hosting company saves it for you
- Here are the bonuses ( free domains). They can be obtained if you pay the tariff for the year. Each of the tariffs assumes limited quantity names
- Setting up DNS. This is necessary if you registered a domain with Beget.com and decided to use it on another hosting. You specify these addresses in the settings of another provider
- This is a list of your domains. The end date of delegation is indicated here and the control buttons are located
- This tab is needed to create and register a new one. Click on the link and go to the domain creation page

In the “Domain name” line, enter the invented name taking into account the zone (RU, COM, NET, RF). The system will automatically warn you if this name is already taken. Below are the prices for registering a domain name. Click the “Continue” button.

On this page, choose who you are an individual or legal. Fill in your passport details and indicate Contact phone numbers And email. It is advisable to provide this information so that you can later resolve any issues that arise with the service administration. Below you need to check or uncheck the box next to the item "Install Private Person". This will allow you to hide information about yourself when checking through the WHOIS service. This option does not work for the RF, SU, RU domain zones; it is always set by default. Click “Continue”.
If you have enough money in your account to pay, then at the last step of registration the system will ask you to choose whether you want to use the domain to create a new website (reserving space for it on servers) or link it to an existing one. You can allow automatic extension of the delegation, but this is only possible if there is money in the account. Click "Register a domain".

A letter confirming the successful registration of the domain and its data will be sent to the specified phone number and email. Within 24 hours, the data in the Whois database will be updated, and it will be possible to use the newly registered domain name. In reality, this happens earlier; in a few hours it will be ready.
CMS and their installation on the site
Website hosting Beget.ru offers its users a wide selection of popular Content Management Systems (CMS). There are a sufficient number of free ones. As mentioned above, the hoster is a certified partner of several similar systems, so when you order one of them, you can get a good bonus. Full list presented below:

Let's consider CMS installation to the site on WordPress example, since it is one of the most popular. To do this, select it from the list. The installation window opens in front of us. In it we indicate:
- What site do we put it on (domain name and root folder)
- Short description
- We come up with a login and password for the control panel (you can entrust the creation of the password to the system)
- You indicate Mailbox administrator
In this window you can select the login and password for the database to which this system will be linked.

Click the “Install” button. The installation will take a few minutes, after which the system will notify you of successful completion. In addition, the installer will report the address of the site where the engine was installed and the address of the admin panel in the form of links. You can go to the panel WordPress management by clicking on the link and entering the above passwords (you entered them during the installation settings).
Installing a free SSL certificate from Beget
The next nice feature of this hosting is the installation of a free certificate. And it will be needed, if not now, but in the near future. Because, Google search engine began to hint at a transition from the http standard to https. They say that sites will be ranked higher, and they will be treated better. For such a transition you need SSL.
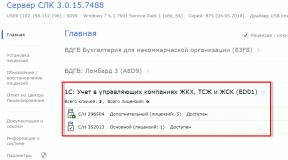
There are many of them, depending on the degree of data encryption. But we'll take advantage of the free offer. To do this, follow the link "Domains and subdomains" in your personal account. A window of your domain names opens, and opposite each of them we find the “SSL” icon. Click on it.

The window for ordering and installing certificates opens. There is a free and paid certificate. The cost of the paid one is 3659 rubles. But I'm not interested. By clicking on the icon, we go directly to the order page.

Features of ordering a free certificate from Beget.com website hosting:
- You can order up to 3 certificates per week.
- Its action extends to one domain and 40 subdomains.
- If you add new subdomains, you need to order a new certificate
- Ordering, renewal and release are free of charge
Click on the “Install” button. You are the proud owner of free SSL. Now you can transfer your site to use the https protocol.
Technical support
I would like to immediately note from my experience of communicating with customer support that they respond promptly and professionally. You can ask questions not only regarding the hosting itself, but also questions about optimization and website creation (not very complicated), setting up servers and certain service files. You can simply ask the question “Why doesn’t this plugin or script work for me?”, technical support staff will try to answer it.
A ticket system is used to communicate with clients. That is, you ask Biget technical support a question and receive an extended answer within a few hours. You can attach a file to a ticket, which improves understanding of the essence of the problem.
In the technical support section You can order the transfer of site files to beget hosting servers. To do this, submit an application. In it you indicate the necessary data, login and password from the control panel of the old hosting provider. The company will do everything for you for free. In this case, the transferred site will work without interruptions.
Additional services
These include free backup and recovery of server data. There are two copying methods:
- Automatic - absolutely crazy paid method saving site files, databases
- Backup on demand. This is already a paid method. It involves creating copies of data and storing them on a permanent basis (without time limits). Each copy is stored in a separate place, which eliminates the loss of all data. It can be created at any time when necessary. It is worth noting that the first copy is always free. Subsequent ones – 2 rubles per day for each archive.
CronTab – task scheduler. Thanks to it you can run in certain time script. It supports running:
- PHP script
- Arbitrary
- HTTP request
- Perl script
- Bash script
Beget Mail. Hosting offers to create its own mailbox for each registered domain. The number of boxes is not limited. You can configure the level of spam filtering, redirect to a mailbox from another provider, and set up an autoresponder. It is possible to collect all correspondence from all e-mails posted on third-party services (Yandex, Google, etc.) on email address, created in Biget.
You can order your hosting provider to check your sites for viruses and their subsequent treatment.
Memcashed – file caching. It allows you to store and process them in random access memory. Thereby speeding up page loading. The cost of this service depends on the amount of information stored. It will be enabled exclusively for you, so neighbors on the server will not slow down your site.

Back call . Beget hosting offers its clients to install a callback widget directly from the site. This will allow visitors to simply click a button and place an order online or get answers to their questions. There are two ways to call back:
- Call directly from the site. As mentioned above, users simply click on a button and the system connects them with you
- Request a call. In this case you will be able to call back
All you have to do is install the script and wait for clients. Prices are low. Payment is made only for minutes of conversation. This service increases site conversion, since more than one customer will not be lost.
Sphinx. This is a site search system. Instead of installing third-party codes, you can use your own hosting service. What will be faster, more convenient and more reliable. The search script is not free. The price depends on the amount of indexed information and the number of requests to it (server load).
Tarantool. Database storage service in RAM. This increases the speed of accessing them and processing requests to it.