Export and import data from mysql. Importing a database into PHPMyAdmin. Importing a MySQL database: what and why
In this article we will consider two questions - how you can import databases and how to solve the problem with importing large databases by changing the settings in php.ini.
As you know, data backup is a guarantee that you will be able to restore your website if suddenly, for some reason, the operation of the site is disrupted. How to restore a website from a backup? There are several ways, we will look at how you can import a mysql database into phpMyAdmin. Before you begin the database import process, you need to delete all tables from the database into which you are going to import files.
To delete tables, log in to home page phpMyAdmin and do the following:
2 - click Mark all;
3 - select Delete from the drop-down menu and click OK,
Now you can start importing the mysql database. To do this, follow these steps:
1 - select the desired database;
2 - open the Import to tab top menu;
3 - find through Browse backup copy with the database and click OK.

If you did everything correctly, a message indicating that the import was successful will appear in the phpMyAdmin window.
Importing large mysql databases
Webmasters often encounter the problem of importing large mysql databases. The problem is due to the fact that in PHPMyAdmin, downloading a database dump is limited by the size of the uploaded file, which by default should not exceed 2MB (2,048 KB). When trying to download a dump of a large database, an error message appears: “The download file size is probably too large...” etc.
Let's look at one way to import a dump of a large database. The import file size limit is determined by the PHP configuration. PHP configuration settings are specified in the php.ini file. This means that to import large databases we will need to change the php.ini configuration file maximum size downloaded files.
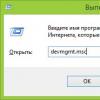
Where is the php.ini file located? You can calculate the path to the php.ini file as follows:
- Create an info.php file and place the following code in it;
- Upload the created file to the root folder of the site (www, public_html);
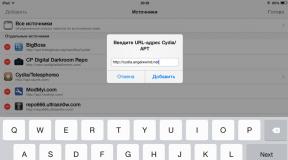
- Enter the address http://your_site/info.php into the address bar of your browser;
- In the window that opens, find Loaded Configuration File, where the path to the file will be indicated;
To import a large mysql database, you need to change the php.ini directives in PHPMyAdmin.
The php.ini file has been found, now all that remains is to edit it, or rather, change several directives in the file as shown below:
Maximum time (sec) to fully load the script:
max_execution_time = 60
The maximum time (seconds) specified for the script to receive all data:
max_input_time = 90
The maximum amount of memory that the script is allowed to use:
memory_limit = 128M
Maximum allowed size of uploaded files:
upload_max_filesize = 200M
The maximum size of transferred data that PHP will accept:
post_max_size = 180M
By changing the above directives in php.ini, we were able to import databases up to 180 M through PHPMyAdmin.

You can also use the free version of Sypex Dumper to import a database dump. The dumper is optimized for maximum operating speed, as well as working with databases of about 800 megabytes.
This procedure involves transferring data from one database (A) to another (B). As a rule, database B is located on the hosting (or in Denver), and database A is located on the user’s computer and is a file with the sql extension. Database A has another name - Dump.
How to import a database?
Importing a MySQL Database Using SSH
This method is used quite rarely, but we will describe it. First, fill in the database from which you will import it to the hosting provider’s server, where your website files are stored. Next, to import the database, use the command:
mysql -uUSERNAME -pUSERPASSWORD DBNAME< DUMPFILENAME.sql
mysql --user=USERNAME --password=USERPASSWORD DBNAME< DUMPFILENAME.sql
Instead of words written in capital letters we substitute:
USERNAME - database user name, for example uhosting_databaseuser;
USERPASSWORD - database user password, for example Rjkweuik12;
DBNAME - name of the database into which the import will be made, for example uhosting_databasename
DUMPFILENAME - name of the dump file from which data will be imported. Here we also need to specify the path to the database that we uploaded to the hosting provider’s server.
Databases (or abbreviated as DB) on most sites have a size (weight) of several tens of MB (megabytes). The initial size of the database at the start of different projects depends on the structure of the site itself (CMS), but then their weight increases with each appearance of a new record.
The records may include information about user registration, comments, personal messages, products, news and other data stored in the site database.
I had the opportunity to work with several sites whose database size exceeded 500 MB (magabytes), and on some even reached 2 GB (gigabytes). Because the standard methods Databases of this size are difficult to transfer (due to hosting and browser limits), then I will share with you several working methods that will help you in solving such problems (moving large databases).
Export (download) large MySQL databases via Sypex Dumper
So, let’s begin our consideration of solving the problems at hand with an easier option, namely, with a ready-made solution.
"Sypex Dumper" – software, written in PHP language, which allows you to work with databases without using phpMyAdmin. The advantages of Sypex Dumper include:
- Multilingual (supports many languages).
- Eat free version script (this is quite enough for our tasks).
- High speed of task completion.
- Working with large databases.
- Convenient and intuitive interface.
- And many other interesting “chips”.
This is what we will use to download (transfer) large databases.
To export (receive, download) the database of a specific site of yours for further use, you need to do the following.
1. free from our website.
2. sxd in a way convenient for you.
3. Next, go to (Where your_site.ru To come in».
4. On the page that opens (if authorization is successful), click once on the section “ Export» in the top menu. If several databases are available to the user, select the one that we will export (download) from the drop-down list. You can leave the rest of the settings unchanged and click on the “ Execute».

I want to note, that you can export not the entire database, but only some of its tables as needed.
5. After the process of saving the database has finished (you can understand this by the progress bar), you can download the database you need by clicking on the appropriate button.

In addition, all exported databases will be stored on your website along the way /sxd/backup/. If saving the database fails, check that the folder backup The write permissions are 777.
This completes the export (download) of the database.
Import (download) of large MySQL databases via Sypex Dumper
Above, we explained to you how to obtain the necessary database; now you need to transfer (import) it to another project, and to do this we do the following.
1. free from our website.
2. Unpack the archive and upload the folder to the website sxd in a way convenient for you.
3. To folder /sxd/backup/ load the previously received (downloaded) database.
4. Next go to the address http://your_site.ru/sxd/index.php(Where your_site.ru– the domain of your website), after which a data entry form will open in front of you. In it you indicate the data of the user who has rights to manage the database you need and click “ To come in».
5. On the page that opens (if authorization is successful), click once on the section “ Import» in the top menu. If several databases are available to the user, select the one into which we will import (load) data from the drop-down list. You can leave the remaining settings unchanged and click on the “ Execute».

I want to note that you can import not the entire database, but only some of its tables as needed.
6. After the process of importing (loading) the database is completed (you can understand this by the progress bar), the task can be considered completed.

Export (download) large MySQL databases via SSH terminal
SSH is a network protocol that allows you to remotely (via special teams) manage the system or server. In Windows, there are many programs for working with this protocol, the most popular of which is “PuTTY”.
On some hosting sites, such as, for example, there is a built-in Terminal right in the control panel. Let's not go far and consider the problem described in the title using his example. It is worth noting that the operations described below can be done in a separate SSH client.
1. Launch the Terminal. It looks like this:

2. If you connect to the server via third party program– log in to it by entering the appropriate data (you can get it in your hosting control panel or from your hosting provider).
second- This:
Mysqldump -u USERNAME -p DATABASE > backup.sql
directly the export itself, where:
USERNAME– login of the user who has access to the database.
DATABASE– the name of the database that we want to export.
backup.sql– the name of the file in which the database will be saved and the path relative to . With this design, the database will be saved to the root of the hosting.
4. in the third stepEnter" on keyboard. note
Once the server is ready to accept commands via SSH again, this will mean that the database export is completed and you can download it via FTP or via file manager hosting.
The export (and import) process is not broadcast in SSH, and if your database is quite large, be patient, as you may receive a response from the server after more than 20 minutes.
Import (download) of large MySQL databases via SSH terminal
We have already found out what SSH is above, and now let’s start looking at how to import a previously downloaded database into another project.
1. To the root of your hosting, download the previously downloaded database in a convenient way for you.
2. Connect to your hosting/server via SSH.
so we definitely go to the root of the hosting, and second- This:
So we get full list files and directories of the current directory. Let's make sure that our previously downloaded database is among them.
4. If everything is fine and the base is in place, enter the final command:
Mysql -u USERNAME -p DATABASE< backup.sql
USERNAME– login of the user who has access to the database.
DATABASE– the name of the database into which we will import data.
backup.sql– the name of the file that will be downloaded and the path relative to . With this design, the database will be imported from the hosting root.
5. After entering the command, you will be prompted to enter the password for the user you specified in the fourth step. Enter your password and click " Enter" on keyboard. note that entering a password in the SSH terminal is not shown, that is, whether you enter the password or paste it, there will always be an empty space in its place.
After this, when the server is ready to accept commands via SSH again, this will mean that the database import is completed and you can conduct further work on the project.
I am often asked how to import a large database onto the server MySQL data. It is known that phpMyAdmin by default has restrictions on the size of the imported database.
If your dump is not much larger than the acceptable limit, you can split it into several parts and import it in several passes. This is justified if, for example, the limit is 2 MB, and your database is 5-10 MB in size. It is clear that “cutting” a 100MB database into 50 parts is a rather labor-intensive and time-consuming process.
There are several options for solving this problem.
Editing the web server config
On VDS/VPS there are no particular problems with this, you just need to correct the config. Namely, in php.ini, increase the allowed maximum values for files uploaded to the server, the maximum size for files transferred using the POST method:
Post_max_size = 2000M upload_max_filesize = 2000M
In addition, if your database is very large, you should increase the maximum allowed script execution time.
Max_execution_time = 32000 max_input_time = 32000
And just in case, you can increase the size of the allowed amount of RAM:
Memory_limit = 512M
After making changes, be sure to restart the web server.
It is clear that this method is not suitable for virtual hosting, because it does not imply the ability to edit configs.
Sypex Dumper
You can use third-party software. And the first application that is worth paying attention to is Sypex Dumper.
Having used it for the first time many years ago and appreciating all its capabilities and advantages, I can safely label it a “Must Have”. Sypex Dumper is a PHP server application that does not require installation. It is enough to copy it, for example, to the root of your site in the sxd directory and call it in the browser: http://Your_Site/sxd/. It is worth noting that you should first place a dump of your database in the backup directory. After initializing the script, you will see the authorization panel for connecting to the database. Enter your username and password. Host and port are optional only if they are specific.
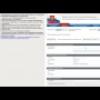
After authorization, you can go directly to importing the database. In field "Database" the database to which you are connected will be selected, and in the field "File" you will see the dump you previously uploaded to the Backup directory.

For most cases none additional settings are no longer needed and you can safely start the import by clicking on the “Run” button. Import, depending on the size of the database and your Internet connection speed, may take some time. During import, you can see which tables are currently being imported into the database. When the script completes, you will see the execution log. It looks something like this:

That's all, actually - the database is imported!
Console
We will not consider importing through the console. I think people who use the console without me know how to import any database. A ordinary users It’s better not to go there without special training. Since executing some commands can lead to serious consequences, including the complete crash of the server.
Finally
I do not presume to say that Sydex Dumper is the only and correct solution. There are other more elegant methods that require the user to have certain knowledge and appropriate access to the server settings.
But in a shared hosting environment, Sydex Dumper will certainly be your indispensable assistant.
Subscribe to my telegram and be the first to receive new materials, including those not on the site.