How to check the integrity of the Windows 10 system. SFC and DISM: Checking and Restoring system files in Windows. Via built-in tools
As a rule, the mode Windows diagnostics 10 (formerly called Safe Mode) starts automatically when the operating system shuts down incorrectly, as well as during various Windows failures.
Safe Mode - diagnostic mode of the Windows 10 operating system
I would like to immediately note that as a specialist Windows installer, this mode in 10 has undergone significant changes. There have never been such extensive diagnostics and recovery tools in Windows operating systems.
That is why, we will consider in detail how to work in the diagnostic safe mode to be able to restore Windows 10. Preparation for such tasks is always useful experienced users and system administrators.
2 Ways to Start Windows 10 Diagnostics Safe Mode
How to login securely Windows mode 10? IN previous versions Windows safe the mode could be started using the F8 key. Now, in order to start diagnostic mode in Windows 10 manually, you need to do the following:
In the window that opens, go to the “Recovery” tab, then “Special boot options” and click the “Restart now” button; 
Windows 10 is forced to reboot;

Windows 10 diagnostic mode in action
After we forced a computer reboot in a special boot option, the Windows 10 system does not boot, but a blue “Select Action” window appears, where we need to decide and select from the options: 
- “Continue” - in this case we exit the diagnostic mode, the Windows 10 system loads;
- “Troubleshooting” - by selecting this tab, we will be able to carry out a complete diagnosis of the system;
- “Turn off computer” - accordingly, in this case the computer turns off.
Open the 2nd tab, the “Diagnostics” window opens in front of us. Here we can also select tasks from 2 options: “Return the computer to the initial state", "Extra options". Let's consider all cases of developments, first select “Return the computer to its original state”; 
Everything is clear here without comments, so let’s start studying the “Advanced parameters” tab, to select which we press the arrow button in the upper left corner. 
In the “Advanced Settings” tab there are a lot of useful utilities, using which you can revive the Windows 10 operating system. Let’s take a closer look at all this gentleman's set diagnosing the system!
- System Restore - This tab is used to restore the system to a specific point in time. To use this feature, a restore point must be created. Recovery points are created automatically (if this option is enabled on the disk) in certain moments(for example, after installing a program or Windows updates), such points can also be created manually. Very useful option! I advise you to create points manually from time to time.
Now let’s open the “System Restore” tab and see what’s there. So we choose account, under which we want to open the recovery process, in the next window we enter the password and click the “Continue” button, the “Recovery” window opens system files and parameters". And we see that there are no restore points on the system disk. By default, “System Restore” is disabled; it must be enabled in the “System Protection” tab, which I will discuss in detail in the review article “System Restore.” 


- Restoring a system image - when choosing this option, you also need to select the account on behalf of which the recovery will be performed, then Windows looks for the system image on the disk and displays messages asking you to specify the location of the backup copy. We will consider this option in the near future. Follow the news on the website and in the VK group!

- Startup Repair - When you select this option, the system tries to fix problems that prevent Windows 10 from loading;

- Command line - when you select this tab, the Windows 10 command environment opens, from where you can perform many manipulations with the system (for example, run a scan disk Chkdsk, open the utility for working with hard Diskpart disks and much more);


- Boot options - by selecting this mode, you can boot Windows 10 in safe mode, which turns on debugging mode, keeps a boot log, disables automatic reboot systems when the system fails. It is very easy to launch Windows 10 Safe Mode with these useful options. You just need to select one of the options using the F4-F6 keys. What happens next Windows boot 10 in safe mode;

One of the undoubtedly indispensable tools of the Windows 10 system is diagnosing and troubleshooting computer problems. Consisting of several child tools, this application makes it easy to solve problems that arise in the system - from audio failure to fixing errors in operation network adapter. But how to use this useful utility"at full capacity"?
Windows 10 Diagnostic Tools
Windows 10 PC Diagnostics consists of 20 tools that identify system problems and fix them.
Run computer troubleshooter
In the Search bar, enter “Troubleshooting” and open the found item.
We need a highlighted item in the results
How errors are corrected
Diagnostics occurs as follows: the running component checks the current state of the system and compares it with the default initial state. If differences are detected, the tool informs the user about this and offers to “roll back” the system to the original settings.
How to use diagnostic tools in Windows 10
After going to the Troubleshooting tool, we see a window in which 4 sections are available to us.
Sections and settings available to the user

Now let's learn more about how to work with tools. Let's look at the example of fixing sound problems.
- Select “Play sound” in the troubleshooting window.
Diagnosing audio problems
- Be sure to check the “Automatically apply fixes” checkbox. Click “Next”.
- After the system detects problems, you need to apply the proposed settings, if, of course, you want to solve the problem.
All we have to do is apply the fix.
Sometimes administrator rights are required to apply the settings (select “Run as administrator”).
Setting up administrator rights
How to remove the memory diagnostic icon from the notification area
Some users don't like the fact that the notification area (the area with small icons in the right corner) is often crowded. Among others, this zone may be occupied by a diagnostic program. How to remove an annoying icon?

Computer diagnostics at startup
Surely most of you are familiar with the picture of a blue screen at startup. The text on it begins with the words “There is a problem on your PC...”.
A picture familiar to most
Why does it start
One of the most common reasons for such a failure is incorrect installation of system updates. Perhaps you did not have enough patience and turned off the computer when the message “Do not turn off. Updates are being installed” or this happened due to a voltage drop. In any case, this inscription is not accidental, and at the moment the system requires an update adjustment. For those users who are afraid to get involved in the system themselves, we advise you to take the computer to a service center. But if you want to try to do this with improvised means, we follow the following instructions.
How to disable
For subsequent steps, we will need to boot through safe mode.
- Click on the notification area (lower right corner) and select the “All settings” tile.
We need the “All parameters” tile
In the window that opens, we need the “Updates and Security” item.
“Updates and Security” item
Now select “Recovery” and in “Special boot options” click on “Restart now”. We wait.
Select “Special boot options” and reboot
When we boot the computer, we enter safe mode. Select “Advanced options” and here the “Download options” tile. As is clear from what is written on the screen, we need to press F4 to boot into safe mode. Click.
Everything is described in sufficient detail on the screen.
Now is the moment of truth. If the download went fine, then the problem causing blue screen, originated in the software part. Then here, in safe mode, check your computer’s device drivers (if they are outdated) and look at the list of programs - we are interested in suspicious programs whose installation date coincides with the date problems appeared in the system.
If the blue screen also prevents booting in safe mode, the system warns us about a serious hardware problem that needs to be solved in a service center or by rearranging Windows.
How to run a random access memory (RAM) test
There are several ways to do this:

In both cases we get to the “Checker” window. Windows memory" Here we select the option we need.
We have two options for running diagnostics:
The RAM check will begin after the system reboots. You will need to wait some time, during which the current scan status will be displayed on the screen. At the end of the check, the system will restart again. The diagnostic result can be viewed by clicking on the “Memory Checker” icon in the notification area in the lower right corner of the screen.
Identifying network and internet problems
Before you start solving network problems through system tools, make sure that there are no network failures on the part of the Internet service provider. Try rebooting your modem and/or router. If the problem persists, then you should contact yourself simple way solutions to network problems.
In the lower right corner, look for your connection icon, right-click on it and select “Diagnostics problems” from the context menu.
Select your problem type
After selecting your problem type, simply follow the on-screen instructions.
One of the most common causes of network problems is outdated driver network device. In this case, you need to update it.
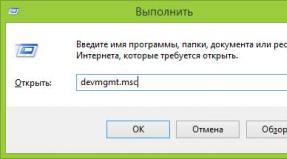
- Right click on the Start icon. Select "Device Manager".
Select "Device Manager"
- In this window, expand the “Network adapters” item.
You need to select the network adapter you are interested in
In the list of available adapters, we look for one that responds to the Internet connection (in the picture this is the second Realtek).
- Sometimes after installing a driver update, the system may ask to restart. Reboot either immediately or when it is convenient for you.
IN context menu select “Update driver”, and in the window that opens, agree to automatic search updated drivers.
Select the first menu item
Now follow the instructions on the screen and close the setup wizard when finished.
Problem solved.
Problems with the diagnostic wizard - does not start or freezes
What should you do if you have problems with the problem solver? It sounds strange, but it happens more often than you think.
We need to restart one of the system components. Before proceeding with the following steps, make sure that you are running as a system administrator.
- Right click on the Start menu and turn on Control Panel.

We are looking for .NET Framework 3 versions in the list
- After loading the system, we follow the same path, but now we set the checkbox to the active state. Click OK and reboot again.
Ready. You can run the troubleshooter again.
To solve normal situations and system problems, the troubleshooter is the most suitable option. There are many third party programs and utilities, but, as a rule, Windows 10 copes with failures on its own. Everything that you cannot fix at home becomes a concern service center. We remind you: if you are not sure that you can handle working with system files and settings, it is better to immediately take your computer to a specialist. Have a stable job!
Nobody likes it when the usual customized Windows 10 starts to crash and freeze. Let's figure out what reasons this may be associated with, and learn how to identify and correct the problems that have arisen.
Checking Windows 10 for errors
Errors at work computer devices there are two types:
- hardware - physical damage to the device’s hardware is to blame for their appearance;
- software - associated exclusively with the software component.
Let's figure out how to identify these failures and correct them using various means.
If hardware errors can be “cured” only by replacing or repairing the damaged part, then software failures can be corrected using special built-in or third-party utilities.
Diagnostics Windows 10 using SFC
SFC.exe is a system utility built into Windows 10, which is responsible for checking the integrity and functionality of system files. If any of them are damaged, the program automatically repairs them. SFC is not omnipotent: it is recommended to use it in conjunction with DISM, which will be discussed later. However, using this utility is practically the first thing to do in case of system failures.

For some (sometimes quite a long) time, the utility will check system files for integrity. After completion of the work, it will give the user the result.
SFC cannot repair some of the system files while Windows is running, because they are currently in use by the system. If the SFC check shows that there are problems, but it cannot solve them, the utility must be launched again, but not from the system, but from the Windows recovery tool.
You can open the Windows Recovery Tool in the following ways:
- go to “Start” - “Settings” - “Update and Security” - “Recovery” - “Special boot options” - “Restart now”;
The Update & Security item in Windows Settings allows you to access the special boot options menu
- select the "System Restore" option when booting from installation media (or from a recovery disk);
Click on the "System Restore" button when booting from installation media
- instead of the start button, click on a special button that allows you to enter recovery mode. It is available on some laptops, for example Lenovo. As a rule, such a button is located either next to the system start button or next to the charger connector.
Some laptops have a button that opens the recovery menu
From the recovery menu, do the following:

This time, the SFC utility will be able to repair all files, even those that are usually inaccessible to it.
Video: how to run the SFC utility
Scan and repair Windows 10 using DISM
DISM is another utility for recovering damaged files. Its scope of application is much wider than that of SFC. With its help you can even do backups systems. DISM and SFC are responsible for different groups of system files, and they sharing more effective than using alone.
Diagnostics and repair of system files using DISM are also carried out through the “Command Line”. How to enter it is described above. There are several options for using the command:
- dism /Online /Cleanup-Image /CheckHealth - no check is performed, the utility displays the latest saved data on the status of the files;
The command dism /Online /Cleanup-Image /CheckHealth shows what results the disk check gave last time
- dism /Online /Cleanup-Image /ScanHealth - checks the integrity of files without “fixing” the problems found;
The command dism /Online /Cleanup-Image /ScanHealth starts checking all system files through DISM without “repairing”
- dism /Online /Cleanup-Image /RestoreHealth - starts checking the integrity of files and then restoring damaged files.
Check in DISM system files with subsequent restoration of damage is launched by the command dism /Online /Cleanup-Image /RestoreHealth
Scanning and restoring files takes quite a long time. It is also a completely normal feature of the DISM utility that the status bar freezes at 20%.
Video: how to check the integrity of Windows 10 using SFC and DISM
Checking the hard drive for failures
In addition to physical damage hard drive, there are also errors that can be “cured” using the built-in Windows 10 diagnostic tools. To fix more serious problems (for example, bad sectors) you can use third-party utilities, but after a while the disk will still have to be changed.
Using the Command Line
Using the Command Line, you can run the built-in Check Disk utility, which checks the disk for errors and, if possible, corrects them. IN Windows environment this program will not be able to check system disk(Drive C): It will prompt you to reboot and will check during the reboot before the OS starts.
If the chkdsk utility receives a system disk as input, it prompts you to reboot the system to check it
The utility is launched in the “Command Line” (how to enter there is described above) using the chkdsk command<имя диска с двоеточием>with the given parameters:
- /f - auto-correction of found errors;
- /r - check for bad sectors and attempt to restore damaged information;
- /offlinescanandfix - offline scan, in which the program first “disconnects” the disk from processes in the system, and then checks it. Applies if the disk is in use and a “simple” run of Check Disk cannot fix the errors;
- /? - help on the command.
The command with the /r option can take up to several hours to complete.
As a result, chkdsk will display the disk data obtained during the scan
Video: how to check your hard drive for failures using chkdsk
Using StorDiag
The storage diagnostic utility is present only in Windows 10 and is not used in other versions of the system. Just like Check Disk, it is launched via the “Command Line” using the command stordiag.exe -collectEtw -checkfsconsistency -out<путь к папке, куда сохранится отчёт>.
StorDiag does not correct the errors found, but only diagnoses them and writes the received data to a report file.
However, its diagnostic scope is wider than that of Check Disk, and if you are an advanced user, you can use this program to more accurately determine the cause of problems with your device.
Checking the disk using the StorDiag storage diagnostic utility will allow you to diagnose problems and write the resulting data to a separate file
Using PowerShell
Windows PowerShell is a “Command Prompt” shell used in Windows as another management tool. It is distinguished from a regular console by a wider range of applications, the ability to use scripts and other improvements.
PowerShell is located at Start - All Programs - Windows PowerShell. The console can also be found by simply typing its name in the Start menu search.
- To check the disk, type in the PowerShell “Command Prompt” running as administrator (right-click on the PowerShell icon - “Run as administrator”) one of the following commands:<буква диска без двоеточия>- normal check with recovery;
- To check the disk, type in the PowerShell “Command Prompt” running as administrator (right-click on the PowerShell icon - “Run as administrator”) one of the following commands:<буква диска без двоеточия>-OfflineScanAndFix - offline check (what it is was described above).
The specified commands entered in PowerShell will launch the disk diagnostic and treatment tool
Using Explorer and Control Panel
Diagnose HDD To check for errors, you can run the diagnostic utility through Explorer. To do this, follow the path: “My Computer” - right mouse button on the disk that needs checking - “Properties” - “Service” - “Check for errors”. The check performed is similar to Check Disk.
Diagnostics and error correction can be started from the disk properties window
In addition, through the “Control Panel” you can activate system maintenance, which includes checking hard drives. It is located along the path “Start” - “Control Panel” - “Security and Service Center” - “Maintenance”. In the maintenance window, you can view the results of the previous scan or start it again using the “Start maintenance” button.
To start disk maintenance, you need to click on the corresponding button
Video: how to check your hard drive for errors using the built-in diagnostic utility
Windows Registry Diagnostics
Registry - another one Windows component, which often gets damaged, leading to crashes, glitches and freezes. To prevent this from happening, you need to periodically clean it, removing outdated branches, consequences of failures and erroneous entries.
Manually cleaning the registry is very labor-intensive and time-consuming. In addition, it is easy to make a mistake when carrying out this process, which can lead to negative consequences (including system crash).

Therefore, we will touch on the topic of manual cleaning in passing. If you don’t want to waste time on manual cleaning, use one of special programs , which will automatically clean the registry of unnecessary and erroneous entries. The most popular of them is CCleaner - free utility

, which not only corrects registry errors, but also cleans the computer of garbage and accumulated temporary files.
Let's figure out how to work with it.
You can download CCleaner from the official website of the developer.
Video: how to clean the Windows 10 registry manually and using CCleanerWhen system failures are corrected, Windows begins to “fly” and delight the user with its impeccable work. Check the system for errors in a timely manner so as not to miss any problems that have started, and it will serve you for a long time.You will need Windows 10 if you suspect that such files have been damaged or some program has changed the system files of the operating system.
Running a Windows 10 integrity check using SFC in the recovery environment
In order to boot into the Windows 10 recovery environment, you need to:
- Go to Settings - Update and Security - Recovery - Special boot options - Restart now. (If the item is missing, then on the login screen, click on the “on” icon at the bottom right, and then, while holding Shift, click “Reboot”).
- Boot from a previously created Windows recovery disk.
- Boot from installation disk or bootable flash drive with the Windows 10 distribution, and in the installation program, on the screen after selecting the language, select “System Restore” at the bottom left.
After that, go to “Troubleshooting” - “Advanced options” - “Command line” (may require an administrator password). At the command line, use the following commands in order:
- diskpart
- list volume

As a result of executing the second command, you will see a list of volumes. Remember the volume letters corresponding to the "System Reserved" drive (with bootloader) and system partition with Windows 10. Continue typing the commands:
- sfc /scannow /offbootdir=C:\ /offwindir=E:\Windows
(where C is the partition with the bootloader, and E:\Windows is the path to Windows folder 10, your letters may be different).

An integrity scan of the operating system system files will start, BUT this time the SFC team will be able to recover all files. Scanning may continue for a considerable time. Close when finished command line and restart your computer normally.
Checking and repairing system files using DISM.exe
The Windows image deployment and servicing utility DISM.exe identifies and fixes problems with corrupted system files that the SFC command failed to resolve. Also, it makes sense to use this tool if SFC does not detect integrity violations Windows files 10, but you have reasonable grounds to believe that such violations exist.
To use DISM.exe, run a command prompt as an administrator (by right-clicking on the “Start” button). Then you can use the following commands:

Note: In case the component store restore command does not work for one reason or another, you can use the install.wim (or esd) file from the mounted ISO Windows image 10 (How to install Windows 10 from a USB flash drive) as a source of files that require recovery. You can do this using the command:
- dism /Online /Cleanup-Image /RestoreHealth /Source:wim:path_to_wim_file:1 /limitaccess
Instead of .wim, you can use the .esd file in the same way, replacing all wim in the command with esd.
When using the specified commands, a log of completed actions is saved in
Windows\Logs\CBS\CBS.log and Windows\Logs\DISM\dism.log
Just like the SFC method of checking file integrity, you can use the DISM tool in the Windows 10 Recovery Environment.
DISM.exe can also be used in Windows PowerShell running as an administrator using the Repair-WindowsImage command. Example commands:
- Repair-WindowsImage -Online -ScanHealth - checks for damage to system files.
- Repair-WindowsImage -Online -RestoreHealth - check and fix damage.
As you can see, checking the integrity of files in Windows 10 is not such a difficult task, which can sometimes help fix a variety of problems with the OS. If you couldn’t, perhaps one of the options in the instructions for Restoring Windows 10 will help you.
As the owner of a computer with Windows 10, you have repeatedly witnessed that the “ten”, although it is constantly being improved, is quite crude operating system, and a lot of problems arise in it. Developers solve only the most common problems by introducing fixes into service packs or releasing emergency patches (fixes) to get rid of a specific error. So, for example, it happened with When special cases arose relating only to a computer with a certain hardware or software, Microsoft offers an integrated troubleshooting tool.
Launching the Problem Determination Tool
Diagnostics of a computer with Windows 10 begins with launching a tool that contains a lot of tools designed to find and correct errors that have arisen on a PC.
Note that Windows 10 includes about 20 tools designed to identify problems and then fix them.
The tools are launched through the “Control Panel”.
- Go to the “Control Panel”.
- Switch the element visualization type to “Categories”.
- We launch the “Troubleshooting” applet to open a window with a list of applications for troubleshooting your computer and fixing them.
The principle of operation of any component is as follows: it checks the current system settings and compares them with the default settings. If inconsistencies are detected, the user is notified about this and is asked to return Windows settings 10 to its original state or somehow change automatically to resolve the problem. This is how Microsoft diagnoses and fixes problems with software launching.
Composition of problem identification tools
The conflict resolution tools are divided into several categories, many of which also include subcategories.

- Programs – This tool can be used to run applications that are experiencing incompatibility issues when launching.

After starting the search for problems, the utility will scan the system and display a list of applications installed on it. In the window, you need to select the problematic program and click “Next” to run diagnostics to identify the source of the conflict.

- Hardware and sound – using the tools located in this category, diagnostics of the hardware used on a computer with Windows 10 is carried out.

The funds include:
- device configuration – detection of difficulties in the operation or configuration of a specific computer hardware component;
- sound – used when problems occur during playback/recording of sound or conversations on Skype and similar programs for Windows 10;
- network – diagnostics of operation and configuration of networks, including wireless, and network devices;
- printer – getting rid of conflicts that arise during the printing process;
- Windows Media – search for reasons that cause problems with playing videos and DVDs;
- video playback – identifying reasons that prevent video files from being played;
- background transfer service - diagnose problems that prevent files from downloading in the background;
- apps from the store - identifying factors that prevent apps from Windows Store function normally.
As you can see, the set of tools for identifying problems and returning your computer to a state of normal functioning in Windows 10 is large. Another question is their effectiveness. But here the entire responsibility lies on the shoulders of developers with more than 20 years of experience in creating operating systems.
In any case, these tools have more than once saved beginners from performing full reset or completely reinstall it.
To make it easier to find the application you need, all tools can be displayed in one window without sorting by category. The “View all categories” button is responsible for this.

Working with tools
To use diagnostic tools, absolutely nothing is required from the user. The operation of each element is accompanied by the launch of a wizard window with tips, a couple of buttons and the presence of switches (checkbox, checkbox).

The only thing you should do after identifying the problem is to apply the recommended fix for it.

Be careful, the application will require administrator privileges to change some settings. Such functions are distinguished by the presence of a blue and yellow shield icon.

New opportunities
Windows 10 has new features for identifying and correcting problems in its functioning, which make it possible to detect a problem before the computer starts (in preboot mode).
To call a menu with a list available tools Restart your computer while holding down the Shift key. After the reboot, on the action selection screen, click “Troubleshooting”.

There are two options available here: returning the PC to its original state (reset Windows 10) and additional options.
In the additional parameters there are tools that allow you to restore the functionality of Windows 10 by:
- rollback to the previous state;
- using a system image;
- return to the previous build;
- launching tools for restoring downloads of the “tens”;
- using command line features.

As you can see, Windows 10 is distinguished not only by the presence of errors and problems, but also by a set of tools for eliminating them and returning the computer to a working state, sometimes without requiring virtually any activity or knowledge from the user.
(Visited 26,077 times, 1 visits today)