Remote access to USB via Ethernet. USB over IP device for hardware connection of USB over a network (USB over IP, USB over Network, USB over Ethernet) For connecting usb devices to lan
It seems every year system administrators there is less and less work. In the era of Windows XP and the first versions of OS X, basic general access access to a folder on another computer could not be done without the obligatory “dances with a tambourine,” especially if these were computers with an Apple system and an operating system from Microsoft. Today, users have a myriad of solutions - from cloud syncing to using Bonjour or AirDrop to quickly share files. Developers USB Network Gate from Eltima Software decided to take aim at another barrier - sharing USB devices, and they did it great.
Not having a particularly rich set of devices, we decided to test the functionality of the program on two simple things: a USB flash drive and an iPhone 5S. Having connected the device, we see how it appears in the main program window, and by clicking the Share button it becomes available both over the local network and via the Internet. To access it on another computer, just open the second tab of the program and select the required device - and it will immediately connect to your computer, as if it were actually inserted into a USB port.

As stated, everything really works, and with virtually no settings. Yes, to access via the Internet you will have to take care of the IP address of the host computer, but this is a matter of a couple of seconds. At the same time, advanced users will be pleased with the ability to set up a secure connection - encrypted and password protected. It is also possible to work with the program from command line. Those who need it will appreciate it. The only drawback is the actual refusal of the program to work under El Capitan - we hope the developers will fix this bug soon.

One can imagine many scenarios for using USB Network Gate, both at home, where, with the exception of printers, simple access to remote devices is still the stuff of fantasy, and in the office - the employer will not have to spend on an additional device, and employees will not have to run from one computer to another. We are sure that you have already come up with many other advantages yourself. And considering that the program has a free trial period for 14 days and versions for Windows, Mac and Linux and Android, it would be a crime not to try it.
USB Network Gate is a program that allows users to connect USB devices connected to other computers using IP channels.
There are different implementations on the market remote connection USB devices, both hardware and software. Some of them require users to have certain knowledge and skills; in some cases, setting up can take a lot of time. USB Network Gate surprised me with its simplicity. I downloaded the program, installed it, clicked the Share button and the device was immediately available for connection on a remote machine with the client installed.
USB Network Gate can be indispensable, for example, when using USB tokens on the RDP server, the program allows you to configure exclusive access to devices for an individual remote desktop user, isolating him from other users. The program can also be used in a virtual environment if for some reason the device cannot be connected directly. There are versions for Windows, Linux (RPM and Deb packages), Apple OS X and, most interestingly, for Android. Now let's talk about how it works.
Server
The program is both a server and a client. When launched, by default it shows all USB devices connected to the computer. However, you can display and configure sharing of all ports.
It is possible to configure the connection separately for each device or port, allowing connections only for a specific address. To protect the connection, authorization and encryption are provided.

Client
When using USB Network Gate as a client, the application scans local network For server availability, displays all devices available for connection. If the server is on a different subnet, for example when connecting via VPN, you can add it using the “Add server” button. After I shared the printer, it appeared in the list of available connections on my MacBook. In addition to the printer, I connected USB HDD with HFS+ partitions, it also connected, but the partitions took about three minutes to mount, apparently due to their large size.

Hi all! In this article I want to talk about USB over IP technology. What is it, why is it needed, what scenarios and options for this technology are in demand today.
So, gentlemen, if you use virtualization heavily, it doesn’t matter where - at work or at home (if you are an enthusiast) and various systems management of this very virtualization - Hyper-V, Xen, VMware, then we were faced with a situation where it was necessary to forward a USB port to a virtual machine. But due to the limitations of virtual machine hypervisors, this is problematic, since the USB ports are virtual machines are missing. What to do if you need to connect a USB security key software, a crypto-protected token and similar necessary things? If with physical server there were no problems, then with the virtual one a simple question arises: how to do this?!
This is where USB over IP technology comes to the rescue. No need to rack your brains, everything has already been thought of. Looking ahead, I will say that there are both hardware and software tools for forwarding USB over IP.
Below the cut is a detailed review and a lot of interesting things...
Both have both advantages and disadvantages. Let's look at the advantages of USB over IP hardware devices over software ones:
- High reliability and fault tolerance;
- Low power consumption;
- High deployment speed and ease of configuration;
Disadvantages of USB over IP hardware devices:
- Higher cost compared to software emulation tools.
I will tell you in more detail about software emulators of USB ports in one of the following articles.
One day I was faced with the task of forwarding USB HASP keys to a 1C Enterprise virtual cluster. After reviewing and viewing a large number of solutions, both software and hardware, the choice fell on devices from Digi International , namely . Now I will tell you about the product line and specifically which model I chose for my virtualization systems and why.
AnywhereUSB is a fairly compact device, which is a USB hub with an Ethernet port combined into one housing. The following illustration can clearly illustrate the usage patterns:
Model range overviewDigiAnywhereUSB
At the time of writing, 5 device models are available for purchase, designed for different numbers of USB ports, and a model with combined COM and USB ports.
 AnywhereUSB /2 is the simplest, low-end two-port model.
 AnywhereUSB/ 5 and AnywhereUSB/5 with Multi-Host Connections are two five-port models.
 AnywhereUSB TS: a model with 4 COM ports on board.

Device specifications, differences


Initial setup and device management
There are several interfaces for setting up and managing devices:
Web interface for configuration, monitoring and administration;
AnywhereUSB config utility;
Telnet;
SNMP
The most optimal and convenient to use is the Web interface.
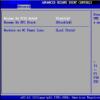
 AnywhereUSB/5. Web interface, Network Configuration menu.
We connect our USB IP hardware to a network with a running DHCP server and in the browser go to the IP address assigned to the device. To find out the address, you can use the AnywhereUSB config utility, which can be downloaded from the official website of the device manufacturer.

In general, the initial setup of the device is no more difficult than any household router. We get to the login and password entry page - the default login is - root, password - root.There are several options for assigning an IP address. AnywhereUSB can operate in several modes:
Dynamic IP address assignment (DHCP);
Static IP;
Auto Private IP Addressing (Auto-IP).
Forwarding USB ports to the client computer
Everything is simple and easy here. To forward the port to the client PC, we need to install the AnywhereUSB drivers on the machine where we want to receive our USB device, and specify the address of our magic box from Digi. Accordingly, do not forget to connect our USB devices to our USB-IP hub. This is all.
If necessary, obtain detailed information, about the connected device, free/busy ports - you can use the AnywhereUSB View utility, which is installed along with the drivers.
The entire installation and deployment process takes about 20 minutes.
Personally, I use the AnywhereUSB/5 with Multi-Host Connections device in my work. Its difference from younger models is that it supports groups, and this is very convenient. Now I’ll explain: in this model we have 5 USB ports at our disposal. These 5 ports can be divided into groups and forwarded to different virtual machines(hereinafter referred to as VM). For example, we need to transfer 3 devices from ports 1,3,5 to VM1, a device on USB port 2 to VM2, a device on USB port 4 to VM3. We create 3 groups. We combine ports 1,3,5 into group 1, define the second USB port into group 2, and define the third USB port into group 3. Then we connect the necessary groups on the necessary VMs using the utility - and everything works. Everything is done in a matter of minutes. The older model AnywhereUSB /14 can also create and send groups over the network. You can throw anything - for the sake of experiment, I even threw a USB HDD. No glitches or slowdowns were noticed.

 Configuring groups and interfaces in the RealPort USB Configuration menu. Select a group in relation to the USB port.
Conclusion
At the end of the review, I want to say that, unlike similar software The hardware is configured once, does not glitch, does not get hot and works stably. Also, an undeniable advantage is the ability to work in a failover cluster, i.e. The host machine does not lose USB connections when switching. It is important.
More detailed information information about Digi International products, as well as drivers, firmware and utilities can be downloaded from the official website.
That’s probably all, if you have any questions, ask in the comments.
Good luck and good luck to everyone!
All sorts of adapters have been released over the past few years. Sometimes it seems that developers are trying to translate one interface into another, seemingly completely incompatible. This article will focus on the Ethernet to USB adapter. This tandem, by the way, also seemed a little strange until recently. After all, converting a network interface to USB without special electronics was considered difficult to achieve.
The article will also provide a description, characteristics and overview of several key models.
Purpose
Ethernet USB The adapter is used to connect a device equipped with a USB port to the network via regular RJ-45. This allows you to free up the main Ethernet connector for other needs. This can also help in a situation if it is not in the system at all.
General technical specifications
Externally, almost all Ethernet USB adapters are a small box similar to a flash drive. It is very convenient to carry in your pocket or small bag.
On one side of the case there is a connector for RJ-45, and on the other there is a small piece of wire with a USB “male”. Sometimes it can be a solid structure.
Different versions of the device can be equipped with LEDs indicating its functionality.
Since there is not only a USB interface, but also an Ethernet interface, often in order to integrate the adapter into the system, for its correct operation you will need to install drivers, which are usually included in the kit.
Model overview
For comparison, it is worth considering the main representatives in this niche. Almost all leading companies producing network and electronic devices. Since this is specific equipment, you can find these devices only in some stores or on the well-known Chinese product portal.
Satechi 3 Port USB 3.0 + Ethernet LAN Network Adapter
This one is made in a classic compact style. On board he carries one Ethernet port, capable of operating at speeds of 10, 100 and 1000 Mbit/s. A special feature of the device is the presence of 3 USB ports, which makes it a compact hub for connecting additional devices, for example, external hard drives or mobile phones to charge them.
To get started, you do not need to install any drivers. The device is immediately ready for use after direct connection.
DUB E-100 from D-Link
A very simple and compact Ethernet USB network adapter. The most budget version, intended for household needs. One available USB port and a standard RJ-45 connector. Speed characteristics are defined at 10 and 100 Mbit/s. For normal operation of the device, you need to install drivers from the CD included in the kit. Installation is quite simple and does not require special skills.

One of the features of the adapter is its reduced power consumption, which is especially important for laptop owners.
Supported operating systems include the entire Windows line, as well as MAC OS and Linux.
DUB-1312 from D-Link
Essentially, this is an improved version of the previous adapter. It has the same compact dimensions. But it uses USB 3.0, which gives higher data transfer speeds, while guaranteeing USB 1.0 and 2.0. The performance of the Ethernet interface has also increased and reaches 1000 Mbit/s.

Just like its younger brother, it requires installed drivers in the operating system. Energy saving technology is used in the same way.
TP-Link UE330
The device is an adapter with a USB-female to Ethernet, as well as one standard USB for connecting to a computer.
The presence of 3 USB version 3.0 ports capable of transferring data at speeds up to 5 Gbps makes it indispensable as a hub when connecting other devices. If the number of connectors on a PC is limited, then the device will help when connecting additional peripherals.
The adapter is capable of working in all known operating systems, no driver installation required.
HP XZ613AA
One of the simplest devices for connecting a network to a computer via USB. By the way, the version used in it is 2.0, which is not so fast. The network element is capable of transmitting data at speeds of 10 and 100 Mbit/s.

The device can work normally in the Windows line. And to provide indication there are LED lamps.
HP N2Z64AA
This adapter is less compact, but has an additional USB connector. Both are version 3.0, which provides high data transfer speeds. Well, and, in fact, the RJ-45 connector itself for connecting to the network.
5bites UA3-45-03BK
Quite an interesting adapter model. The cable is separated from the housing and is connected if necessary. Since the device is also a hub, it is an ideal Ethernet USB adapter for a printer. This is facilitated by three USB connectors with high operating speeds, which version 3.0 guarantees.
Among the interesting features, it is worth highlighting the automatic algorithm for determining the connection diagram - direct or crossover. The adapter can work with all known desktop systems.
StarTech.com USB31000NDS
This adapter is just that: an adapter. That is, they are placed in one case without any wires USB connectors and Ethernet. This is both a minus and a plus at the same time. It will be convenient to place it in the back of the system unit, but in a laptop the “rigid coupling” will sometimes get in the way a little.

This USB to Ethernet converter adapter has USB 3.0 version, which gives good performance. Speed network interface is 10, 100 and 1000 Mbit/s. This is quite enough for comfortable work on the Internet and downloading rather “heavy” files.
The device can automatically detect the connection pattern, whether crossover or direct.
Wi-Fi NetGear A6100-100PES USB 2.0
Speaking about network adapters via USB, we cannot help but consider the Wi-Fi version. This device- nothing more than wireless adapter, only instead of Ethernet the Wi-Fi interface is used.
To avoid interference and, as a result, reduced speed, the adapter has two frequencies - 2.4 and 5 GHz. Since many household appliances and devices can also operate on 2.4 GHz, a 5 GHz backup would be a great solution.
The device is very compact and easily fits into a pocket or small purse.

Interesting features can be described special function Push N Connect, which allows you to establish a connection with one click. Naturally, everything must be configured in advance.
Conclusion
Many craftsmen are trying to assemble a USB Ethernet adapter with their own hands. However, due to the narrow specificity of the device, this approach has not been widely used. And you can’t find ready-made prototypes and diagrams as such. Of course, you can create something similar from Arduino elements, but the time and search for components is unlikely to justify the effect of the craft.
In general, judging by the reviews, this type Few people will appreciate network cards. This is due to the fact that today, on almost any personal computer or laptop always has at least one RJ-45 connector. Therefore, installing an additional port may be necessary in very rare cases. In addition, sometimes it is easier to install a ready-made network card into the system. But many still find it useful and use adapters to expand the capabilities of their computers and systems.
announced the start of production of an industrial device NETUSB-100 iX , which allows you to connect various USB 2.0 devices over the network Ethernet. As is known, the maximum cable length for connection USB devices is 5m, use NETUSB-100 iX allows you to connect remote USB 2.0 equipment at almost any distance, including the wireless option, using WIFI bridge with an external access point or via a router.The connected equipment can work with all computers in a given network segment. Upon restart, if you have the appropriate settings, remote devices will automatically connect to the selected computer. The maximum network speed is 1 Gbit/s. NETUSB-100 iX automatically detects the network speed and connects to it. Even though the device only has one port USB 2.0, you can connect up to 4 devices to it using any four-port USB concentrator (hub).

Power is supplied through a snap-on connector that provides a secure connection and can be poweredfrom 9 to 48 Volts. The kit includes a 12V 1A power supply.
Plastic housing with the ability to mount on DIN - rail, vertical or horizontal wall mounting.

In addition, the device can also be used in an open-frame version. To do this, just unscrew two screws and remove the board from the case, and there are three points for fastening on the board.

The software is fully compatible with NETUSB-400i and, if you are already using this device on the network and want to expand the number USB ports, you just need to connect a new device to your network. The program will automatically recognize it and it will be ready for use literally a few seconds after connecting.
Main differences from the device NETUSB-400i : only one port USB 2.0 (expandable to 4 ports using an external hub, but if you need 5V 500 mA power on each port, then the hub itself must provide this) and a plastic case. All other characteristics are almost the same.
NETUSB-100 iX device already in stock, retail the price is
87.4 USDat the Central Bank exchange rate on the day the account is issued +2%.
Read also...
- Creating a custom archives page in WordPress How to integrate this template into any theme
- Remotely turn on your computer for free, without SMS and without clouds, using Mikrotik
- Professions: social group administrator
- How to remove a program from Android, including the standard desktop application of various fruits android how to remove