Module name with virtualbox dll error. VirtualBox - solution to the problem with the error E_FAIL (0x80004005) at startup. Changing the startup type
Fail 0x80004005. This failure occurs when trying to launch using the Oracle VirtualBox program.
Causes
Typically, the e fail error code 0x80004005 can be seen if the application failed to write the state to a file. The material may be busy with another process or damaged. In such a situation, the program tries to save data about the virtual machine. Moreover, the files receive a similar name and the prefix -tmp or -prev.
Elimination
If the error code e fail 0x80004005 is visible on the screen, go to drive C. Open the Users folder. We enter the directory with the username. Open the VirtualBox VMs folder. We go to the directory with the machine name. At the next stage of troubleshooting e fail 0x80004005, we move the file from vbox to any convenient location. It can also be removed. We are talking about a file with the name of the machine. We remove the prefix from the vbox-prev element extension. If the directory contains xml-tmp or xml-prev files, we deal with them according to the algorithm described above.
operating system

In a less common case, the cause of e fail 0x80004005 could be a Windows update. To be more precise, component KB3004394 sometimes interferes with startup virtual machine. To normalize the situation, delete it.
Go to the Start menu. Enter cmd into the search bar. In the results we find a program with the appropriate name. Click on this element right mouse button. In the menu that appears, select run with administrator rights. A command prompt window opens. In it we enter the task of removing the KB3004394 component. Click on Enter. If this update is present on the system, it will be removed immediately. After this, we restart the computer. Let's start the virtual machine again.
If error code e fail 0x80004005 occurs, there is another way to resolve it. We need to enable virtualization in BIOS personal computer. We are talking about a technology called Intel Virtualization. She is also mentioned in various sources under the code name Vanderpool. The meaning of the technology is the ability to operate one computer built on a single central processor,as multiple virtual devices. Virtualization allows you to independently and simultaneously run multiple applications or operating systems.
BIOS on various motherboards is different. However, they all work on the same principle. Incorrect settings BIOS platforms can affect the performance of the entire system. BIOS requires conscious and careful user actions. It's best to leave the setup to an expert. If all else fails, install an older version of VirtualBox.
Error 0x80004005 most often occurs when a user tries to open a virtual machine in the VirtualBox application. The reason is the inability to find the file from the previous session. The failure could have occurred during recording or when the sectors on which the data was stored were damaged. In this case, we see error code 0x80004005 in Windows 10 and the program fails to open. Next, we will talk about several ways to deal with the problem.
Method 1
The E-FAIL error code 0x80004005 can be resolved by simply renaming the files in the virtual machine folder. If a failure occurs, the session is still saved, but the prefix –prev, sometimes –tmp, is added to the vbox extension. In this case, the source file that is being searched is missing, but the information can be retrieved.
The reason 0x80004005 appears in VirtualBox Windows 10 is located in the user folders of the system drive. Open a directory like From:/users/[Current NAME]/VirtualBox VMs.
Go to the directory with the machine name. Here you will see not only the “native” file with a normal extension, but also one that was saved with problems.

Save the original file with the .vbox extension to another location just in case. And rename the one with an unwanted prefix.
We proceed in the same way with the .VirtualBox folder. After this, restart the application, error 0x80004005 should disappear.
Method 2
In the case where there is no “incorrect” session document, but error code 0x80004005 Windows 10 occurs, how to fix it in order to enjoy the benefits of the VM? Let's try to roll back the changes from Microsoft. Many people remove this function in their OS, but if you forgot or simply didn’t think about it, then in one of the received packages you can get KB: 3004394. It needs to be removed.
- Launch the PowerShell directive execution shell (required as an administrator). To do this, right-click (right mouse button) on the menu button.

- Type wusa /uninstall /kb:3004394 and press Enter.

The unwanted update will be removed.
Method 3
The error “E-FAIL 0x80004005” in VirtualBox Windows 10 may appear when virtualization is disabled in the BIOS. You need to go into basic settings upon boot. For many PCs, this is done using the F2 button, which is pressed immediately after turning on the computer. Laptops may have a special button. For example, on Lenovo it is located next to the power key.
If this does not work for you, then a new version is installed - UEFI. In this case, you need to hold down +[I] at the same time and go to the updates and security section.

Here in the recovery area, click the reboot button.

During the startup process, different menus will appear on a blue background. Go sequentially: Troubleshooting – Extra options – UEFI Firmware Settings.
To get rid of error 0x80004005 in VirtualBox, look for the Intel Virtualization section and enable it (the “Enabled” value).
If the problem is not in the virtual machine
A similar marker “0x80004005 unidentified error» Issues related to updates or the network are also flagged.
Cumulative update KB3081424
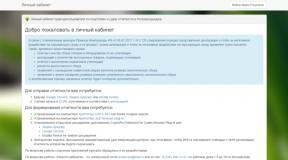
Error 0x80004005 appears in Update Center.

If this package is not installed for you, run the troubleshooting tool in the settings (in the same place where you looked for the BIOS entry).

If any pending updates are found, apply them.

Adobe Flash Player updates fail in Internet Explorer and Edge
In Windows 10, error 0x80004005 occurs when there are problems with the player. To fix it, go to settings and in the update center area, tap "Checking for updates". This will help fix error 0x80004005 if you have disabled automatic download updates. You will have to wait until all packages that require installation are found.

You can always delete unwanted ones by following the link "View update history".

Click on the delete link.


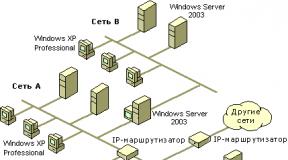
Unable to connect to a remote PC via local network
If you have combined several computers into one network and are trying to access one of them, you may receive a ban with error 0x80004005. In this case, fix it through the registry editor.
- +[R] – regedit

- Go sequentially Computer\HKEY_LOCAL_MACHINE\SYSTEM\CurrentControlSet\Services\LanmanWorkstation\Parameters.
- Change the value of the AllowInsecureGuestAuth parameter to 1.

Write in the comments in what situations you encountered error 0x80004005 and how you got rid of it.
When working with the VirtualBox hypervisor, various types of problems often arise, one of them is the E_FAIL error (0x80004005), which appears at the start of the virtual machine (VM). The appearance of such an error does not necessarily have to be preceded by some of our user’s incorrect actions. Although they are not excluded. This error may appear due to updates to the VirtualBox program itself, a malfunction in its operation, or in the operation of the host system. Previously, when saving the state of the VM, something prevented the correct writing of data to its configuration file, or the configuration itself changed, and now, when resuming work, we get the E_FAIL error (0x80004005). What to do? How to get rid of this error?
How to resolve the E_FAIL error (0x80004005)?
For example, in our case, the E_FAIL error (0x80004005) arose due to problems with the operation of an additionally connected virtual hard drive. It crashed in the settings, and the VM, without matching the earlier configuration, naturally does not want to start.
We will try to solve the problem using methods from simple to complex.
1. Resetting the VM state
If you're lucky, the most simple solution With such an error, the saved state of the VM may be reset.

The state will be reset, and the guest OS can start safely. If not, move on.
2. Manipulation of the configuration file
In some cases, certain manipulations with the VM configuration file will help resolve the problem described. In Explorer, open the folder with the data of such a VM. By the way, to quickly open the VM storage path, VirtualBox provides a special option. Open the “Car” menu and click “Show in Explorer”.
In the folder of a specific VM, we need two files with its name, but with different extensions - “.vbox” and “.vbox-prev”. The first one will have a VirtualBox icon, the second one will have no icon. The first file needs to be deleted.

We rename the second file: in the extension “.vbox-prev” we remove the prefix “-prev”. As a result, the second file will take the place of the first.

Note: VirtualBox configuration files may have extensions ".xml" and ".xml-prev", respectively. In this case, we proceed by analogy: we delete the first “.xml” file, and turn the second “.xml-prev” into the first one by renaming it.
Now we can try to start the VM. When you run it, the second file “.vbox-prev” (or “.xml-prev”) will be generated automatically.
3. Return to previous versions VirtualBox
Various problems in the operation of new versions of VirtualBox are, unfortunately, a common occurrence. Over time, as the developers receive our complaints, new versions are corrected and become stable. However, at the beginning we have what we have. VirtualBox is supplied to us free of charge, and all the imperfections of the program are secretly attributed to this fact. If you encountered the E_FAIL (0x80004005) error after upgrading VirtualBox to new version, we remove the latter using the uninstaller, clearing the remaining programs and installing an earlier version. We introduce existing VMs into the interface of the reinstalled program using the “Add” function in the “Machine” menu. In the Explorer window that opens, indicate the path to the configuration file for each of the VMs - the same one that we discussed manipulations with in the previous paragraph of the article, a file with the extension “.vbox” (or “.xml”).

4. Recreating the VM
If none of the previous methods helped get rid of the error in question, we resort to re-creating the VM. We will not delete all of it, only the settings, while leaving it virtual HDD– in fact, the most valuable of its components. And based on the file on such a disk, we will create a new VM with a clean configuration file, which certainly should not cause us any trouble.
We follow the path of storing VM files in Explorer. Now we need virtual disk– a file with the extension “.vhd”, “.vdi”, “.vmdk” or another format supported by VirtualBox, which was specified when creating the VM. We cut this file and paste it somewhere else outside the folder we are working with. Well, the point is important: we place the disk file in the root of the partition or in some other folder, this will be temporary storage. The only thing is that you don’t need to transfer it to another disk partition in order to avoid unnecessary overwriting of a large amount of data.

Having provided the virtual disk with a temporary home, we delete the VM folder.

Now we delete the VM in the VirtualBox window.

We just remove it from the list.


The name can be given the same as it was before. We set the necessary parameters, but do not connect the hard drive.

We don’t touch anything in the VirtualBox window for now, return to the virtual disk file and transfer it from the temporary storage location to the folder of the new, just created machine.

Now we configure it in the VirtualBox window. Click the “Configure” button and set the necessary parameters - increase the video memory, add processor cores, select the paravirtualization interface if necessary, configure shared folders and clipboard, do not forget to enable EFI support if you previously used EFI software emulation with installing the guest OS on a GPT disk, etc. But the main thing is to connect the virtual disk. In the “Media” settings section, click the SATA controller button.


And we indicate the path to the disk file - the same one that we previously moved back and forth for the purpose of its safety.

Click “Ok” in the settings window and we can start the VM. When re-creating, it is usually also necessary to reinstall add-ons inside the guest OS.

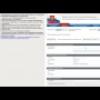
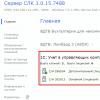
On some computers, when starting virtual VirtualBox machines An error appears that says “Failed to open a session for the virtual machine.” For me it looked like this:

If you click on the word “Details” in the window of this error, you can see the code for this error - E_FAIL (0x80004005):

It’s especially annoying if you already had a working virtual machine set up in VirtualBox that you were using, and after a while it simply stopped starting, giving the error E_FAIL (0x80004005) “Failed to open a session for the virtual machine.” In this article, we will sequentially look at three solutions to this problem with starting a virtual machine.
First solution
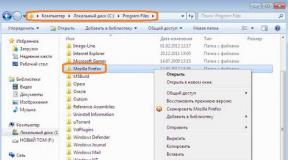
Go to drive C, then to the Users folder, then select the user under which you installed VirtualBox (my name is Sasha), then to the VirtualBox VMs folder, and there should be a folder with the name of your virtual machine. We created a virtual machine called Win8.1, so the full path to the required folder will look like this: C:\Users\Sasha\VirtualBox VMs\Win8.1

As you can see in the screenshot above, in this folder I have two files with the name of my virtual machine “Win8.1”: “Win8.1.vbox” and “Win8.1.vbox-prev”. You must first copy both files to another location on your computer (do backups), and then in the source folder delete the file “Win8.1.vbox”, and rename the file “Win8.1.vbox-prev” to “Win8.1.vbox”. Just remember that you will have your own name for the virtual machine. After this, the virtual machine should start without error. If the error remains, simply return the copied files to the original folder.
Sometimes the specified folder will not contain the files that I described above, but with the xml extension - for example, “Win8.1.xml-prev” and “Win8.1.xml-tmp”. In this case, it is enough to rename the “Win8.1.xml-prev” file to the “Win8.1.xml” file, and the virtual machine should start without errors.
Second solution
Another cause of the E_FAIL error (0x80004005) may be one of the operating system updates. Windows systems KB3004394. You must remove this update so that your virtual machine can start again without error.
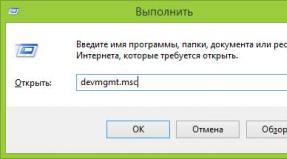
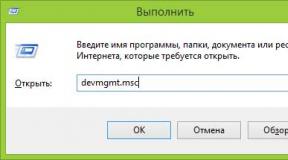
Go to the Start menu in the lower left corner of the desktop Windows desktop, and then in the right column click "Run" as shown in the image:

A dialog box will open, and in it you need to type English language the word “cmd” and then click OK:

A black screen will open with command line and a blinking cursor:

In it you will need to carefully type the following command:
wusa /uninstall /kb:3004394
and press Enter. It should look something like this:

Windows will look for the specified update on your computer, and if it finds it, it will remove it. This usually helps if solution #1 did not help.
However, there are times when even this method does not help, and you have to move on to the third method.
Third solution
If the first two methods did not help, then you need to install one of the stable versions of the VirtualBox program (currently these are versions 4.3.12 and 4.3.10), having first uninstalled the version of VirtualBox with which you are currently installed (just do not uninstall it yourself virtual hard disk file). In versions 4.3.12 and 4.3.10, the E_FAIL error (0x80004005) was not observed.
You can download these versions from the official website using the following links:
I described in detail how to install the downloaded VirtualBox program in this article. Please note that if you remove the old VirtualBox from your computer, you will most likely experience a temporary loss of Internet connection, just as if you installed another version of this program. There is nothing wrong with this; simply restarting the computer solves this problem.
I hope you found this article helpful. If you have any additional questions, please ask them in the comments.
Post navigationVirtualization- interesting opportunity modern computers, which allows you to use part of the device’s resources to run any operating system within the main OS. This technology reached its maximum relevance in Windows 10 due to the increased need to run programs that are compatible only with older versions of this OS.
Programs of this kind for servers and desktop computers began to appear a long time ago, but over time, Oracle has been the most successful in this field. Its product called VirtualBox made it easy to configure and use such features even to a simple user, while being very stable.
But even in such a long-debugged and stable program, a situation often arises when the user was unable to open a session for the virtual machine due to an error 0x80004005.
When the problem appears
The problem has been observed on all versions of the operating kernel Microsoft systems with version 6.1 and older. In other words, an error when launching an image already installed on a virtual machine occurs on OSes from Windows 7 to latest Windows 10. The occurrence of the problem does not depend on the type of system you installed on your PC or the version of the VirtualBox program.

Such an error becomes especially unpleasant when the user has already installed, configured and even used the virtual machine for some time. In this case, a banal restart no longer gives any results, that is, further operation of the OS on VirtualBox is impossible without taking urgent measures.
First option
After you try to activate the virtual machine, you see the following message appear on your screen: error code 0x80004005, you should close the program.
Let's go to system disk, usually denoted by " WITH».

Next, look for a folder with information for your account. You can see it when you log in to the system, launch the menu “ Start» in Windows 7/10 or activating the tiled menu at the top of the screen when using Windows 8.
We go there and find the folder “ VirtualBoxVMs", in which we look for the directory of the non-starting virtual machine. There you will see three files, the list of which will look like this:
- Example.vbox.
- Example.vbox-prev.
- The “Logs” folder (we ignore it, we won’t need it).
First copy " Example.vbox" And " Example.vbox-prev» to any other location on the computer, for example, to drive “D”.
Then we perform a simple combination:
- We return to the folder with the idle virtual machine.
- Delete the Example.vbox file.
- Rename the file Example.vbox-prev to Example.vbox by calling options by right-clicking.
In new versions of the program, the contents of the folder may be slightly different, for example, it may contain files “ Example.xml" And " Example.xml-prev».
For all of them we perform exactly the same operations:
- Let's make a backup copy.
- We erase the file with permission.xml.
- Change the name “Example.xml-prev” to “Example.xml”.
The procedure described above takes no more than five minutes and is worth trying initially. It will work almost always, except in one other case.
Another solution to the problem
There are a number of situations when a user receives the message " Failed to open session for virtual machine"because of one Windows updates under the marking KB3004394. In this case, it is possible to fix the problem by removing this update from the system. There are two ways to do this:

Third option
If you have tried both solutions, but the above error code still appears instead of the system boot window, then you should roll back to the previous version VirtualBox.

A list of stable versions of the program can be found at this link.
Before installing the old version, remove current version from the system, while leaving the data. The list of actions is as follows:
- Enter Control Panel, and then to the menu " Installation and removal of programms».
- Select a program there VirtualBox.
- When asked to delete program user data, click No.
- Download and install another stable version of the program from the list above.
It is possible that if you cannot install an older version, you will have to completely uninstall the program along with all the data, since old version may not be compatible.
Bottom line
So, we have indicated several ways to solve the problem of opening a virtual machine session. If you know any other methods, feel free to leave them in the comments, and we will definitely add them to the main text of the article.
Video on the topic