How to open parental controls. Active and passive control. Free or paid RK
Many parents find it quite difficult to control the actions of their children on the computer, which the latter often abuse by spending too much time on computer games, visiting sites that are not recommended for school-age children or engaging in other activities that negatively affect the child’s psyche or interfere with their studies. But fortunately, your Windows 7 computer has special tools that you can use for parental control purposes. Let's figure out how to enable, configure, and, if necessary, disable them.
It was said above that the parental control function is applicable to parents in relation to children, but its elements can be successfully used for adult users. For example, the use of such a system in enterprises would be especially relevant in order to prevent employees from using the computer during working hours for other purposes.
This function allows you to limit certain operations by users, limit the time they spend near the computer and block certain other actions. Such control can be exercised both using the built-in operating system tools and using third-party applications.
Using third party programs
There are a number third party programs, which have built-in parental controls. First of all, this is antivirus software. Such applications include the following antiviruses:
- and etc.
In most of them, the parental control function comes down to blocking visits to sites that meet certain characteristics, and to prohibiting visits to web resources at a precisely specified address or template. Also, this tool in some antiviruses allows you to prevent the launch of applications specified by the administrator.
Learn more about the parental control capabilities of each of the above. antivirus programs can be found by following the link to the review dedicated to it. In this article we will focus our main attention on the built-in Windows tool 7.
Turning on the tool
First of all, let's figure out how to activate the parental controls already built into Windows 7. You can do this by creating a new account, the manipulations of which will be controlled, or by applying the necessary attribute to an existing profile. The mandatory requirement is that he should not have administrative rights.
- Click "Start". Click "Control Panel".
- Now click on the inscription "User accounts…".
- Go to "Parental control".
- Before proceeding to create a profile or apply a parental control attribute to an existing one, you should check whether a password is assigned to the administrator profile. If it is missing, then it needs to be installed. Otherwise, a child or other user who will need to log into the system under a controlled account can safely log in through the administrator’s profile, thereby bypassing all restrictions.
If you already have a password set for your administrator profile, then skip next steps on its installation. If you have not done this yet, then click on the name of the profile with administrative rights. In this case, you must work in the system under the specified account.
- A window will be activated where it will be reported that the administrator profile does not have a password. It immediately asks whether it is worth checking for passwords now. Click "Yes".
- A window opens "Secure administrator passwords". In element « New Password» enter any expression by entering which you will log in to the system under the administrator profile in the future. It is worth remembering that when entering, the case is taken into account. To the region "Password confirmation" you should enter exactly the same expression as in the previous case. Region "Enter a password hint" filling out is not required. You can enter any word or expression into it that will remind you of the password if you forget it. But it’s worth considering that this hint will be visible to absolutely all users who try to log into the system under the administrator’s profile. After entering all the required data, click "OK".
- After this, you return to the window "Parental control". As you can see, near the name account administrator is now set to a status indicating that the profile is password protected. If you need to activate the function you are studying for an existing account, then click on its name.
- In the window that appears in the block "Parental control" move the radio button from position "Off" into position "Turn on". After that press "OK". The function regarding this profile will be enabled.
- If a separate profile for the child has not yet been created, then do this by clicking in the window "Parental control" according to the inscription "Create a new account".
- The profile creation window opens. In field "New account name" indicate the desired name of the profile that will work under parental control. It can be any name. For this example we will assign a name "Child". After that click "Create an account".
- After the profile is created, click on its name in the window "Parental control".
- In the block "Parental control" put the radio button in position "Turn on".


Setting the function
Thus, parental control is enabled, but it doesn't actually set any restrictions until we configure them ourselves.
- There are three groups of constraint directions that are displayed in the block "Windows Settings":
- Time limits;
- Application blocking;
- Games.
Click on the first of these names.
- A window opens "Time limit". As you can see, it presents a graph in which the rows correspond to the days of the week, and the columns correspond to the hours of the day.
- Clamping left button mouse, you can highlight the graph plane in blue, indicating the period of time when the child is prohibited from working with the computer. At this time, he simply will not be able to log into the system. For example, in the picture below, a user who logs in under a child’s profile will be able to work with the computer from Monday to Saturday only from 15:00 to 17:00, and on Sunday from 14:00 to 17:00. After the period is marked, click "OK".
- Now let's go to the section "Games".
- In the window that opens, by toggling the radio button, you can specify whether the user under this account can play games at all or not. In the first case, the switch in the block “Can a Child run games?” must stand in position "Yes"(by default), and in the second - "No".
- If you choose the option that allows you to play games, you can additionally set some other restrictions. To do this, click on the inscription "Set game categories".
- First of all, by toggling the radio button, you need to indicate what to do if the developer has not assigned the game a certain category. There are two options:
- Allow games without specifying a category (default);
- Block games without specifying a category.
Choose the option that suits you.
- In the same window, go down further. Here you need to indicate the age category of games with which the user can play. Select the option that suits you by installing the radio button.
- Going even lower, you will see a large list of content, the launch of games with the presence of which can be blocked. To do this, just check the boxes next to the appropriate items. After all the necessary settings in this window have been made, click "OK".
- If you need to ban or allow specific games, knowing their names, then click on the inscription "Prohibition and permission of games".
- A window opens where you can set which games are allowed to be turned on and which are not. By default, this is set by the category settings that we set a little earlier.
- But if you set the radio button opposite the game name to the position "Always allow", then it can be enabled regardless of what restrictions are set in the categories. Similarly, if you set the radio button to position "Always prohibit", then the game will not be able to be activated even if it meets all the conditions specified earlier. Enabling those games whose switch remains in position "Depends on the rating", will be regulated exclusively by the parameters set in the category window. After everything necessary settings produced, click "OK".
- Returning to the game management window, you will notice that opposite each parameter the settings that were previously set in specific subsections are displayed. Now all you have to do is click "OK".
- After returning to the user controls window, go to the last settings item - “Allowing and blocking specific programs”.
- A window opens “Selecting programs that a Child can use" There are only two items in it, between which you must choose by moving the switch. The position of the radio button determines whether the child can work with all programs or only with the permitted ones.
- If you set the radio button to position “The child can only work with approved programs”, then a list of applications will additionally open, where you need to select the software that you allow to be used under this account. To do this, check the boxes next to the corresponding names and click "OK".
- If you want to prohibit work only in individual applications, and in all the rest you don’t want to limit the user, then checking the boxes next to each name is quite tedious. But you can speed it up this process. To do this, immediately click "Select all", and then manually uncheck those programs that you do not want your child to run. Then, as always, click "OK".
- If for some reason in this list If there is no program that you would like to allow or prohibit your child from working with, then this can be corrected. Click the button "Review…" to the right of the inscription "Add a program to this list".
- A window opens in the directory where the software is located. You should select the executable file of the application that you want to add to the list. Then click "Open".
- After this, the application will be added. Now you can work with it, that is, allow it to run or prohibit it, on a general basis.
- After all the necessary actions to block and allow specific applications completed, return to the main user controls window. As you can see, the main restrictions we set are displayed on the right side. For all these parameters to take effect, click "OK".


Disabling the feature
But sometimes the question arises, how to disable parental controls. It is impossible to do this from a child’s account, but if you log into the system as an administrator, then disabling is simple.

Tool "Parental control", which is built into the Windows 7 OS, can significantly limit the performance of unwanted operations on the computer by children and other users. The main directions of this function are to limit the use of a PC according to a schedule, prohibit the launch of all games or individual categories, as well as restrict the opening of certain programs. If the user believes that these options do not sufficiently protect the child, then, for example, to block visits to sites with inappropriate content, you can use special tools antivirus applications.
Let's face it - our children are often ahead of us in mastering modern digital technologies. They master the Internet from an early age, and the older they get, the more we, parents, are concerned about the question of how to protect them from the huge amount of non-children’s content that overwhelms the Internet.
Internet Parental Controls
Parental control- mostly an illusion, no method will work indefinitely. Something bad will definitely penetrate through all the filters, and the children themselves will certainly will try to get around restrictions you set. Many of the child prodigies do not perceive parental control as a barrier on the road at all; for them it is just a speed bump.
What should parents do? First of all, you need to understand that relying on one product to protect children from inappropriate content is unrealistic. A multifaceted approach to parental control is needed. Moreover, it would be more correct to call all these measures content limiters rather than parental controls.
If you, like most modern people, are constantly busy, you are unlikely to have time to keep track of new products software, filtering content, or block every malicious site on the router. Instead you need more simple solutions according to the “set it and forget it” principle.
So, here are three such ways to set up Internet control.
1. Set up your router (or computer, gadget used by children) to a “Family Friendly” DNS server.
Every time you visit a site on the Internet, you type its address or name into your browser. After this, your computer searches the network for the IP address of the server to which this name corresponds. This is done for the convenience of users, since it is unlikely that anyone will want to enter IP addresses manually. The server that performs the task of translating a URL into an IP address is called a DNS resolver.
Your home router is most likely set to automatically route to DNS server provider. And this server, as a rule, does not filter content and provides full access to all Internet resources. But there are so-called “Public DNS resolvers” that you can use instead of the server provided by your ISP. Some Public DNSs automatically filter content and weed out porn sites, as well as sites known to be fraudulent or contain malware. This doesn't guarantee that everything will be filtered out, but if you choose a "family-friendly" DNS resolver, most sites with adult content will not end up on your children's computer screens and gadgets.
However, setting up such a DNS resolver will not prevent your child from accessing a “bad” site directly using its IP address. But this will already be associated with certain difficulties for him, because... it’s much easier to click on a link in a search engine or type in a URL.
2. Enable temporary Internet access restrictions on your router.
You can't monitor your children's online activity all the time, especially when you're sleeping. Most home routers and wireless points access have the function of limiting Internet access at certain hours. Therefore, you can limit your Internet use to daytime hours and early evenings only. To set up, read the manufacturer's instructions.
3. Turn search engines into safe search mode and block it.
The next way to weed out “junk” from the Internet is to enable “Safe Search” filtering in the search engines you use. Such major search engines as Yandex and Google provide such a function. The results for your queries will not include links to sites with obscene content. Again, this method is not 100% guaranteed to work, but it's still better than nothing. Many search engines also let you lock this setting in the browser so your kids can't turn it off simple removal tick or similar simple action.
The article discusses ways to organize parental control over PC operation using standard Windows functions And additional programs. The main condition for all the considered methods of limiting computer work is complete freeness!
The total penetration of computers and the Internet into every home began around the mid-2000s. And with it came a number of problems that needed to be solved. There were especially many of them among users with children...
Modern children, seeing their parents constantly sitting at a PC or with a tablet, begin to show interest in computer technology almost before they start talking! Not giving a child what he wants is tantamount to a disaster with crying and accompanying hysterics :) Therefore, it is better not to prohibit children from “communicating” with the computer, but limiting this “communication” to a level that is safe for children and the PC itself.
Based on numerous requests from our readers and as answers to frequently asked questions regarding the “child and computer” problem, I bring to your attention an article about free organization of parental control on your own!
Creating user accounts
The less third-party software on your computer, the better. This is an indisputable fact. Therefore, before installing anything, try to find out whether it will be sufficient for your purposes and regular funds Your operating system.
To better imagine what we need from parental control, let’s highlight its main tasks:
- Schedule of allowed time intervals for computer operation.
- Manage permissions to launch and install various programs or games.
- Control over visits to Internet resources.
As we see, ideally, we should ultimately create something like a partially isolated environment in which a child could work, but in such a way as not to harm either the system or his psyche. The user account mechanism, which is built into any, even the oldest of the currently popular Windows - XP, is ideally suited for this.
Creating an account for your child is quite simple. You need to go to the Control Panel (via the Start menu or the Computer icon in Windows 8) and find the “User Accounts” section there. In the window that opens, we will need to activate the guest account (if it is disabled) and set the parameters for logging into it.
The only thing that can cause minor difficulties is creating a new profile in Windows 8. Here we will need to click on the link “Change an account in the Computer Settings window” and create a new user (the “Child” profile, which does not require entering Email) already in the Metro interface:

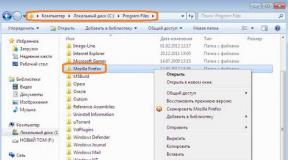
After creating a new account, your child will be able to log into the system using his own password (the password can be disabled later) and work with his own set of programs installed only for him. However, nothing will prevent him from going to Drive C and directly launching everything he wants from the Program Files folders and the like... Therefore, the account requires further configuration.
Blocking access to programs and important files
Special and easy-to-use tools for parental control (we will discuss them below) were introduced only in Windows 7. Before that, Windows Vista the module was also implemented, but it worked very poorly, and in Windows XP (and before) it did not exist at all! However, some things could be configured there too.
For example, restrictions on the launch of certain programs and files were possible (and still are possible) in the “Local Security Policy” subsection, which is located in the “Administration” section of the Control Panel:

In the window that opens, on the left side we need to expand the "Application Restriction Policies" section and select the subsection " Additional rules". Next, in the right part of the window, right-click context menu and click "Create path rule". The rule editing window will open, in which you can specify the path to the application or document that you want to block, and then select the access level for it (unrestricted, with standard rights, or denied).
We apply the changes and now, when you try to access a blocked file, the system will issue a notification that the resource is blocked. Similarly, you can create rules for certain areas of the Internet or specific files based on their hash (this is already in the area of advanced configuration and is optional).
Blocking access to sites
So, we figured out the blocking of programs. Now let's try to solve something with Internet access. There are much more opportunities here. In addition to the above-mentioned method of restricting Internet zones through managing restriction policies, I consider one of the most convenient ways to block access to a site using the HOSTS file:

Located this file on your system disk(usually Drive C) in the Windows\System32\drivers\etc folder and does not have any extensions other than the name “hosts”. If a file of the same name with the EXE or TXT extension is present, it means that it is the result of the activity of some virus and it must be destroyed immediately!
The HOSTS file is opened using standard Notepad (Open with - Select program... - Notepad). By default, it contains a small comment header and only one entry: 127.0.0.1 localhost (everything below, if any, should be deleted if you did not make the edits yourself). The first number is the IP address of the desired resource, and the word separated by a space (or better yet, a tab) is the name by which this address will be available in the browser.
Here, for clarity, we will have to make a small digression. The fact is that we are used to visiting sites by writing down their names. By entering this entire word into the search or address bar of the browser, we will be taken to the desired web resource. However, in reality everything is somewhat more complicated...
On the Internet, all websites can be visited directly by entering their unique IP address, which consists of a series of four three-digit numbers separated by periods. However, such combinations are difficult to remember, therefore, in order for an ordinary person to be able to access the necessary web resources in a form understandable to him, special DNS servers were invented (abbreviated from the English “Domain Name System” - “domain name system” ). They store in their databases the correspondence between the site’s IP address and its name, due to which they allow the user not to memorize real addresses, but to use so-called aliases of web pages.
So, returning to our hosts file, I will say that it implements the DNS functionality on each individual computer. At the same time, it has priority over the external DNS server, therefore, if you register your redirection in it, it will work before accessing the web. Therefore, we will use this useful property of the HOSTS file and add a simple line like: 127.0.0.1 vk.com. That's it - goodbye Kontaktik :) We redirected it to the local host and now our child, whenever he tries to log into VKontakte at the specified address, will see an empty one White screen! We do the same with any sites that we want to close.
However, you will say, this method is quite troublesome. What if a child wants to watch something on the Internet that is not intended for children under 16? What now to look for and add to the list of addresses of all porn sites?!! You shouldn’t do this :) Such lists have long been created for us, and we just need to connect them.
This method is also based on the way DNS servers work and consists in using an alternative DNS by default instead of the one provided by the provider. In our latitudes, I would recommend using DNS services from Yandex, specifying its "Family" mode as the default server. To do this, go to the Control Panel in the "Network Connections" section (or "Network and Sharing Center" shared access" - "Changing adapter settings" in new versions of Windows), we will find our network card, which receives the Internet signal, and call its Properties:

In Properties, go to the very bottom of the list and double-click on the line “Internet Protocol Version 4 (TCI/IPv4)”. The properties window will open network connection, in which we need to activate the option “Use the following DNS server addresses”. After this, we can set the primary and alternate DNS in the appropriate fields. For main enter 77.88.8.7 , and the additional one is 77.88.8.3 . Now, when your child tries to access a bad resource, he will be given something like this page in any browser:

Using the Task Scheduler
The final touch to the “portrait” of the implementation of universal parental controls (more precisely, restrictions) will be an example of using the standard Task Scheduler to schedule a computer shutdown at a given time.
You can enter the Scheduler, as well as other sections of the settings, through the Control Panel - "Administration". Open the Task Scheduler and click the “Create task” button. A window with general settings for the new task will open:

Here we need to set a custom name for our task, and also indicate for which account it will be applied. To implement the latter, you need to click the “Change” button to the right of the field where account information is displayed and in the window that opens, enter the name of the account that we need.
The second step is to specify a schedule. To do this, go to the “Triggers” tab and click the “Create” button:

Here we need to indicate that the task must be performed “Daily”, and then set the exact time when the task will be triggered. The remaining parameters can be left untouched. All that remains is to click “Ok” and go to the “Actions” tab:

Create a new action of the “Run a program” type and in the “Program or script” field write the console command to shut down the computer - shutdown. Below there is a field for entering command parameters (“Add arguments”). Here we will enter a mandatory flag for a complete shutdown (-s) and, if desired, additional keys separated by a space, such as a timer in seconds before the PC turns off (for example, 30 seconds: -t 30) or a comment that will be displayed on the screen (-c "ATTENTION!!! Computer will shutdown in 30 seconds!!!"). Now we save our task and at the appointed time it will definitely turn off the computer, no matter how eager your child is to watch another cartoon or complete the level of the next game :)
In principle, with the help of the Task Scheduler you can create many “miracles”. It all depends on your ingenuity :)
Standard parental controls
As we can see, it is possible to implement good protection of a child from the influence of a computer and a computer from the machinations of a child using almost any Windows versions. However, the above methods require parents to understand some of the nuances of the settings and some technical knowledge. If you don’t have an old XP or Vista, then it will be easier and faster for you to organize everything using the standard parental control module.
Since I don’t have “Seven” at hand, I propose to consider the operation of the module using the example of Windows 8.1 (especially since this module has undergone major changes in “Eight”).
First of all, we must create a child account (as described above). Now in the Metro interface we need to go to the “Accounts” - “Other Accounts” section and there select the account we need, over which we want to gain control, and then click the “Manage Family Safety settings online” link:

Clicking on the link will redirect us in the browser to the Microsoft website, where we will need to log into our account. After this, we will see a list of accounts with the “Child” type. Select the one you need by clicking on it and go to the next screen:

I don't think it's possible to get confused here. All items are conveniently sorted and provided with brief explanations for greater clarity. By default we have the following settings:
- Web filter. All sites are allowed except adult sites. Enabled.
- Time limit. Turned off.
- Application restrictions. It is forbidden to delete everything installed programs. Turned off.
- Game restrictions. Turned off.
If desired, you can change each group of settings according to your requirements simply by setting your parameters. For example, you can completely prohibit downloading files from the Internet, set a time limit for working on a PC or specific hours when the user will not be able to turn it on, and also prohibit running all games.
To monitor your child’s work on the PC, there are two sections: “Action Report” and “Requests”. The first one displays in the form of an event calendar what programs and sites your child visits, and the second one displays a list of requests for sites prohibited by the web filter, which can be unblocked manually if desired.
The advantage of a cloud-based implementation of parental control is that you can receive information about your child’s activities at any time and anywhere there is Internet access. However, not everyone may find it convenient to constantly visit the site... Therefore, Windows 8 also provides a not entirely explicit way to manage Family Safety locally. To activate it, go to the Control Panel and select “Family Safety”. In the window that opens, you need to click the “More details” button under all the text and there activate the link “Remove your computer from the Family Safety website”:

A list of accounts on our PC will open in front of us. Click on the one you need and get to the local Family Safety control panel:

This window is similar to the Family Safety management window in Windows 7 and contains, in principle, all the same settings as the web version of parental controls, which we discussed above. The hierarchy of parameters is a little more confusing than in the web interface, but I think it won’t be too difficult for you to figure out what to look for and where.
By the way, if you decide to use online settings again, you can return to them at any time. The only limitation is that when you switch again you will have to reconfigure the security settings...
Free parental control software
As sad as it may be, neither we nor the West have completely free comprehensive programs for parental control... However, there are separate utilities that allow you to implement one or another direction, similar to the standard Windows Family Safety.
While working at school, at one time I spent quite a long time looking for such programs, and now almost all of this research can be found on our website. For example, to block the launch of certain programs and the opening of unwanted sites, you can successfully use the Writer utility:

This program allows you to keep a log of the opening and closing of any windows in Windows while saving their titles. Using the same headers, you can block windows from launching, thus preventing you from launching an unwanted game or opening a site that you consider harmful to your child.
For children, a mini-program called Terminator is also a mega-effective solution for discouraging the desire to play a game you hate. This program does not even have an interface, but it allows you to create significant inconvenience for those who launch one of the applications or games that are included in the INI configuration file. While the program is running, the mouse will behave unpredictably, the keyboard will periodically “press” arbitrary keys, and distortions in the color and shape of objects may appear on the screen. In short, that's it :) If your computer is broken, you need to take it in for repairs;)
To block Internet sites and all kinds of unwanted content, you can install the program NetPolice Lite:

This program is a stripped-down version of the paid traffic control system NetPolice. However, its basic functionality is quite sufficient for everyday use. NetPolice Lite fully filters content unsafe for children and can simultaneously be used to block up to 5 inappropriate sites for one user account (in paid version there are no restrictions on the number of blocked resources and the number of accounts).
A similar, but completely free (at least for now) program is Internet Censor. The program is not yet covered on the pages of our website, however, it is in the list for description. With its help, you can organize Internet access for children based on the “white list” principle. That is, the child will be able to visit only sites allowed in the program - all others are blocked! At the same time, the Internet Censor itself is also protected by a password and you can disable the protection only if you know it.
conclusions
In Windows (especially in modern versions) there are many hidden useful tools, which allow you to implement various tasks without the use of third-party software. For example, starting with Windows 7, the system has a BitLocker component, which allows you to create an encrypted partition on your hard drive that is as burglar-resistant as paid programs encryption. Or the AppLocker module in professional versions, which makes it possible to flexibly and conveniently manage rights to run certain programs for different users. And the same "Family Safety" ...
Microsoft is slowly but surely moving towards increasing the number of useful standard features of its OS, which will be in demand not only by various system administrators, but also ordinary users. Therefore, if you have Windows 7 or 8, then you can solve almost any problem related to parental controls and restricting the rights of different accounts using standard tools built into the system.
For everyone else, I recommend making finer adjustments to your Windows and arming yourself with additional utilities. The right selection of third-party tools will allow you to implement parental controls as well as in new operating systems (and maybe even better).
I wish you all success! Let the computer bring only benefits to your child :)
P.S. Permission granted to freely copy and quote. this article provided that an open active link to the source is indicated and the authorship of Ruslan Tertyshny is preserved.
Parental control is a convenient feature for parents that appeared in latest versions OS from Microsoft. With it you can remove unwanted content, make the browser safer for children, you can also ban the launch of certain applications or limit the time children spend on the PC.
Windows Parental Controls are very useful for usersFor the first time, the Parental Control function was built into previous versions of the operating system and was implemented at the local level. When introduced, parental controls for Windows XP were very limited and did not allow many settings to be controlled through accounts. The restrictions concerned only Windows Player And Internet Explorer. In later operating systems, developers went further. And in Windows 10, all controls for this function were transferred to .
Child account with standard settings. Creation
User account – parameters that determine which computer resources the user has access to, restrictions imposed on the use of the PC, etc. She is also responsible for desktop design and other personalization settings.
Before setting up, you should make a new account; to do this, you will need to open the add user menu by doing the following:
- Go to “Options” through the menu or using the Win + I keys.
- Go to “Accounts” and select “Family and Users” from the menu.
- Click on the “Add” option and indicate that you need to add a family member.
In the window that opens, click on the “Add” item. At this stage you will need to provide an e-mail address; if you don’t have it, it doesn’t matter. The system will prompt you to create it before configuring other parameters. Next you will need to provide owner information:
- surname;
- Date of Birth.
If the e-mail address has not been specified before, then you need to create it here. It is worth knowing that for children under 8 years old, the system will use increased security measures by default. In any case, they can be changed later.
After creating an account, information about it and data for further management will appear. It’s worth knowing that to set up, you’ll have to go to the Microsoft website from your parent’s account. An access link will be shown at the end of the settings.
Important! The first launch should be done independently. Will need to do additional settings, and the system will warn you that the computer’s parental controls are enabled.
Parental controls for Windows 7 work similarly. But everything is managed locally. First of all, you need to enable parental controls by accessing the item of the same name in the Control Panel, and then create an account and set the necessary parameters for it. To turn off parental controls, you will have to go to the control panel again.
Let's look at how to set up an account Windows entries 7 for kids:
- Enable the function of restricting access to the PC for children.
- Create a user account that will not be a PC administrator.
- Go to your account settings and set the necessary permissions for it.
This version of Windows only provides time limits by default, as well as restrictions on running games and certain applications. This is not enough if you want to manage restrictions on access to content.
You can add a user in Windows XP by going to the “Control Panel” and selecting “User Accounts”. It is worth considering here that standard means Administrative settings in this operating system do not offer control over restrictions for children. You can prevent the user from starting the computer at a specified time, customize the installation of programs, and configure some restrictions in Internet browser Explorer.
Account Management
The function is managed through the Microsoft website. This is done to prevent children from turning off parental controls. After going to the service page you need to do fine tuning. For this we choose the desired entry on the list. Will open home page, which allows you to change the following parameters:
- InPrivate is a function that is responsible for viewing pages through a browser in incognito mode. By default, it will be blocked if the child is under 8 years old.
- Activity reports - the ability to monitor what actions were performed on the computer while adults were away, and receive a weekly report about this by email.
All other settings are available through the menu. You can also find information about using specific functions there.
Let's look at what parameters you should pay attention to:
- web browsing;
- applications and games;
- timer.
Page view control function. It allows you to protect children from inappropriate content and is always enabled by default. Safe search is also enabled in the standard settings. It's worth knowing that viewing and tracking downloads works in Internet Explorer and Edge. Blocking applies only to these browsers and does not work in others.
Important! Standard parental controls in Opera or another browser will not work. They must be blocked if you want to limit access to adult content.
Advice. In practice, the level of parental control protection is not always up to par. If you need to ensure protected surfing, then you should install a special secure browser for children - Gogul.
In the "Applications and Games" section all running programs in the child's account. They can be banned. But they are displayed in the list only after the first launch. Age blocking is also supported, targeting .
Timer is a function that solves the problem of limiting the time children spend at the computer. In this case, it is possible to specify the intervals when it is allowed to turn on the computer. The rest of the time he will not be able to log into his account.
Additionally, we note the following functions of the child registration control center:
- Control over your child's expenses and account in the Windows 10 store.
- Location function. True, this function only works with mobile devices and not by everyone.
Features of parental controls in Windows 10
Parents are required to know a number of features before installing parental controls on a computer using OS tools through account management, let's consider the main ones:
- You can easily trick parental controls into blocking an adult site. To do this, simply launch another browser, if this option is not blocked during setup.
- Information delay. Information about the applications you are using is displayed with a delay of up to several hours. This makes it possible to use applications for a long time before being banned.
- It is possible for a child to hack parental controls, and he can spy on the password or extract it using special programs, and then all that remains is to make the necessary changes.
- If you wish to disable parental controls, you can go to your account settings. After this, children will be able to use the computer without restrictions and control.
WATCH THE VIDEO
In some cases, it is safer to use third-party tools to restrict access to prohibited content. This is due to the Microsoft technologies used. Antivirus companies and third-party developers use improved content control algorithms.
Let's look at how to set up parental controls on any computer and protect your child's online activities.
Parental control is special function, which makes it easy to set restrictions on computer use for children.
IN operating systems you can use the built-in functions or download special programs for this task.
Below is a selection the best ways organizations safe work from PC to , And .
The ability to limit the functionality of the OS will be useful for any family, because this is the only way parents can always be aware of what sites their children visit.
Also, you can configure the time you work at the computer - turning it on only at certain hours or turning off the system after a specified period of time.
Windows
Parental controls in Windows are available as standard function operating system.
All versions of Windows OS have the ability to configure Parental Control.
Function characteristics:
- Recording of all computer activities in the form of a separate report. You can log in under your admin account at any time to see all the information about the use of , and other programs. This allows you to analyze exactly how restrictions should be set;
- Control of game installations. Before launching the installer with any game or application, parental controls will check whether the software has age restrictions. If a child tries to install a program with a high age rating, the OS will generate an installation error and the user will not realize that the action was limited by parental controls;
- Creating a list of prohibited sites or allowed resources. You yourself can create a list that your child is allowed to access or use the built-in library of links to sites to which access will be blocked;
- Timely shutdown of the computer. If you cannot agree with your child on the optimal time for finishing games on the computer, simply use the electronic work log function. You select a date in the calendar, a user name, and indicate at what hours the computer can be turned on. For example, if you allow playing games only until 17:00, then exactly at this time the computer will automatically turn off. The child will be able to turn it on again, but will not be able to log into his account.
How to set up standard Parental Control?
IN Windows option parental controls are turned on and configured as follows:
- Open the search box at the bottom of the taskbar and type Family Options. Click on the found settings item;
- In a new window you will have access to all the functions that will simplify your work with your computer. In chapter "Parental control" configure the desired restriction - internet protection, setting operating hours, generating reports, limiting the purchase of games, etc.

After selecting the desired setting, you will be automatically redirected to the official website.

Child Web Guardian
Child Web Guardian is a program that will allow you to completely organize control parameters for another PC user.
Please note that the application can only be launched and configured from an administrator account.
After installation and registration, you can select the one you need other user's profile type:
- "Home";
- "School Computer";
- "Office".
Depending on the account type, a window will open with a list of required settings. Program features:
- Managing user groups. Child Web Guardian allows you to create user groups and set rules for working with the computer for them. Convenient if you want to set up accounts for several children at the same time;
- List of prohibited words. You can activate ready-made lists of words and expressions that will be in background tracked on all web pages. If prohibited words are found on the site, such a resource is blocked;
- Web filter. Parents will be able to create white or black lists of sites by simply copying their addresses. This is an easy way to disable the use social networks in one click. Note that a child can bypass this ban using , so along with blocking sites, it is better to set a time limit for the OS;
- Schedule. As in the standard version of parental control, here you can set the hours your child sits at the computer.

Hide Tools Parental Control
Hide Tools Parental Control allows you to configure in one window all parental control features:
- Launching applications. Here you can specify a list of allowed programs and games, as well as set their operating hours;
- Lists of sites. Limit the use of untrusted resources in all browsers;
- Typed text filter. All phrases typed by your child will be monitored by the program for the presence of profanity;
- Computer activity. Specify days or individual hours when the PC can be turned on;
- Creation. In this window you can configure regular creation hidden screenshots, which will then be added to the parent report.

Kindergate Parental Control
Kindergate Parental Control is a new development from Entasys, which is known for its computer security systems.
The application is aimed at limiting work according to a given schedule.
Also, you can control the sites you visit or block unwanted content.
More features:
- Selecting the content access level. You do not need to create lists of prohibited sites. Just select the level of protection (there are 5 in total) and the program itself will organize the child’s work in;

- Automatic database update. The application connects to a database that contains more than 500 million sites, so you can be 100% sure that the user will not be able to access prohibited resources;
- Installing and uninstalling parental control software is only possible from an administrator account.

Child Control 2013
The main feature of this program is the ability to set up a work schedule not only with the computer itself, but also with the Internet.
You can activate the function to block access to global network or set up a schedule.
The program also monitors the OS for viruses and malware.
The built-in setup wizard allows you to use 4 parameters quickly organize the Child Control utility:
- The “Time limits” parameter allows you to select the hours during which work is allowed;
- The “Blocked times” field is necessary to set the time interval during which access to the computer or Internet will be frozen;
- Web Control – a list of allowed and prohibited sites that you can always edit;
- Other settings. With their help, you can select an acceptable level of security, configure the creation of reports, or receive remote access to the program from your smartphone.

MACOS

Since all parental control programs offer approximately the same list of functions, you can set up restrictions for your child’s account in any case.
If you want to receive real-time messages about what is happening on your PC, it is better to use third-party software, since standard services for Windows and Mac OS do not have such a function.
Thematic videos: