|
Thanks to GPON from Rostelecom, users were able to connect to high-speed Internet on their own computers. You can learn more about the technology by deciphering the abbreviation, which stands for gigabite passive optical network or, translated into Russian, gigabit passive optical network.
GPON from Rostelecom
The foundation of GPON technology from Rostelecom, which has repeatedly received positive reviews from both professionals and users, was laid many years ago. Development began in the 80s of the last century. Tests were first carried out in 1987 in England. The second stage was a consortium in 1995 dedicated to PON standardization. Developers and the world's largest Internet providers took part in it. Within three years of the consortium, the first optical networks accessible to a wide audience were installed in the United States and Japan. Further, the technology began its rapid development in other countries of the world.
In Russia, the implementation of GPON is now at an early stage. Providers MGTS and Rostelecom are actively participating in this event. The transition to fiber optics after long-term use of copper cable is quite difficult, as it requires significant costs for laying new lines and purchasing compatible equipment. Nevertheless, Rostelecom is ready to offer GPON connections not only in large cities, but also in some private sectors outside them.
The GPON connection diagram from Rostelecom is quite simple. The provider supplies optical fiber to each of the houses, and then, using a switch, the cable is divided and sent to compatible user equipment. In the apartment itself, the signal is converted by a special router, which has an input for fiber optics. Such equipment is quite expensive, so users often rent it from a provider.
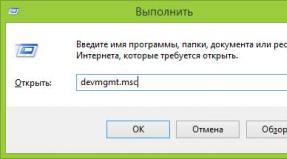
Important: Before setting up GPON from Rostelecom for your own equipment on your home network, you need to connect the Internet operator cable and one computer via the LAN connector. After this, you can log into the device’s web interface.
Setting up equipment for GPON from Rostelecom
Suitable equipment for GPON connection can be rented directly from Rostelecom. If this option suits you, the provider will personally configure the network devices in your home. In cases where equipment is purchased separately, setup costs will not be included in the initial connection. Therefore, you will need to enter the Internet settings on the router yourself.

To successfully create a fiber optic network, you should pay special attention to the selection of equipment. The first thing to consider is the functionality of the router. If you need, in addition to the Internet, to also be able to connect IPTV and telephony, it is recommended to purchase a terminal. In other cases, it will be enough to have a simple fiber optic router.
One of the optimal terminal models that can be rented or purchased from Rostelecom is the G PON ONT RFT620. In addition to four LAN ports for connecting computers to the Internet and a built-in Wi-Fi module, such a device will allow you to take advantage of all the advantages of IP and classic telephony.
Having connected the GPON cable from Rostelecom and the computer via the LAN connector, you need to turn on the equipment and go into its settings. To do this, you will need to open any browser and write the IP terminal in the address bar. GPON ONT RFT620 from Rostelecom uses the IP address 192.168.1.254 to enter the default settings. Before logging into the device software, you will need to enter a login and password, which have the values user/user. After this, you will be taken to the firmware home page. The Internet settings on this model are already predefined by the provider and do not need to be changed.
By default, the equipment does not have a wireless connection, which will need to be activated manually. Wi-Fi on a router from Rostelecom, model GPON ONT RFT620, can be enabled in the “Wireless Network” menu. Before activation, it is recommended to pay special attention to the security settings that will help protect the network from unauthorized access.
GPON technology is a new step in the evolution of broadband Internet connectivity. Thanks to the high speed and stability of the network, users have virtually unlimited opportunities for working and relaxing at the computer.
Setting up the DIR-300 NRU router is not working, please help with advice. I bought this model of router. The store reassured me, they said that it is the easiest to install and almost all Russian Internet providers work with it, and all of them have instructions for installing it on their official websites. Of course, there were no instructions for this model on our provider’s website, and I also realized that the DIR-300 router comes in some different revisions b1-b5 (it turned out I had NRU b5). And each Internet provider configures the router differently, or so it seemed to me. As for the manual book that came with the router, it contains a description of connecting the DIR-300NRU b5 to the XP operating system. I want to connect it first to a system unit with the Windows 7 operating system, and then connect my daughter’s laptop to the created virtual network, but it also has Windows 7 installed. I tried to figure it out myself and you know, all these IPoE and PPPoE, PPTP are a headache got sick. So I have a question for you: can I still connect two of our computers to the router or immediately call a specialist like you. And also, explain in Russian what is the difference between WAN and VPN? Vladimir. Samara.
For a long time now, my friends have been asking me to buy and set up a router for them. We go to the store, buy it and set it up step by step, and you watch everything that happens, everything will be clear even to a beginner. You can connect any router, it all depends on your persistence and, of course, patience. Setting up the DIR-300 NRU Router not complicated, this router is extremely popular due to its inexpensive price of 1000-1100 rubles and good reliability and works with the operating systems Windows XP, Windows Vista, Windows 7. On the official websites of Russian providers, there are instructions for installing it, but as I noticed outdated revisions b1, b2, b3, web interface of settings is black and brown.
- In 2011, D-Link updated the web interface, now the router settings windows (including the new model DIR-300NRU b5 are pale green, and the background is white; naturally, the settings have changed a little. For providers, everything remains in place. This is for many users, It’s confusing for those who have recently purchased a router. At the moment, according to my observations, the most commonly purchased model is the D-Link DIR-300 NRU b5, which has Wi-Fi support at speeds of up to 150 Mbit, uses an updated settings interface, a built-in firewall and compatibility with non-wireless standards. wired communications 802.11b and 802.11g. I advise you to know exactly what you are buying and check everything in the store.
Attention! Setting up the D-Link DIR-300 NRU router (HW revisions: b1, b2, b3) is slightly different from setting up the DIR-300NRU b5 router, but the essence is basically the same, now you’ll see everything for yourself.

Now about the settings. Before getting onto the Internet (global computer network) from our home, you and I first go to our Internet provider or virtual private network provider (for example, Beeline). There are few real providers in Russia, there are many sub-providers, in simple terms intermediaries. But how to configure the router depends on how these providers organize their network.
How do all providers (providing Internet services) differ and how does this affect the router settings?
Nowadays, one half of the providers use the modern network protocol DHCP or IPoE, where IP and DNS addresses are distributed automatically (I must say very convenient for an Internet provider), and to access the Internet they use an outdated tunnel protocol or a new second-level tunneling protocol L2TP (combining PPTP and L2F).
The other half of the providers work using the outdated PPPoE protocol, associated mainly with xDSL technology (for example Rostelecom), that is, they use DSL modems, in the router settings we again select the PPPoE connection type (information at the end of the article) and configure it a little differently than In the first case. Of course, sometimes there are other features, so before you buy a router, this is my advice to you. Call your provider and find out all the information you need to configure the router, ask about which range of router models to choose from, so as not to have to worry later with settings, firmware and, as you said, specialists like me. Now, let's take a closer look at setting up, in my opinion, a very good router from D-Link, DIR-300NRU b5. In general, I set up this router many times in the seven and in, but unfortunately I didn’t look at the accompanying manual, but it turns out that in fact, as our reader said, nothing is written there about Windows 7, but there is information about XP. Don't worry, our router works fine on both operating systems.

Let's start with the fact that you need to find out what network protocols your Internet provider uses - PPPoE or L2TP, you can find out by looking at the contract with it or you need to call the support service of your provider and just ask, this is the best way, by the way. Let's start with the most common and easiest to configure network protocol today, DHCP. You also need to find out how your provider issues IP addresses; in the case of the DHCP protocol, this happens automatically; you can verify this by looking at the Local Connection Properties of your network adapter.
Windows XP
Start - Control Panel - Network Connections - Local Area Connection - Properties - Internet Protocol (TCP/IP) -Properties - Obtain an IP address automatically And Obtain DNS server address automatically.

Windows 7
Start - type View network connections - Local area connection - Properties - Internet Protocol version 4 (TCP/IPv4) and Properties - Obtain an IP address automatically and Obtain a DNS server address automatically.


If you have the Use the following IP address checked in the Internet Protocol Properties and the addresses are registered, the same addresses must be specified in your agreement with your provider, then your Internet provider works using the PPTP or PPPoE protocol. Let's look at setting up a router with these protocols at the end. But before connecting a router with these protocols, you also need to set the Obtain IP automatically and Obtain DNS server address automatically parameters in the Internet connection properties.
Let's move on to the router settings. If something goes wrong, you can always reset the router to factory settings by pressing the Reset button.
Let's connect the local Internet cable provided by your provider to the WAN port on the router, as we see it says internet on it, and connect the router and your desktop computer to each other with a network cable (in our case, blue) through LAN port No. 1.

Users to whom the Internet is supplied using ADSL technology need to connect the DSL modem and router with a network cable, then connect the router with a network cable to the system unit.
The DIR-300 router has only 4-LAN ports, to which you and I can connect up to 4 personal computers that do not have Wi-Fi.

Turn on the router, open any browser: Chrome, Opera, Mozilla, Internet Explorer and enter 192.168.0.1 in the address bar and press Enter.


And here we are in the initial window of the DIR-300 router. First of all, experienced users download the latest version of firmware (software) for the router from the official website and install it. Currently, our router has the latest version of firmware installed, so there is no need to download or flash anything. And my advice to you, even when the firmware comes out, first try to configure the router as it is, without flashing it, it’s easy for a beginner to make a mistake, and then you can restore the router only at a service center.


Name - Beeline
Connection type - L2TP
Will connect automatically- Put a tick
Service name - tp.internet.beeline.ru
PPP Username - our Beeline login starts with 089...
Password - Your internet password
Encryption - Typically No encryption
The device configuration has been changed- Save so that after restarting the computer, the changes you made to the router settings will be saved.

Next, click Connections again, select the Beeline we just created, Connection type l2tp and assign it Default Gateway(check this item). Click Save.

Click on the button Status - Network Statistics. In the WAN field, you and I see information that our router has successfully received the necessary data from the provider and we have Internet.

Now we connect the laptop to our router via Wi-Fi.

Click the Wi-Fi button in the router settings. General settings . We leave everything as default.

basic settings We don’t touch it either. 
Security Settings - Network Authentication or protecting your network from intrusion - select WPA-PSK (Shared Key). Access to your virtual network will be possible only after entering a key known to you and the users of your virtual network. 
PSK encryption key: We come up with an encryption key, preferably 10-digit, consisting of letters and numbers in random order, it’s more reliable
WPA encryption – AES or TKIP+AES, then your network will be accessible to almost all existing Wi-Fi devices.
WPA key renewal period leave it as default.

Sometimes it happens that the router's settings are lost when its power is turned off, so be sure to open the "System" menu in the upper right corner of the page and click on " Save and Reload". Now the changed settings of your router will be saved in its non-volatile memory. Control Panel\Network and Internet \ Network and Sharing Center\Wireless Network Management,

Double click on the network DIR-300 NRU 
Properties of the DIR-300 NRU wireless network. Connection tab, you should have a check mark on the item Connect automatically if the network is within range.

In the DIR-300 NRU wireless network properties window, Security tab, check the security settings – Security type,Encryption type, Network Security Key, everything should match the router settings.

Here, friends, are all the settings of our router in the DHCP network protocol.
As for setting up our router in PPPoE mode, you will need to go to the router settings Network -> Connections and select PPPoE connection type, then enter the username and password, as well as confirm the password. Detailed instructions are available on the D-Link website itself - http://dlink.ru/ru/products/5/728.html

|