Connecting Arduino and getting started on Windows. Installing and configuring Arduino IDE for Windows Download the arduino program in Russian
Let's look at getting started with Arduino on the Windows operating system. Let's take the Arduino Uno platform as an example. For other boards the difference is minimal.
Installing Arduino IDE
First you need to install the Arduino integrated development environment - Arduino IDE - on your computer. Due to the war between Arduino SRL and Arduino LLC, depending on the platform model, choose the Arduino IDE version.
Download Arduino IDE 1.6.4 - d For all platforms except Arduino Leonardo ETH and Arduino M0 (stable version from Arduino LLC).
Launching Arduino IDE
After you have downloadedor and installed the Arduino IDE, let's launch it! A window should open as in the figure below.
Something went wrong?
Arduino IDE won't start? The JRE (Java Runtime Environment) is probably installed incorrectly on your computer. Refer to point (1) to reinstall the Arduino IDE: the installer will do all the work of deploying the JRE.
Connecting Arduino to Computer
After installing the Arduino IDE, it's time to connect the Arduino platform to your computer.
Connect the Arduino to your computer via a USB cable. You will see the “ON” LED on the board light up and the “L” LED will start blinking. This means that power is supplied to the board, and the Arduino microcontroller has begun to execute the factory-programmed “Blink” (blinking LED).
To configure the Arduino IDE to work with a specific Arduino, we need to find out what COM port number the computer assigned to this platform. To do this, go to Windows Device Manager and open the “Ports (COM and LPT)” tab. We should see the following picture:

This means that the operating system recognized our Arduino board as a COM port, selected the correct driver for it and assigned this COM port number 2. If we connect another Arduino board to the computer, the operating system will assign it a different number. Therefore, if you have several Arduino boards, it is very important not to get confused about the COM port numbers.
Something went wrong?
If, after connecting the Arduino to the computer, no new devices appear in the device manager, this may be due to one of the reasons:
Faulty USB cable or port
Blocking by the operating system
Faulty Arduino board
Setting up the Arduino IDE to work with Arduino
Now we need to tell the Arduino IDE that the board it is going to communicate with is on COM port number 2.
To do this, go to the menu: Tools Port and select the “COM2” port. Now the Arduino IDE knows that something is on the “COM2” port. And she will soon have to communicate with this “something”.

So that the Arduino IDE does not have any doubts, we need to tell the Arduino IDE which board we will work with. To do this, go to the menu: Tools Pay and select the “Arduino Uno” board.

Now the Arduino IDE knows everything it needs to flash the Arduino firmware.
Something went wrong?
Is the list of serial ports empty? This means the Arduino is not connected correctly. Return to step (3) to debug the connection.
Arduino IDE incredibly slow when navigating menus? Disable all external Bluetooth Serial devices in Device Manager. For example, a virtual device to connect to a mobile phone via Bluetooth may cause this behavior.
The environment is configured, the board is connected. Now you can proceed to uploading the sketch.
Arduino IDE contains a lot of ready-made examples in which you can quickly see the solution to any problem. It also contains a simple example of “Blink”. Let's select it.

Let's modify the code a little to see the difference with the factory LED blinking.
Instead of the line:
let's write:
Full version of the code:
void setup() ( // set pin 13 to output mode pinMode(13, OUTPUT); ) void loop() ( // send a “high signal” to pin 13 digitalWrite(13, HIGH); // wait 100 milliseconds delay( 100); // send a “low signal” to pin 13 digitalWrite(13, LOW); // wait 100 milliseconds delay(100);
The "L" LED should now light up and go out every 100 milliseconds. That is 10 times faster than the factory version. Let's upload our sketch to Arduino and check if this is true?

After booting, the LED will start flashing faster. This means that everything worked out. Now you can safely move on to “”
Something went wrong?
As a result of the download, an error like avrdude appears: stk500_get sync(): not in sync: resp = 0x00 ? This means that the Arduino is not configured correctly. Go back to the previous steps to ensure that the device has been recognized by the operating system and the correct settings for the COM port and board model are set in the Arduino IDE.
To write (edit) and upload (firmware) programs (sketches) to Arduino, you need to install a programming program like Arduino IDE, or use an on-line Web editor. You can download (download) the latest version of the Arduino IDE program, or use the web editor from the Software section of the arduino.cc website.
Downloading (uploading) Arduino IDE from the official website:
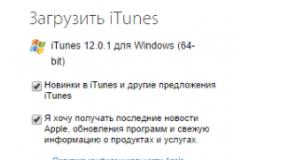
Go to the official Arduino website and select, from the list provided, the operating system your computer is running on. In this article we will look at installing the Arduino IDE on the Windows operating system. Selecting the first line " Windows Installer"You will install the Arduino IDE (as you install any other programs), and by selecting the second line " Windows ZIP file for non admin install» You will download a ZIP archive with a program folder that you can run without installation (even if you do not have administrator rights on your computer).
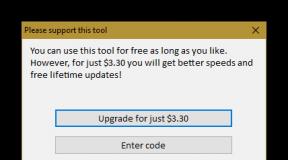
Regardless of which operating system you choose, you will be asked to thank the developers, it’s exactly that, it’s up to you.

If you just want to download the program, then click on the “JUST DOWNLOAD” button; if you want to download the program and thank the developers, contributing to the further development of the software, then click on the “CONTRIBUTE & DOWNLOAD” button.
Wait until the file is downloaded
After the download is complete, the file should be in the folder: " This computer > Downloads "(unless you specified a different location to save the file).
Run the installation file
from the folder: “This computer > Downloads” (you will have Arduino IDE version numbers instead of X.X.X in the file name).


- 1st message: introduces you to the license agreement, click on the “I Agree” button, 2nd message will appear.
- Message 2: prompts you to select installation components, click on the “Next” button, message 3 will appear.
- Message 3: prompts you to select the path to install the Arduino IDE, click on the “Install” button, message 4 will appear.
- 4 message: informs you about the progress of the Arduino IDE installation, after which message 5 will appear.
- Message 5: informs you that the Arduino IDE installation is complete, click on the “Close” button.
During the installation process, above message window 4, Windows windows may appear asking you for permission to install drivers:

Allow the installation of drivers by clicking on the “Install” button; these drivers will allow you to identify and work with Arduino boards connected via the USB bus.
This completes the Arduino IDE installation. .
The program icon should appear on your desktop:
Launching Arduino IDE:
When you first launch the program, you may receive a Windows Firewall message about blocking access to some Arduino IDE Java networking functions:

Allow access by clicking on the “Allow access” button. After that, this window will not appear.
The Arduino IDE program window will open:

The following figure shows the purpose of the areas and functional buttons of the program:

Now you can write a sketch (code) and upload (upload/flash) it to Arduino. But before that, you need to connect the Arduino board to the computer and tell the Arduino IDE program which Arduino board you connected and to which port...
Connecting the Arduino board:
After you connect the Arduino board via USB port to your computer, the Arduino IDE program needs to indicate which Arduino board you connected. To do this, select the desired board from the list in the menu section " Tools > Pay > Name of your board

Now you need to select the Com port to which your Arduino board is connected. To do this, select the desired Com port from the list of available Com ports in the menu section " Tools > Port > Available port number", as shown in the following figure:

If the USB controller of your Arduino board is implemented on an FTDI or similar chip, then in the list of available Com ports you will not see the name of the Arduino board in brackets opposite the Com port. In our case, you would simply see “COM1” and “COM7”, then the question arises, which of these ports is the Arduino board connected to?
This issue can be resolved very simply. Disconnect the Arduino board from the computer and open the " Tools > Port » . In the list of Com ports you will only see available Com ports, that is, in our case only “COM1”. Now connect the Arduino board to the computer and open the menu again " Tools > Port » . Now you will see that the list of Com ports has increased by one (in our case, “COM7” has been added to “COM1”), and it is to the Com port that appears that your Arduino board is connected.
If, when you connect the Arduino board, you do not see the appearance of a new Com port, then the USB controller of your Arduino board is implemented on third-party chips and you need to install an additional driver for it. Like, for example, the driver for the CH340G chip.
Uploading a sketch from the Arduino IDE program to the Arduino board:
After you have indicated the type of Arduino board, selected the Com port and written your sketch (program code), the sketch can be uploaded (uploaded/flashed) to the Arduino board controller . To do this, select the menu item “» or click on the button in the form of a circle with an arrow:

If you wrote a sketch in a new window and did not save it to a file, then before loading it into the Arduino board, the Arduino IDE will prompt you to save it. Enter the name under which you want to save the sketch to a file and click on the “Save” button.

During loading, you will see a status bar that will display the progress of compiling and loading the sketch. If there are no errors in the sketch and it is successfully loaded, then information about the amount of used and available Arduino memory will appear in the notification area, and the message “Download complete.” will appear above the notification area.

The small sketch above (in the picture) will make the LED on the Arduino board blink. Many sketches are simplified and shortened by using libraries. You can find out what libraries are and how to install them in the section.
Real-time event simulation has been the backbone of many industries. Over the years, some major simulation processes have been in the field of aeronautics and aviation. Today, Arduino simulators allow all beginners and professional designers to learn how to program and test ideas without the fear of wasting energy along with their money.
Arduino simulators are great platforms for programmers and designers who want to learn the basics of design and circuit design. The success of such programs is due to the fact that it provides you with the opportunity to learn without the fear of damaging your device. Additionally, students who may have trouble purchasing electrical equipment without having a clue about how it will function can understand many of the nuances through trial and error with the help of these simulators. This will save you a lot of money and time.
Another big advantage of Arduino simulators is that it supports line-by-line debugging, so the user knows exactly where and on which line he or she did something wrong. Simulators come in a variety of forms and are designed to be compatible with major operating systems - Windows, Linux and Mac OS. Therefore, to make it easier to find a great Arduino simulator designed for your computer's ecosystem, we have compiled a list of the most popular programs.
Arduino Simulator by PaulWare
As the name suggests, this Arduino simulator was created by a developer named Paul. The simulator is open source and has gathered its own share of fans who are both adding their ideas and creating tutorials on how to use the simulator. This free product was made primarily for the Windows ecosystem and provides sufficient support for beginners.
The main components it provides to support your project are LED momentary switch, 4 by 4 matrix keyboard, 4 by 4 matrix keyboard with LCD display, rotary switch, etc. The YouTube video will give you enough information to get started using this Arduino simulator.
It also has a dedicated section on the Arduino manufacturer's forum where you can become a member to learn more about updates and design patterns.
Simduino for iPad
This is a paid product designed for use on the Apple smart device ecosystem. This is a comprehensive simulator that allows you to learn about programming and electronics on the Arduino platform. It provides sufficient support for most Arduino C programming languages and can be used to run multiple projects according to the user's needs.

This program has an excellent rating on iTunes. Good support helps its users understand the details and descriptions available to users on the official website. For about $2, you'll get a great Arduino simulator that's compatible with your iPad.
ArduinoSim
This is a cross-platform Arduino simulator that delivers what it promises, providing an excellent platform for learning programming and circuit design. Although the program is not open source, this simulator is free and gives you the opportunity to work on Windows and Linux operating systems. ArduinoSim was created in Python to integrate with the Arduino environment.
ArduinoSim was built specifically for a scientific and engineering audience. And its user base has provided enough material to support usage. But we must understand that the project relates to the field of electrical engineering. Don't forget also that this is a completely free solution.
Arduino Simulator for PC
It is also one of the best Arduino simulators for several reasons. These reasons include its cross-platform features, preliminary designs, debugging sketches, and the ability to develop complex ideas conveniently and easily. Can work on both Windows and Linux. Users can also choose the LCD display and Arduino board type: Mega, Nano and Leonardo.
It is important to note that the program is not open source, and its features are developed and enhanced by its developers. There is also a lot of supporting documentation and example projects. Unfortunately, the product is relatively expensive, costing around $20. But with so many features and a great debugging tool, Arduino Simulator for PC is a great choice if you're willing to invest some of your money.
Emulare Arduino Simulator
Interested in Arduino multitasking? Then Emulare is your best choice. This innovative simulator provides the user with the ability to simulate multiple Arduino projects simultaneously without any glitches. It is also billed as a cross-platform simulator due to the fact that it supports both Linux and Windows operating systems.
Emulare was created for primarily electrical projects and is equipped with a rich library of objects. Emulare focuses on ATMega microcontrollers that will allow you to embed entire circuits with AVR memories, buttons, switches, timers, LEDs, and other components. Surprisingly, Emulare with all its features and components is completely free and has enough support to help users understand its features.
Simulator for Arduino
The product developed by virtronics is a full-featured simulator available for students and beginners in the world of electronics who are looking for a great Arduino simulator. This is a cross-platform simulator that is supported by both Linux and Windows operating systems.
Features of this simulator and some of its benefits include: a tutorial covering the basics of Arduino sketching; testing sketches of ideas to see working patterns, fine-tune your connections, and develop virtual presentations for new clients. It's also important to note that Simulator for Arduino is not an open source application, but it is free.
Yenka
Yenka is an excellent simulator that students and advanced users can use to learn and teach programming and circuit fundamentals. Like most Arduino simulators on our list, it is equipped with all the necessary features to test sketches/ideas, debug your projects and develop complex projects without commissioning the hardware.
Yenka is widely used by teachers teaching basic electronics, but the cost may make it unaffordable for students. This is a cross-platform simulator that runs on both Linux and Windows operating systems. Despite the cost, the program may be the ideal Arduino simulator for your personal use.
AutoCAD 123D
Autodesk's role in electrical circuit design over the years cannot be overstated. The 123D is another one of Autodesk's Arduino-compatible offerings. First, it's important to note that 123D is a CAD application that has a dedicated feature for circuit design. So when you download the free app, you will get both a CAD app and an Arduino simulator.
Like the other simulators mentioned above, 123D is a really great tool for learning the basics of Arduino programming and circuit design. The application runs on Windows and Android ecosystem. It also has a very large base of resources and support (like most Autodesk products) for designing circuits or learning from scratch. This application is highly recommended for most users.
LTSpice Arduino Simulator
LTSpice is a free, versatile and accurate circuit simulator with the ability to simulate programs and projects designed for the Arduino ecosystem. The simulator comes with many features that have been designed to make simulation easier and include its circuit and waveform attributes.
This is one of the few simulators that is supported on both Windows and Mac OS platforms. It is highly recommended by a large number of online resources to make the learning process easier. As mentioned earlier, the simulator is absolutely free.
PSpice
Every electrical and electronics engineering student must have encountered PSpice during the months spent learning the basics of circuit design and programming. But for those who don't know what PSpice is, it is an intuitive simulator that can be used to simulate Arduino due to the many features integrated into the application. PSpice is supported by Windows and Linux operating systems and comes in different modules or types.

Students can use PSpice Lite, which is completely free, to learn the basics of Arduino programming, while companies, teachers and other experts can use paid PSpice. PSpice is currently used in various industries - automotive, education, energy supply, etc.
Circuit Lab
Circuit Lab Arduino Simulator is a simple schematic and powerful simulation tool. This simulator was developed after PSpice, and it was built primarily for use by electricians and electronics engineers. Its functions allow the user to explore the internal workings of Arduino, implement debugging of projects and design circuits.
The Circuit Lab app is not free, and this may be a limiting factor for students looking for an affordable Arduino simulator to work with. The application works on both Windows and Linux operating systems. The development of the program is supported by a large community and has a sufficient number of supporting materials, case studies and examples that talk about its capabilities and use.
EasyEDA Simulator
Here's another one of my favorites due to its features, ease of use, and wide support for major operating systems. EasyEDA is good for learning programming and circuit design on Windows, Linux, Mac OS and Android - something few can boast of.
This comes with price, which may be a deal breaker for some. In addition, there are many educational materials, as well as an online community dedicated to discussing the features of EasyEDA.
Circuits-cloud Simulator
Among all the applications above, there was no option for modeling in the browser. Whereas Circuits-cloud is an excellent Arduino simulator that can be used by anyone to learn the basics. The app is designed with only basic design features to make sketching and simulation fun and easy to understand for beginners. The app is also free!
Systemvision
Proteus by Labcenter

This is an excellent Arduino simulator that combines simplicity with lots of features for easy Arduino simulation. The program has made breakthroughs in various industries including; automotive, internet of things (IOT) and education. Compatible with Windows and Linux and, of course, expensive. You can learn more about the program, versions, and community at the program's website at labcenter.com.
× Close

Arduino IDE is software for users of the Windows operating system that allows you to write your own programs (sketches) for the Arduino platform.
This platform is primarily aimed at amateur designers who use Arduino to build simple automation and robotics systems. However, sometimes more or less serious projects were created on the basis of Arduino.
But, if you are aiming to do a large-scale industrial project or manage important highly technical projects, then you should not take the risk using Arduino. The program, although it has a flexible system that allows professionals in their field to realize their plans, was created from the very beginning for training.
The Arduino IDE consists of a fairly simple text code editor, a project manager, a compiler, and a module for loading firmware into the microcontroller. This integrated environment is written in Java and is based on Processing and other open source software. Unlike the online version of the code editor (Arduino Web Editor), the desktop version can be used in the absence of the Internet.
The Arduino programming language is standard C++ (using the AVR-GCC compiler) with some features that make it easier for beginners to write programs.
- Advantages of Arduino IDE
- availability;
- easy-to-use and understand interface;
- the program is compatible with all versions of Windows operating systems;
- availability of tools necessary for work;
- several programming language options;
- the opportunity to deepen your knowledge of the C++ language;
- built-in set of sample programs;
functions of saving, exporting, checking, searching, replacing sketches.
- Disadvantages of Arduino IDE
- the program is not designed to work with complex systems;
The operation of some versions, according to users, is characterized by instability.
Installing Arduino IDE for Windows
Installing the program does not require complex manipulations. Download the Arduino IDE from the link provided to you, open the downloaded file and follow the special instructions provided in the installation window.
Changes in latest version ()
- New goal! ARM64 boards are now fully supported (Nvidia Jetson and RaspberryPi3 with 64-bit operating system).
- Fixed bugs related to UTF8 on Windows.
- Fixed: Can now compile again using OpenJDK (JavaFx dependency removed).
- Fixed: Only use TouchBar on OSX 10.12 or higher.
- PluggableDiscovery: Easily add your own discoverer and make it available in the Boards/Port menu (thanks to @PaulStoffregen for the idea and initial implementation).
- LibManager: slowdown during search has been reduced.
- Fixed: Make sure the sketch line is visible if it contains an error and needs to be highlighted.
- Linux: Installer now tries to symlink /usr/local/bin (this does not affect normal off-system installation) Thanks @2E0PGS.
- Fixed firmware update not available for third party WINC boards.
- Use lexicographic distance as a last chance to find the library you need (if any other technique fails).
- Fixed some prototypes being inserted in the middle of a function.


Arduino is a controller program for programming various automatic devices.
Application
Arduino software consists of several parts - the development environment and the board. First you will need to download the program. There should be no problems downloading and using it, since the software is distributed completely free of charge and has a Russian-language localization. After this, you should buy a special board. Keep in mind that without purchasing it, there is no point in installing the software.
The board itself is needed in order to connect various elements to it such as light bulbs, motors, sensors, speakers and other parts. Well, with the help of the controller it will be possible to write a program that will control this entire created device. Among other things, Arduino can connect to software installed on the user’s computer. Among the programs with which it integrates are Pure Data, Macromedia Flash, Super Collider and several others.
Interface
The Arduino interface is quite laconic. On the top panel you can find buttons "File", "Edit", "Sketch", "Tools" and "Help". Below them there are also several function keys, whose functionality can be understood by the icons present on them. The development environment includes a slightly primitive code editor, a compiler and a module with which you can download firmware to the board using a USB cable. To use all these modules, you must be proficient in the C++ programming language, since the firmware will be written using the “pluses”.
Key Features
- allows you to create robotic devices and fully control them;
- When installing the software, you should additionally buy a board and USB;
- Suitable for use by novice programmers;
- interacts with some of the programs installed on the PC;
- uses C++ language when programming;
- supports all current versions of Windows;
- includes a compiler and debugging tools;
- has a very pragmatic graphical shell.