Pro100 new cutting. Exporting a list of parts from the PRO100 program to Kuznetsov's "Raskroy". Advantages of the PRO100 furniture program
We continue to design a kitchen cabinet in the furniture program PRO100.
The first part of the cabinet is already there. Now I use the same principle to create the “stand” part.
The dimensions of the part are as follows: the depth is the same as the bottom -500 mm, and I calculate the height in this way - from the height of the entire cabinet (850 mm) I subtract the height of the legs (100 mm), the thickness of the bottom (16 mm), the thickness of the table top (28 mm) , 850 - 100 - 16 - 28 =706 mm. The width of the stands is 16 mm and I fix this size so that it does not change. I save the part to the library.
I install the stand on the bottom.
Now I create a duplicate of the part; to do this, I move the mouse cursor over the stand, hold down the left key and move the part to the side, without releasing the left button, I click the right button. Now, in the place where I moved the rack, a new part with the same parameters has appeared.
I align the “stand” and “bottom” parts. I select both parts while holding down the “Shift” key, they will turn purple, and press the “Align to Left Edge” button.
The stand will move to the edge of the “bottom” piece and both pieces will align.
I create a “stiffening rib” part with the following dimensions: width -768 mm, height -16 mm, depth -70 mm.
I align it along the top edge with the “stand” part. I duplicate the edge and align the second part along the front edge with the “stand” part.
I select all the details, to do this I move the cursor to the side to a free space so that it is above all the details, hold down the “Shift” key and left button mouse and move the cursor diagonally down. A frame appears, it should capture all the details. I release the button, all the parts turn purple. I press the “group” button.
Now you just need to click on one part and the entire group will be selected. Now you can check the overall dimensions of the box. Now they should be: width -800 mm, height -722 mm, depth -500 mm.
I create the “back wall” part. The part will be made from fiberboard with a thickness of 4 mm. The dimensions of the part are the same as those of the box, minus 5 mm in height and width 795 x 717.
I place the part behind the body and align it.
I am creating a “shelf” part. I make it 5 mm deeper than the bottom (more is possible). Dimensions: width -768 mm, height -16 mm, depth -495 mm.
I insert the part inside the cabinet approximately in the middle.
I am creating a “facade” detail. Typically, the size of the facade is calculated as follows: width - the width of the box divided by two, minus 4 mm; height - box height minus 4 mm. But since I’m designing a kitchen cabinet, the height here is calculated differently. The tabletop that will cover the cabinet has an element underneath called a drip tray.
Therefore, the upper gap between the countertop and the facade must be at least 5 mm plus a lower gap of 2 mm, as a result we get that the height of the kitchen cabinet facade is equal to the height of the box minus 7 mm.
Therefore, in my case: the width of the facade is 800: 2 - 4 = 396 mm; the height of the facade is 722 - 5 - 2 = 715 mm.
I duplicate the facade.
Now I’ll put the cabinet on its legs.
I create a part with dimensions: width 40 mm, height 100 mm, depth 40 mm. When creating a part, in the “Report” tab, check the box next to the inscription “List of elements”. Next to the inscription “Parts list” I uncheck the box.
There will be six legs. I arrange them under the cabinet.
I create a “base” part with dimensions: width -800 mm, height -95 mm, depth -16 mm. I install it under the cabinet.
I am creating a “tabletop” part, dimensions: width -800 mm, height -28 mm, depth -600 mm. The tabletop has constant height and depth parameters. I install the countertop on top of the cabinet.
I click the “Reports and Calculations” button. And in the window that appears, in the “Parts List” tab, I check the number of parts and their sizes.
I select the entire product, click the “Group” button and add it to the library. Design completed.
| Created 09 Oct 2014 | |||||||||
First I used Cutting 2, then Cutting 3. They differ quite a lot. But I liked the Cutting 2 version better. The third version has additional features, which by and large are not really needed for small-scale production. Cutting 2 still helps me in preliminary calculation of the amount of material and the length of cutting lines for large orders, such as kitchens. To create the final cutting map, I use the Nowy Rozkrój program (Cut Optimiser or New Cut Manager) from the creators of the PRO100 program. . Both sites can be switched to Russian and read the description of the programs. Now I will describe the simple process of creating cutting cards. .
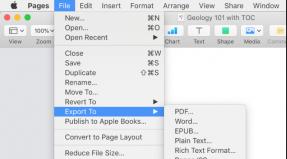
We open any project we created in PRO100. Click on the Σ tab.
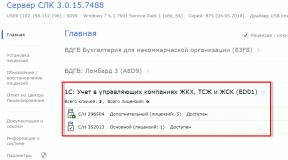
The window that opens will display a table in which all elements of the project with their characteristics will be indicated. At the bottom of the window we find the Copy all tab.

Let's click on it. Now we can insert a table with our elements into the list of parts in Cutting 2. But we only need elements of the base material, let’s say laminated chipboard with a thickness of 18 mm. Therefore, open Excel and insert the list of PRO100 elements. Now we select those lines in which the elements are not 18 mm and delete them. As a result, what remains is a table consisting of 4 columns, in one of which there is only the number 18 in all cells. Select and delete this column. Select and copy the remaining elements. Launch the Cutting 2 program. Parts table on the right.

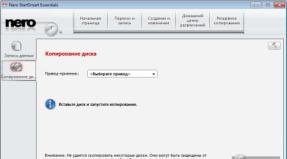
If it is not empty, click on the X icon above the right table and confirm clearing the list. Now right-click on the first empty cell of the list and in the drop-down menu select the line Add from clipboard.

Click on the Run calculation icon.

The cutting map is ready. Can be printed and used. But I encountered some inconveniences. For example, the numbers are too small, the cutting lines are not clear enough.

The people who cut the material for me were unhappy about having to use a magnifying glass. But for the preliminary calculation of the cost of the product, the program was ideal due to the transfer of parts from PRO100 to Cutting 2 described above.
The Nowy Rozkroj program is a better optimizer.

But all part dimensions must be entered manually.

The program calculates several cutting options at once.

Depending on what is important to you, you choose your option. The option with a shorter total length of cutting lines is more suitable for me, while others need an option with fewer scraps (junk).
First, in the settings, I specify the cutting option without stripes,

which allows you to place large quantity details. After the first cutting attempt I can see how much free space remains on the last sheet. If more than 30% is not occupied by details, then in the program parameters I indicate the horizontal cutting option

and start the final calculation. The seller keeps the remaining horizontal strip of the popular colors of the material for himself, which reduces the cost of the furniture. The cutting maps created by the Nowy Rozkroj program are quite detailed and clear, the dimensions are displayed perfectly.

The cutting result may be different. For example, you made the optimal cutting with the option without a strip, and you ended up with 3 sheets and 3 parts. This is especially important if the seller does not sell this color of material in stripes, but only in sheets. In this case, use the following option:
When adding each part, uncheck the Part Properties table in the Structure position.

Then, looking at your design, go through the detailing and note the structure in the details, the structure on which can only be consistent with the design, i.e. other structure options on these parts are not acceptable. If this method does not help, then reduce the size of hidden parts, such as plinths and connecting strips, by 10 mm or more. But don't overdo it.
There is another important advantage of this program. If you mark an edge on any side of the part, then it will not move from this side to the other when the part is rotated by the optimizer, which can happen in other programs. If the end edge is made of paper, the dimensions of the parts remain the same as in the project, but if the PVC edge is 1-2 mm thick, then do not forget to subtract the thickness of the edge from the size of the adjacent side with the one being pasted.
An example of drawing up cutting maps
Do not pay attention to the beginning of the video until the Nowy Rozkrój program starts. And then everything is on topic. A small technical hitch.
If your sheet, for example, is 2800 by 2070, and the side trim is 10 mm, forgetting that you need 4 mm for the cut, you indicate the part size 2790 by 600 with an edge of 2790. As a result, the edge slides by 600. Pay attention to this is attention. One day I didn’t check the card and gave it to work. Firstly, the guys had a hard time gluing the edge to the 600 side, because... the part rested against the workshop door, we had to move the machine. No one thought that a distance from the machine to the wall of 2.5 m could ever be insufficient. And secondly, I had to pay to have the edge glued on the long side, and at that moment I didn’t count on it. Therefore, be careful.
An error you may encounter when creating cutting plans

The PRO100 program is designed for fast and efficient furniture design and interior design. With her participation it is possible for short term implement a design project for a room of any complexity, obtain its high-quality visualization, and calculate the cost. The PRO100 program contains optimal set tools for three-dimensional computer modeling, intuitive, easy to use.
The PRO100 application is successfully used in furniture production and makes the work of planners and designers easier. With its help, you can design furniture “from scratch,” create your own library, simulate interior design, plan production supplies, and receive assistance at the stage of product sales. At each stage of work, immediate visualization in several options, their evaluation and reports is possible. That is why PRO100 is successfully used by large furniture enterprises, medium and small businesses, professional and amateur designers.
Availability of a computer with operating system Windows allows the program PRO100 download free in Russian, easily install and start modeling your cabinet furniture. Most design operations are carried out using the mouse. The editing toolbar (alignment, positioning, rotations, etc.) helps in the work. Each project element includes a properties window to describe the relevant characteristics - name, material, dimensions, price, etc. Visualization of the interior is possible in seven projections, taking into account the lighting mode. You can also add graphic effects.
Advantages of the PRO100 furniture program:
- Intuitive interface.
- Instant high-quality visualization.
- Powerful information base from ready-made libraries.
- Possibility of creating your own library.
- High accuracy of material calculations.
- Possibility of experiments with color, shape, material.
The PRO100 program is ideal for anyone involved in the design and development of cabinet furniture. In production, with her participation, high efficiency and quality of work are achieved, and the range is expanded. Using PRO100 for interior design by beginners allows you to quickly decide on key issues - shape, color, style of products.
Optimization of cutting of various sheet materials is carried out in special programs, which helps to do everything correctly and save a lot of time on completing this task. We have compiled a small list in which we have selected for you several representatives of such software.
“Master 2” provides users with great opportunities not only in drawing up a cutting project, but also in running a business. Multi-user mode is supported, there is sorting and systematization of entered information, and data on materials and contractors is saved.

Implementing a warehouse will help you always be aware of the remaining amount of materials. There is a distribution into tables where active orders, planned orders and an archive are located; all information can be viewed and edited by the administrator. "Master 2" has several assemblies, one of them is distributed free of charge and is available for download on the official website.
Cutting 3
This representative with a huge selection of materials and parts is more suitable for individual use. The cutting turns out to be well optimized; the user only needs to enter the required dimensions, select materials and specify additional settings, if required.

Cutting 3 provides users with the ability to use files from other programs, for example, loading parts from . In addition, visual design is supported.
Astra Cutting
"Astra Cut" simplifies the cutting process as much as possible. All you need to do is load the parts, indicate their dimensions and wait until the cutting map is processed. Third-party and official libraries of furniture and other objects that are suitable for procurement in this way are supported.

We recommend that you pay attention to the presence of built-in documentation. It is systematized and formed as the work on the project progresses. Just go to the appropriate tab when needed and print any of the compiled documents.
There are many programs on the Internet that perform the same actions as the representatives of our article, but they all copy each other. We tried to select the most suitable and high-quality software.
PRO100- the program is capable of designing furniture, as well as instantly performing stereoscopic visualization of the scene conceived by the designer. This is a professional solution for designers, this publication is easy to use, has a rich set of tools, and a user-friendly interface.
A lot is provided for your use. standard modules, as well as the ability to create your own libraries. This program provides quick access to updated information in automatically report of packages and chip elements, various projections, assessments. The user can print the required version at any time. PRO100 is an independent, stand-alone product, for full operation of which an ordinary PC with Windows OS is sufficient.
Methods of use
If you need to make an existing interior more modern (or create a new one), it is quite logical to call for help modern technologies. Using PRO100, you can create pieces of furniture from scratch, solve production issues or help undecided buyers make a choice. The corresponding visualization of the result for any of the above procedures is performed almost instantly, PRO100 6.20 program download version in Russian is free and with excellent speed.
There are many types of furniture available, estimates and reports. This pro100 5.20 program with a key and libraries will be useful for both small, start-up enterprises and large organizations that have been selling furniture for several years. Due to ease of use (the user can perform most of the necessary manipulations using only the mouse), speed, and the ability to make any amendments to the current project at any time, this program can significantly facilitate the work of sellers and manufacturers of furniture, for this you need to take the opportunity and download pro100 in Russian the full version for Windows.
Main characteristics
PRO100 has one important characteristic- it is a completely self-contained application that does not require the support of any other software solutions other than Windows OS. Starting to work with it, the user begins the procedure of creating the pieces of furniture he needs. He carries out various manipulations with chip bags (from which furniture is created in this program), folding them in space (virtual, of course) in the same way as it would happen in reality. In this way, you can easily collect a personal library of materials, elements, and finished pieces of furniture used in your enterprise. Or just use ready-made, standard collections, complete free version PRO100 download with key via torrent no waiting or advertising.
Given software tool is an ideal tool and can provide significant assistance to manufacturers, designers, and sellers of any type of furniture - kitchen, room, office, special purpose or even garden (for example, if you need to design a fireplace). PRO100 program (full version in Russian): download for free


As already mentioned, most manipulations are performed only with the mouse - as if you were collecting ordinary children's cubes. For more advanced work, you can use toolbars, which have many useful options for making edits. Thus, the user can perform alignment, rotation, positioning, and advancement of an object. Each element that is present in the workspace has its own small characteristics panel, in which you can set the necessary properties for it (type of material, dimensions, name, cost, relationship with reports, etc.). So, PRO100 is a powerful tool that can really help you a lot.
The interior arrangement mode can be viewed from seven projections (including perspective). In each project, you can determine the size of the created interior automatically. Light projections greatly simplify the workflow: visualization, textures, sketches, wireframes and realistic colors. Each of these layers can be edited and various graphic effects can be applied to it: translucency, shading, creating clearer contours, etc. The changes made are immediately displayed and taken into account in all modules available in the program - from the price list to realistic visualization. It only takes a couple of minutes to arrange one room. At any stage of project creation, the user can change the modules he uses in any way, we recommend download PRO100 program for free and without registration right now.
So, you can add shelves, holders, an entire piece of furniture; change the level of brightness, color, etc. by clicking the mouse. That is why this program is used by most people who are in one way or another connected with furniture design.
After completing the project, the user can automatically transfer the chip bags to special tool, which then optimizes the dimensions and layouts the furniture boards. Therefore, you can, just being at the computer, carry out all the stages necessary to translate a new furniture project into reality - from creating a visual image of a piece of furniture, to real prints on the appropriate materials, ready for cutting, to the correct graphic diagrams!