Code 126 The specified module was not found. Way to solve the problem
Most users computer systems Those who work with the Windows operating system often encounter a problem in which a message appears stating that a certain module was not found (error 126). This causes confusion among some computer owners, so this article will attempt to answer this question.
Reasons and devices that cause the error “The specified module was not found”
It is worth immediately noting that if such problems occur, there is no need to worry too much. The appearance of such an error does not entail serious consequences and does not pose a threat to the operation of the Windows operating system. This can occur in various situations. However, the main reason is the incorrect identification of damaged dynamic libraries, as well as disabled HID devices. For example, USB mice. Also, the reasons for the error may be services that interpret certain access to important functions of the operating system.
Solving a problem related to the Radeon video card
Unfortunately for many fans of graphics chipsets presented by Radeon, these video adapters are most susceptible to failures of this kind. Even with correct installed drivers There may be a conflict when using OpenGL functions. In the event that the system displays a notification that a specific dll module, there are three ways to solve this problem:
Update video card drivers to latest version;
install the latest versions of DirectX;
tamper with the system using the command line, as well as performing several further manipulations.
If everything is most likely clear with the first two methods, there is no need to dwell on them in more detail. As for manually fixing the problem, this needs to be discussed separately. There is no need to explain how the commands below will work. Especially you should not delve into the essence from a technical or software point of view. It's enough that they work.
Thus, for integrated graphics adapters such as Intel HD Graphics or similar Radeon, nVIDIA and other chips, command line You must first enter CD /d C:/Windows/System32, and after that you need to write copy atio6axx.dll atiogl64.dll. Then you should press the enter button. For desktop models, the command is slightly different. It looks like this: copy atio6axx.dll .dll. After this, you also need to click on the enter button. When all the steps are completed, everything should start working adequately.
HID devices
Smart HID devices can also cause an error like “The specified module was not found.” In this case, the situation is in a certain sense the same as with graphics equipment. True, as a rule, the problem is only that for certain reasons the driver files were damaged or deleted. In this case, for example, for the Windows XP operating system, it is worth booting from an installation or recovery disk. Then you will have to find a file called Drivers.cab in the installation distribution. In most cases it can be found in the i386 folder. You will need to extract three main components from it:
Mouclass.sys;
mouhid.sys;
hidserv.dll.
Next, you will need to make a mandatory reboot of the computer, doing this in safe mode. To do this, use the F8 button when starting the Windows operating system. After this, you will need to copy certain files to the System32 directory of the Windows root folder. Then the operating system reboots again, only this time it proceeds in normal mode. Usually after such manipulations the system begins to work without failures.
Server errors
In addition, problems cannot be ruled out with access to the server. In this case, various unexpected difficulties may also arise. In this case, as in previous situations, the error “The specified module was not found” is displayed on the screen. In order to combat it, it is proposed to use an editor system registry. It should be called using the regidit command, which must be entered in the Run menu. Next you will need to go to the HKEY_LOCAL_MACHINE\SYSTEM branch, and after that to CurrentControlSet. Then go through the “tree” - Services, and at the end find the parameters section, which is located in the lanmanserver branch. In this case, you will have to enter the value “%SystemRoot%\System32\srvsvc.dll” if it is not specified. The thing is that the Windows operating system is capable of accepting any server, both internal and external.
Thus, as has already become clear, when an error appears in which the system cannot find a specific module, the problems can be solved. It is worth noting that there is nothing complicated about this. After all actions are carried out correctly, future failures will be eliminated. However, it is recommended that you first determine the cause of this error, and then begin performing various operations to fix the problem. The solution depends entirely on which component is faulty.
It may consist of a software or hardware element. This article did not describe all the problems that may appear in connection with such errors. But in this particular case, the most common types of failures were considered, as well as the most effective ways to correct them. You should also not exclude the possibility that the error may be related to the hardware itself. In other words, the drivers have nothing to do with it at all. In this case, you will have to change the hardware itself. Although, such situations are rare. Therefore, methods of changing hardware should be used when nothing else helps and the user is unable to cope with the problem in any other way.
In the process of working with the operating system, be it launching programs, connecting equipment, etc. You may encounter a situation where “Error 126: The specified module could not be found” appears on your screen and you need to fix it.
Error 126 - the specified module was not found, how to fix the error and find the module
From the text of error 126 it is clear that the operating system, when launching the application, did not detect the module necessary for its operation. But this is in the general case, but in practice there are many more situations. Let's look at how you can resolve this error.
Error 126 when loading the operating system
It is clear that some file was registered in startup, but now it is not there. Perhaps, for example, it was removed by an antivirus as virus software. Launch the registry editor: “Win + R” - regedit. Follow the path:
HKEY_LOCAL_MACHINE\SOFTWARE\Microsoft\Windows NT\CurrentVersion\Winlogon
The Shell parameter must be explorer.exe. If you see anything else, delete it. Do the same with the Userinit parameter, which should not have any value other than: C:\Windows\System32\userinit.exe. Restart your computer.
"The specified module was not found" when starting the application

Here you need to understand which application launch and the absence of which module leads to error 126. Usually it is enough to find its working version and copy it to replace the old broken one. If we are talking about drivers, then it is better to visit the manufacturer’s website and download the latest update from there. If you have a computer with a similar software, you can copy missing file out of him.
Error 126 and connecting USB drives
This indicates problems in the WMI module installer service (Windows Modules Installer), which is responsible for installing, connecting and operating USB flash drives. It is clear that without its normal operation, flash drives will not be detected and access to them will be impossible. Go to: “Control Panel” - “Administration” - “Services”. Find Windows service Modules Installer (Windows Module Installer) and use the right mouse button to go to its properties.

Start the service manually. Check if it works after rebooting. If error 126 does not disappear, check the integrity system files from the command line as administrator -
Many users of Windows-based computer systems often encounter a problem when they receive a message stating that the specified module was not found (error 126). Not everyone knows how to interpret it, and the question of which particular device is causing this problem often causes confusion. Let's figure out what's what.
Reasons and devices causing the error “The specified module was not found”
The failure itself with the indicated error, in general, does not represent anything particularly serious in terms of consequences for the operation of Windows operating systems.
This error can occur in a variety of situations, but, as practice shows, in most cases it can come down to incorrect identification of damaged dynamic libraries, disabled HID devices (for example, USB mice), or services that interpret correct access to server OS functions.
Error “The specified module was not found”: problem solution for Radeon video cards
To the great regret of fans of graphics chipsets from Radeon, these video adapters are most susceptible to failures of this kind. Even with correctly installed drivers, there may be a conflict with the use of OpenGL functions.

If the system displays a notification that the specified dll module was not found, there may be three ways to solve this problem: either updating the video card drivers to the latest version, or installing the most current ones DirectX versions, or directly interfering with the system using the command line and performing several subsequent actions.
With the first two methods, I think, everything is clear, so we won’t dwell on them. But it’s worth talking about manually fixing the problem separately. Now it’s not worth explaining how the commands below will work (especially with software or technical point vision). It's enough that they just work.
So, for integrated graphics adapters (those that are built directly into motherboard) such as Intel HD Graphics or for similar chips Radeon, nVIDIA, etc. in the command line you need to first write CD /d C:/Windows/System32, and then copy atio6axx.dll atiogl64.dll (pressing the enter key after each commands). For desktop (non-embedded) models, the command looks slightly different: copy (again, followed by “Enter.” In theory, after this everything should work fine.
HID devices
So-called smart HID devices can also cause errors like “The specified module was not found.” In a sense, the situation with them is the same as with graphics hardware, but in most cases the problem only boils down to the fact that for some reason the driver files were damaged or deleted.

In such a situation, for example, for Windows XP, you need to boot from an installation or recovery disk (for example, a Live CD), find a file called Drivers.cab in the installation distribution, which is usually located in the i386 folder, and extract three main components from it: mouclass.sys, mouhid.sys and hidserv.dll.
After this, you must restart the computer in safe mode (F8 key when starting Windows), then copy the specified files to the System32 directory of the Windows root folder. Next - another reboot of the OS, but in normal mode. As a rule, after this the system operates stably in normal mode and without any failures.
Server errors
Unforeseen difficulties may also arise with access to servers. In this case (similar to previous situations), the error “The specified module was not found” appears. You will have to deal with it through the system registry editor, which is called by the regidit command in the “Run” menu (Win + R combination).

Here we need to go to the HKEY_LOCAL_MACHINE\SYSTEM branch, then CurrentControlSet, then along the “tree” - Services, and finally - the parameters section located in the lanmanserver branch. Here you need to enter the value “%SystemRoot%\System32\srvsvc.dll”, of course, if any other value is specified. The point here is that the Windows OS itself perceives any server, whether internal or external, as the general concept of “server” and does not make much of a difference even if access parameters are different.
Bottom line
As a result, as is already clear, even if an error occurs due to the fact that for some reason the specified module was not found, it is still possible, and this is done quite simply, and no critical failures in the system are expected in the future. But first, it is advisable to determine the nature of the error, and only then make a decision in favor of correcting it. What it will become depends only on which component is experiencing a failure: software or hardware.
Of course, not all problems that may arise in connection with such errors are described here. However, in our case, these are the most common types of failures and the most practical methods for fixing them. We cannot exclude the possibility that the problems may be related to the hardware itself, that is, the drivers have nothing to do with it at all, but it is the hardware that will have to be changed. However, these, as they say, are the most extreme cases, which should be resorted to when nothing else helps (and it does not depend on the user or the operating system). But that's a completely different story...
IN operating system Windows XP has a service called “HID Device Access” (in Windows 7 it is called “Windows Modules Installer”), which is responsible for the functionality of USB devices. If it does not start, problems arise with USB devices. An error with code 126 appears on the monitor screen and a notification that “The Access to HID Devices service is not running. Error 126: The specified module was not found."
How to fix it this error in operating systems XP and Windows 7 and launch a USB device?
Way to solve the problem
This error code 126 can be fixed quite simply. There are two methods for this.
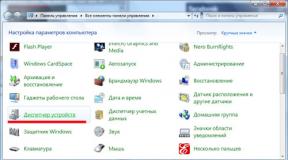
In the first case, you can try to start the service yourself. To do this, press “Win + R” and enter “services.msc”.

In the list of services we find “Access to HID devices” for Windows XP or “Windows Modules Installer” for Windows 7. Double click open settings. In the “General” tab, in the startup type, change the value “Automatic” to “Manual”. Then click “Launch”.

Reboot the PC and check the status of the service, which should be indicated as “Enabled”.
If this method does not work, you should take installation disk Windows of the same version and system capacity, find the files “hidserv.dll”, “mouclass.sys”, “mouhid.sys”, copy them and replace them in drive C, folder “Windows”, “System32”, “drivers”. Only inserting new files should be done in safe mode.

After completing these steps, reboot the system and check the functionality of the devices.
Manually editing the Windows registry to remove invalid Error 126 keys is not recommended unless you are a PC service professional. Mistakes made when editing the registry can render your PC inoperable and cause irreparable damage to your operating system. In fact, even one comma placed in the wrong place can prevent your computer from booting!
Because of this risk, we highly recommend using a trusted registry cleaner such as WinThruster [Download] (developed by Microsoft Gold Certified Partner) to scan and repair any Error 126-related issues. Using Registry Cleaner [Download] you will be able to automate the process of finding corrupted registry entries, missing file references (such as those causing the %%error_name% error), and broken links within the registry. Before each scan, a backup copy, which allows you to undo any changes with one click and protects you from possible damage to your computer. The best part is that fixing registry errors [Download] can dramatically improve system speed and performance.
Warning: If you are not experienced user PC, we DO NOT recommend manually editing the Windows registry. Using Registry Editor incorrectly can cause serious problems and require Windows reinstallation. We do not guarantee that problems resulting from incorrect use of Registry Editor can be corrected. You use Registry Editor at your own risk.
Before manually restoring Windows registry, you need to create a backup by exporting the part of the registry associated with Error 126 (for example, Windows):
- Click on the button Begin.
- Enter " command" V search bar... DON'T CLICK YET ENTER!
- While holding down the keys CTRL-Shift on your keyboard, press ENTER.
- A dialog box for access will be displayed.
- Click Yes.
- The black box opens with a blinking cursor.
- Enter " regedit" and press ENTER.
- In the Registry Editor, select the Error 126-related key (for example, Windows) that you want to back up.
- On the menu File select Export.
- On the list Save to select the folder where you want to save the backup Windows key.
- In field File name enter the name of the backup file, for example " Windows backup copy".
- Make sure the field Export range value selected Selected branch.
- Click Save.
- The file will be saved with extension .reg.
- You now have a backup of your Windows-related registry entry.
The following steps for manually editing the registry will not be described in this article, as they are likely to damage your system. If you would like more information about editing the registry manually, please check out the links below.