Or the disk on which the image is located. Creating a virtual disk image at home. How to use it - programs and mounting
In my opinion, anyone who has a computer at home should know what a disk image is and be able to use virtual drives. This article came up on its own as an attempt to give a systematic and fairly comprehensive answer to a number of questions from my friends and acquaintances that arise when working with this data storage technology. Disk images can be very useful not only for movie lovers and gamers, but also for ordinary people trying to save their data.
What is a disk image
A disk image (often called image in English) is a file that contains a complete copy of the data and structure of the file system of a disk. This way it can be saved optical disk(CD/DVD/Blu-Ray), hard drive partition, floppy disk or flash drive contents. In fact, this term refers to any file with information sufficient to duplicate the structure and content of some information storage device. Moreover, it does not matter whether this particular disk image was obtained from real physical media or was created using special software. As a rule, sectors of the storage medium are duplicated in the disk image file, and the file system is ignored.
At the time of writing, there are a huge number of formats (ways of recording the structure and information of some medium). The oldest and most famous is the ISO format. However, disk images in this format do not support a number of technologies, such as multi-session disks. Therefore, numerous formats have emerged that provide more full copy carrier structures. The most popular ones are: NRG, MDF, IMG, CCD, CUE, DMG and BIN. Of course, there are many more different formats, but these are the most common.
What is a disk image for?
First of all, disk images are needed for Reserve copy. This technology allows you to make a copy of any media, with the ability to reproduce it in its original form, even if the original is lost. For example, it is convenient to have an image of the system partition of a computer or laptop with already installed software and the settings made? Convenient, of course! If the system crashes, it will be enough for us to restore system partition from such an image, stored somewhere safe. The time difference, compared to installing the system and all the software, is simply colossal, I assure you. Most reasonable system administrators in companies with more than a dozen computers they do just that.
Another example is a disk with drivers or software for some device. I know from myself that losing such discs is a piece of cake. And if I collected images of such media in one place in advance, then even if I didn’t find original wheels, then you don't have to worry.
In addition to backup, disk images are often used by gamers to speed up work with information on external media. Accessing a disk image stored on the HDD is an order of magnitude faster than accessing a CD or DVD in a regular drive. Due to this, there is often a significant gain in the speed of loading the game and its operation.
A variety of software is often distributed on the Internet in the form of disk images. Of course, among these disks there are a lot of illegal copies of various games, operating systems, etc. But, hand on heart, I can say that this kind of software can also be in demand for completely innocent purposes. For example, not long ago they brought me a laptop. Rely on him licensed Windows XP. The sticker is there, but the Windows disk itself is missing. The regular distribution kit "Vortochek" is not suitable, since serial number he is not happy with the sticker. As a result, I found on the Internet a disk image with a distribution kit specifically for this laptop model. After installation, it created a legal version of the operating system on the laptop.
It should be noted that a number of programs are distributed completely legally in the form of disk images. Usually, these are all kinds of LiveCDs - disks from which you can boot your computer. All leading antiviruses and most programs for working with hard drives have such options. So not all disk images on the Internet are pirated.
How to create a disk image
Disk images are created using special programs. A lot of such applications have been written. Most of them are paid -,. However, there are also free ones - or.
As mentioned above, disk images are files containing data and information about the structure of any media. However, please understand that imaging software optical disks with distribution kits of programs or operating systems and hard drives As a rule, different ones are used. There are several programs that support creating images from both optical media and hard drives, but I recommend using more highly specialized software. Despite some similarity in functions (creating an image, cloning a disk, restoring (writing) from an image), the applications used are different and should not be confused.
To create and replicate images of flash drives (sometimes you need this), you can use a wonderful program.
How to work with disk images
Disk image files can be used as follows:
- Launched using virtual drives. For this purpose, programs are used that emulate (simulate using various software) drives into which disk images are mounted. Such a virtual drive appears in the system as a regular physical disk drive. With its help, you can use various disk images as physical media, reading information from them and writing it. One of the most popular programs that ensure the operation of such drives is Alcohol 120% with its free version and Daemon Tools Pro with free Daemon Tools Lite.
- Recorded on media of suitable size and type. Most often, discs recorded in this way are complete copies of the originals (there are several types of protection that cannot be bypassed in this way, but this is a topic for a separate article). Most programs for burning discs, as well as those applications with which the disc images were created, can handle this.
Well, that's all on this topic for now...
One of the most convenient tools in the IT world, it is a disk image. If you are still unfamiliar with this concept, then be sure to read the article.
I remember the times when many computer games could only be launched if there was a game disc in the drive. That’s when this wonderful technology came to our aid. It was enough to create a disk image file, and then, when necessary, emulate it into a virtual drive. In this way, it was possible to deceive the game’s protection, but gradually game developers began to implement more complex protection algorithms.
If we talk in simple language the image allows us to simulate the presence of a disk in the drive.
But, of course, the usefulness of a disk image lies in more than just disk emulation.With the help of images you can, without any special knowledge, write down boot disks , which serve as an excellent assistant in diagnosing and repairing a computer.
Boot disks help us with:
- testing of components;
- computer repair;
- treatment of viruses;
- transferring and restoring files.
What is a disk image?
A disk image is a complete copy of the data located on a CD, floppy disk, or even a partition. hard drive. In this case, the entire structure of the disk file system is also preserved. The most common disk images are in the format .iso, .nrg, .mdf.
Let's not get carried away with theory, but consider everything in practice?
Disk image is an exact sequence of ones and zeros from the surface of the disk. Thus, if exactly the same sequence of ones and zeros is copied/written to another disk, then we will get an exact copy of the original disk.
Many may have a question: “ Why create some kind of .iso image if you can just open the disk and copy all the files from it to another?“That’s right, but if you copy data from a boot disk in this way (for example, an operating system installation disk) and write it to a new one, you will not be able to install the system from this disk later. Such a disk will simply represent an archive with files and folders, and will not be bootable.
.iso files are very convenient for storing information that needs to be written to disk frequently.
So, how to create a disk image file on your computer?
For this we need free program ImgBurn, which you can download by following the link. In addition, do not forget to download the crack for ImgBurn on the same page.
ImgBurn allows you to both create image files and write finished files to disk.
After installing the program, a window with an extremely simple interface will open in front of us.
All program menu items are in Russian, and understanding it will not be difficult even for a novice user.
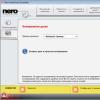
Of course, to create an image, we need to insert the disk into the drive and click on the “Create disk image” button. A window will appear in front of you in which you can make a number of settings. Personally, I didn’t change anything and left everything as default. Pay attention to the “Destination” item; the storage location of the file on the hard drive is set there.
After the process is completed, the program will display a message in which you just need to click the “OK” button.
How to burn an image to disk?
Burning an image to disk is as easy as creating it.
The first step is to decide on the image file that you want to burn. I will record the image Hiren's Boot CD, which you previously downloaded to your computer . Read what Hirens Boot CD is in my next article, and in order not to miss anything important, subscribe to my articles. Also, don't forget to install a blank disc in the drive.
If everything is done, then we start recording. To do this, click the “Burn image to disk” button.
In the next window, select the image file. In my case, this is the HBCD.iso file, which is located on my E:\ drive.
Click the “record” button.
We are waiting for the recording to complete.
Once again I repeat that boot disks are Very a good helper when repairing a computer. Especially in cases where the problem cannot be solved using the operating system or in cases where the system does not boot due to a failure or viruses.
I think many have heard of such concepts as disk image, format .iso, but not everyone knows what it is and what it is eaten with.
In this article, I will try to briefly tell you about the main aspects related to this issue, so that you have an idea of why disk images are needed and what format they come in.
Let's begin.
What is a disk image?
Disk image (image)– this is a file that has a specific format and extension unique to it (for example, for an archive it is .rar or .zip). We can say that a disk image is a copy of the original CD/DVD disc. But the structure of the image file system does not necessarily repeat the structure of its source.
There are currently quite a lot of formats and image extensions, these are: iso, bin,mdf, img, dmg, nrg and others. The most common and known format is ISO standard 9660 (iso 9660). This standard is supported by almost any program (even an archiver).
Disk image formats
Now let's take a closer look at image formats, namely the most common ones:
What are they:
- iso– is the generally accepted, most widespread standard of images.
- nrg– disk image created in the program Nero Burning Rom.
- mdf– main program image file Alcohol 120%(program for working with images). It also contains an additional file in the format mds. It contains track and title information. Availability additional file image is not necessary.
- img– format of the image created using the program Magic ISO. Previously used in Mac OS 9 and earlier versions. May also have secondary files in the format ccd And cue:
- ccd– a copy of music tracks or CD/DVD data created using the program CloneCD
- cue– information about CD/DVD tracks
- dmg– a format found exclusively in the OS family Macintosh.
- bin- this is the format of game images - consoles Sega Genesis or PlayStation. This image stores data in binary form. Often has a secondary file in the format cue.
How can I use disk images?
There are a lot of emulation programs, i.e. programs that work with disk images. But out of all the many such programs, I would mention only two. These are the most common Alcohol 120% And Daemon Tools. True, both programs are paid, but each of them also has free, stripped-down versions - this Daemon Tools Lite And Alcohol 52% respectively.
To run (mount) the image, you need to perform 2 steps:
- Install virtual drive. As a rule, a virtual drive is already automatically created when the program is installed.
- Mount image (mount image). Select the appropriate option in the emulation program and... done.
To create a disk image not from physical media, it is best suited ISO programСommander.
Afterword.
Disk images often greatly simplify working with a computer. Using them, you can save information contained on disks, which may soon deteriorate, break, and so on :)
That's probably all. Good luck with your images.
A disk or system image is actually a complete, exact copy of a DVD/CD disc while preserving the file system structure. The image contains all the same data as on the disk, but it is protected from modification. To view image data you can use special programs: Alcohol, UltraISO, Daemon Tools (DT), or regular WinRar (but this is impractical because during viewing, WinRar needs additional disk space for temporary files).
To view the image, you need to create a virtual drive - it is created automatically when installing DT, UltraIso, etc. The process of opening an image in a virtual drive is called mounting the image.
To open the image, you must:
1. In Daemon Tools. Open the program, right-click on the virtual drive and click mount. Next, specify the path to the image file and click open. You can see your image and its data through My Computer - open the virtual drive into which you mounted the image, it appears as a regular CD/DVD drive and sometimes BD (Bad Dsic).
Or in the tray, if you use the DT agent, right-click on the DT icon, select "Virtual drives - Drive - Mount image - Specify the path to the image and open." 
2.In UltraISO: run the program, select Tools - Mount to virtual drive Select drive - Click browse and specify the path to the image file - Open - Mount. In the UltraISO settings, you can specify the number of virtual drives in case you need to mount several images at the same time. 
In DT, to add another drive, you can right-click in the tray “Virtual drives - Add” or open DT and press the drive button with a plus sign.
To create a disk image:
1.Open Daemon Tools and click the floppy disk button (save icon - not everyone knows how a floppy disk is displayed). Insert the disk of which you want to create an image into the drive, Select the drive where to save (Output image file) and click start. You can use the tray: right-click on the DT icon and select Create disk image. 
2.In UltraISO: insert the disk of which you want to create an image into the drive, then open the "Tools - create a CD/DVD image" menu. Specify the drive, format and where to save (Save As). The most common format is ISO.
To modify/change disk image files, open the image in UltraISO: File - Open. Next, change everything you need in the image - you can delete image files, add any other files by dragging them from the disk into the Ultra ISO program. When you finish making changes, select "File - Save As" and specify where to save the modified disk image.
Here is a short excursion on the topic of disk images, how to work with them, create and modify them.
Read how and why an ISO image is used. How to create an ISO image from an optical disc, mount it to your PC's virtual optical disc, or extract data from it, if necessary. Personal stationary and mobile computing devices are extremely popular and are widely used in all areas of our lives. Every sector of the economy, education, healthcare, social culture, etc., one way or another, uses computer technology for its needs. All accounting, control, processing and storage of various information is carried out using such devices.
Content:
Naturally, computer devices are used quite widely by users for personal use. Performing various tasks, communicating using electronic applications, creating any information files, editing and sharing audio, video files and images, sending and receiving emails, organization of leisure and entertainment and much more.
It is not surprising that for correct operation computer devices It is necessary to have modern, high-performance software that will allow you to fully use their capabilities.
Most modern computer programs, which have a wide range of capabilities, are delivered to the user on optical media or otherwise in a specific digital format. And quite often a situation arises when it is necessary to save a copy of a particular disk. In this case it may help "ISO image". "ISO file"(often called image "ISO") is an archive file that contains an identical copy (or image) of data found on an optical disk, such as a CD or "DVD". This type of file format is often used for backing up optical discs or for distributing large sets of files to be written to an optical disc.
What's happened "ISO image"
Name "ISO" taken from the name of the file system used by optical media, usually "ISO 9660". Can you imagine the image "ISO" as a complete copy of everything stored on a physical optical disk such as "CD", "DVD" or "Blu-ray" disk, including your own file system. It is a sectoral copy of the disk, and no additional compression is used. Idea of images "ISO" is that you can archive an exact digital copy of a disc, and then use that image to burn a new disc, which in turn is an exact copy of the original. Most operating systems (and many "utilities"– auxiliary computer programs, which perform specialized standard tasks for the correct operation of the equipment or operating system) also allow you to mount an image "ISO" How virtual disk. In this case, all your applications treat it in the same way as if it were an actual optical disc inserted into your personal computer's drive.
While many users use "ISO" to create backup copies of your optical drive, "ISO image", these days, is mainly used for distributing large programs and operating systems because it allows you to store all the files in one easily downloadable file. People can then decide whether they want to mount the image for later use or use it to burn an optical disc.
Most bootable operating systems, including "Windows" and various distributions "Linux", spread like images "ISO". This will come in handy when downloading current version "Ubuntu" for subsequent installation on your computer or installation of any old game disc on a laptop in the absence of a real physical disc.
How to connect "ISO image"
Concept "install ISO image" means that you will mount your disk image to a virtual optical disk. All your applications will treat the mounted image as if it were a physical disk in your personal computer's drive.
Operating system versions "Windows 8, 8.1 and 10" allow you to mount a disk image "ISO" without the use of additional third-party software. To do this, just open the file explorer "Windows" folder where the image of the required one is stored "ISO disk", and right-click on it to open a pop-up context menu. In the list of available actions that opens, you need to select a section "To plug".

Or in file explorer "Windows" Left-click on the required image "ISO", and then on the Explorer main menu ribbon in the tab in the section "Control" click the button "To plug".

If you are using on your personal computer operating system "Windows 7"(or a previous, earlier version of the system), then you will need to install additional application a third party app, such as a free and easy to use app "WinCDEmu".
How to record "ISO image" to disk
OS "Windows 7, 8 and 10" have an image recording function "ISO" to disk, directly built into the pre-installed services of the system itself. Everything you need to record "ISO image", is to insert an optical disc into the computer drive, prepared for recording, and then use one of two methods to choose from. By analogy with the previously described connection methods "ISO image" you will need to open in file explorer "Windows" folder containing your "ISO image". Now right-click on it and select the command from the pop-up context menu that opens.

Or mark the file with the left mouse button "ISO image" and in the tab in the section "Control" press the button.

Note: If your personal computer does not have a device that allows you to write to an optical disc, you will not see this button. Also, if you have a file compression application installed (such as "7-Zip"), and it is associated with the file extension "ISO", this button will also be unavailable to you. We'll cover this in more detail in the next section.
IN operating system "MacOS" recording function "ISO image" to disk works on the same principle as in the system "Windows", so there is no need to describe it in detail.
How to extract data from an ISO image
If you don't want to mount "ISO image" or burn it to a disk, but still need to access the files stored inside, then you can extract its contents to your computer. For this you will need third party application, For example "WinRAR" or "7-Zip". We will show a way to get data from "ISO image" using an example application "WinRAR", but you can use the application you are used to working with.
If when installing the application "WinRAR" you associated it with a file extension ".iso", then to open and view its contents, you only need to double-click the required "ISO image". Depending on the size of the original "ISO file", the opening process may take some time, so be patient.

You can copy any files from "ISO image" into a regular folder by simply dragging and dropping them.
If you want, you can also extract the full contents "ISO image" to a regular folder. In File Explorer, simply right-click on "ISO image" and open the popup context menu. Among the available actions, you can use one of three sections to choose from, each containing a specific file extraction command. Team "Extract files" allows you to independently select the location for subsequent extraction of files, the command "Extract to current folder" extracts files to the same location where the file is located "ISO image", and the team "Extract to "folder name"» creates a new folder at the location "ISO image" and gives it a name "ISO file".

Other file compression applications such as "7-Zip", work on the same principle and offer similar features as the application described above.
However, one important detail should be noted. If you install a file compression application such as "7-Zip" or "WinRar", and you allow this application to associate with files "ISO", then you will no longer see the built-in control commands "ISO images" in file explorer "Windows" to fully work with them. So it's better to have a control "ISO images" in the file explorer, because you can still right-click on them and access compression application commands to extract data from "ISO image" whenever you want.
If you have already installed one of these applications and it is associated with image files, then you can easily reassign the file extension "ISO" for file explorer "Windows". To do this you will have to use the application "Options". This application contains all the basic operating system settings. And the developers "Windows 10" intend to replace the application with it "Control Panel" to improve the user experience. Therefore, we will dwell in more detail on possible ways opening an application "Options". We will show you five ways to access the application, and you can choose any method you like for further use.
1 way: Open file explorer "Windows" "This computer". On the Explorer main menu ribbon, select the tab "Computer". On the tab panel that opens, in the section "System" press the blue button with the white gear "Open settings".

Method 2: Click the button in the lower left corner of the desktop "Start", located on "Taskbars", and open the main user menu "Windows". Select the button with the gear shown on it in the left menu panel and open the application. Or on the list installed applications lower the scroll bar slider down, and, in the corresponding menu item, select the section "Options".

3 way: Search on "Taskbars" button "Search", presented in the form of a magnifying glass and located next to the button "Start", and open the search bar. Enter your search phrase in the query field "options". The system will analyze in the graph "Best Match" Click on the link of the application you are looking for.

4 way: Click icon "Windows Action Center", which is located in the lower right corner of the desktop on "Taskbars". In the pop-up sidebar menu, find the buttons at the bottom quick access. To open the desired application, press the button "All parameters".

5 way: The simplest and most quick way to call the application "Options"– press the keyboard shortcut together "Windows + I" and open the app directly directly.

On home page go to section "Applications". Next in the left panel new page Choose a section "Default Applications". In the right pane, move the scroll bar to the bottom of the page and click the text link.

The next window displays a very long list of file extensions. Use the scroll bar to find the extension in the list provided. ".iso". Next to the indicated icon in the right half of the window, click any application that is currently associated with the file extension ".iso". From the pop-up menu, select the file explorer option "Windows".

How to create your own file "ISO" from an optical disc
Process of creation "ISO file" from discs allows you to get digital backup copy physical disks. Then you can use the created "ISO files" to install them on computers that do not have optical drive. In the future, you can create additional copies of the disk image from your existing "ISO file" without using the original physical disk. And of course you can share it "ISO way" with other people.
While operating systems "MacOS" And "Linux" come with pre-installed software that allows you to create "ISO image" from a physical disk, in the operating system "Windows" there is no such possibility. Instead, you'll have to use a third party app to create "ISO file"