How to close the Disk Manager snap-in window. Windows does not assign letters to external drives and USB flash drives. Hard drive logical drive management
I encountered the following problem: when connecting any removable external hard USB disk / Windows flash drives does not assign a drive letter to it. When you connect a disk, a message appears about installing a new device, the disk appears in Device Manager, but is not displayed in Explorer.
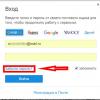
In order for a disk to become available on the system, it must be manually assigned a drive letter each time through the Disk Management console. To do this you need to open the console Computer management(via the Win+X menu) and go to the section Storage devices -> Disk Management. In the list of drives, find the connected removable USB device. As you can see, the disk is healthy, there is one partition with the NTFS file system created on it, but no drive letter is assigned to it. To assign a letter to it, right-click on the section and select the menu item " Change drive letter or drive path».
In the window that appears, click the button " Add", select "" and in the drop-down list select the letter that you want to assign to the drive (for example, F:) and click OK.

After this, the connected USB drive appears in Explorer with the drive letter assigned to it. However, after disconnecting USB devices or rebooting the computer, it is again not assigned a drive letter. You have to again assign a letter manually through disk management - which is somewhat annoying.
Advice. Verify that Windows detects the partition(s) on the connected drive and that the partition is formatted as a file NTFS system/FAT32/ . If, or the disk is unpartitioned, most likely the USB disk is just new or the partition table is damaged and you will have to restore the file system first.
It seems like some kind of automatic partition detection function on external hard drives is not working.
How can you solve the problem?
First of all, check if the service is running Virtual Disk(the service is called Virtual disk ). You can check the status of a service through the service management console ( services.msc).

or from command line:
SC query vds
SERVICE_NAME: vds
TYPE: 10 WIN32_OWN_PROCESS
STATE: 1 STOPPED
WIN32_EXIT_CODE: 0 (0x0)
SERVICE_EXIT_CODE: 0 (0x0)
CHECKPOINT: 0x0
WAIT_HINT: 0x0 
If the service is stopped, start it from the graphical snap-in (Start button) or like this:
Net start vds

Advice. In some cases for correct operation The Virtual Disk service has to change its startup type to Automatic (see).
Check if the problem is still there. If enabling the service Virtual disk it didn’t help, let’s check if the automatic mounting of new volumes function is enabled.
Note. When the automount function is enabled, Windows automatically mounts the file systems of new disks connected to the system and assigns drive letters to partitions. If automount is disabled, Windows detects new disks but does not produce them automatic installation and does not assign drive letters to new volumes.
Open a command prompt window (with administrator rights) and run the commands:
Diskpart
Within diskpart, let's check whether automatic mounting is enabled for new volumes:
DISKPART>automount
Automatic mounting of new volumes disabled.
As we can see, automounting is disabled. Let's turn it on
DISKPART>automount enable
Automatic mounting of new volumes enabled.
Automatic mounting of new volumes is enabled.
Let's finish working with diskpart
DISKPART> exit
Leaving DiskPart... 
Note. By the way, the automount function is also responsible for ensuring that the system remembers the drive letter assigned to the drive. Thanks to this, the next USB connection disk, the partitions on the external drive will be assigned the same letters as when it was previously connected (of course, if these letters are not occupied). To clear saved associations, you need to use the command automountscrub.
Restart your computer and check if the letters are assigned external drives.
Check if the partition is set to USB disk attributes are hidden and "will not assign a drive letter". At the Diskpart command line, run:

After this, this partition on the flash drive should be automatically assigned a drive letter on any computer.
Also keep in mind that if there are multiple partitions on a USB flash drive, Windows will only see the first partition. The ability to create appeared only in Windows 10 1703 (before that, in order for the second and subsequent partitions on flash drives to be accessible in Windows, you had to use a trick that forced ).
If your flash drive does not appear in the Disk Management console, try using a different one USB port, cable. Try connecting the flash drive directly to the computer (without USB hub), check whether the power is turned on and whether it is detected on other computers.
While working with personal computer It may be necessary to change, add or remove partitions hard drive.
If at the initial Windows installation 7, while the creation of sections takes place interactively and is intuitive, making changes to the created sections requires a certain skill.
Due to the lack of any experience in these matters, the user may incorrectly perform the necessary actions, which will subsequently lead to complete loss of data or even failure of the hard drive. The Disk Management utility will help facilitate the process of creating and changing disk partitions.
Disk Management utility and its functions
The Disk Management utility is a tool for performing various operations with hard drives and their partitions.
With its help you can:
- create, delete, merge volumes on a disk;
- compress volumes;
- format volumes;
- assign letters for volumes;
- add volumes without rebooting;
- manage local and remote disks online.
Opening Disk Management
There are several ways to launch the program.
Via the Start menu
- Click on the “Start” menu and right-click on “Computer”. Select "Management".
Right-click on “Computer” and select “Manage”
- In the “Computer Management” window that opens, click on “Disk Management”.
Select "Disk Management"
- The Disk Management window will open.
Disk Management window
- Press the Win and R keys simultaneously.
Press the Win and R keys
- In the Run dialog box that opens, enter the command “diskmgmt.msc” and click OK.
Enter the command “diskmgmt.msc” and click “OK”
- Click on the “Start” menu and select “Control Panel”.
Click “Control Panel”
- IN search bar Enter “administration” and click on the “Administration” section that appears.
Click on the “Administration” section
- Select “Computer Management” from the list.
Select "Computer Management"
- In the “Computer Management” window that opens, click on “Disk Management”.
Click on “Disk Management”
There are situations when the Disk Management console does not open or opens but the console window is blank and the warning “Could not connect to the Logical Disk Manager service” appears.
The reasons that caused this problem to appear may be different. To eliminate their influence on the disk management process, you must perform the following steps:
- Conduct antivirus scan. Launch antivirus program It is recommended to do it from an optical disk or from a protected flash drive. After checking, open the “Quarantine” of the antivirus. If the dmdskmgr.dll library is in Quarantine, then return it to its place.
- Run the command Rundll32 setupapi, InstallHinfSection DefaultInstall 132 %windir%\inf\dmreg.inf through the Start menu and the Run window.
- Go to “Control Panel” - “Administration” - “Services” and make sure that “Logical Disk Manager” and “Logical Disk Manager Administrative Service” are running. If they are stopped, then enable them.
- Enter the Basic Input/Output System (BIOS) menu. To do this, when turning on the computer, press Del, F2 or Esc (the choice of key depends on the computer manufacturer). If the launch panel does not contain information about the connected HDD, then check the connecting cables at the points of connection to the drive.
The very first hard disks, first created by IBM in 1973, contained 30 cylinders, each of which was divided into 30 tracks.
By analogy with automatic rifles using the .30–30 Winchester cartridge, such discs were called “Winchesters”.
Over time, in colloquial speech the word “Winchester” was transformed into “screw”.
Most hard drives are sold already prepared for installing Windows, i.e. the main partition has already been created on them.
The remaining operations are carried out during the system installation process. Installation is carried out from a bootable optical disk or USB device.
At one of the installation stages, a window will appear asking you to select a space to install the system.
Choosing a space to install the system
If the hard drive was not prepared for immediate installation of the system before going on sale, then all operations will have to be done by the user. This requires a bootable optical disk or USB stick.
Before installation, configure the BIOS (basic input/output system) to boot from a DVD or USB drive:
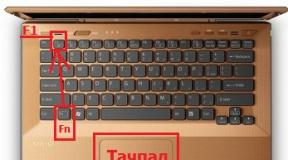
- At the initial stage of booting the computer, press the F11, F12 or Esc key (the choice of key depends on the computer manufacturer) to call the Boot Menu.
- In the menu that appears, select the drive from which you need to boot the system.
In the menu that appears, select the drive from which you need to boot the system
When forming a partition on a hard drive, all free space is used, and additional partitions are created after installing Windows 7.
If possible, it is better to take advantage loading Windows PE, in which are built Acronis programs Disk Director or Partition Magic. These utilities are designed to manage hard drive partitions.
Windows Preinstallation Environment (Windows PE) is used to prepare your computer for Windows installation. It is a built-in element of other installation and system recovery tools and is not intended to be used as a primary operating system.
In the absence of such boot disk, like Windows PE, you can:
- Boot from a disk containing shell software Volkov Commander.
Find fdisk.exe
- Launch in this shell system utility fdisk.exe to create primary and secondary partitions.
Create the main and additional partitions
The created logical drives must be formatted using the format.com utility. Now you can proceed to installing Windows 7.
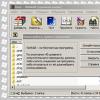
Hard drive logical drive management
You can manage hard drive partitions through the context menu of each of them. They provide a set of commands necessary for work.
Compressing a Partition
The command to compress a logical drive is specified in context menu.
- Right-click on the partition and select “Shrink volume” in the context menu that opens.
In the context menu, select “Shrink volume”
- Enter the size of the compressed space in megabytes and click the “Compress” button.
Enter the size of the compressed space and click the “Compress” button
Creating a section
A new partition is created in a free area of the hard drive that is not yet part of a formatted volume. At the bottom of the Disk Management console, this space is highlighted in bright green, and in the legend line it is indicated as “Free”.
- Once the partition has been compressed, right-click on the unallocated space and select “Create simple volume” from the context menu.
Right-click on the unallocated space and select “Create simple volume” from the context menu
- The “Create Simple Volume Wizard” will launch.
After launching the “Create a Simple Volume Wizard”, click “Next”
- Specify the size of the new volume.
Specify the size of the new volume
- Assign a letter (letter) to the disk.
Assign a letter to the disk
- We decide on the file system, cluster size and volume label.
- We format the partition.
We format the partition
- In the last window, click on the “Finish” button and create a new logical drive.
Click on the “Finish” button
Formatting a partition
- In the context menu, select the “Format” command.
Select the command “Format...”
- You can set the word for the volume label, select the file system to reformat. It is recommended to leave the cluster size at default. Click on “OK”.
Select the volume label, NTFS file system and click on “OK”
After reformatting, the volume is ready for use.
Changing the section letter
- In the context menu, select “Change drive letter or drive path.”
Select “Change drive letter or drive path”
- In the window that opens, click on the “Change” button, change the letter and click on “OK”.
Change the section letter and click on “OK”
Merging sections
When there is a need to reduce the number of logical drives, two are merged into one joint logical drive. Before merging, the necessary information from the logical drive being removed is copied to another drive or removable media.
To merge one drive with another:
- Select the volume that we want to attach and call the context menu. Click on “Delete Volume”.
Select the volume, call the context menu and click on “Delete Volume”
- A message will appear in the window that appears indicating that all data on the volume will be deleted. Confirm deletion.
Confirm deletion
- A partition with the status “Free” will appear in place of the deleted volume. Select it and select “Delete partition” in the context menu.
- To attach an empty volume to the desired logical disk, right-click on the section to which the empty partition will be attached, and select “Extend volume” in the context menu.
Right-click on the section to which the empty partition will be attached, and select “Extend volume” in the context menu
- In the next window, mark the empty volume and attach it to the main volume.
Mark an empty volume and attach to the main volume
After the merger is complete, restart Windows 7 to avoid errors and information loss.
Disk management programs
To manage disks, in addition to the standard Disk Management utility, there are several programs. They have become widespread due to their clear and user-friendly interface. Such programs include:
- Acronis Disk Director is a program that provides management of logical disks and is responsible for servicing “hard drives”; Provides management of logical disks and is responsible for servicing “hard drives”
- Partition Magic is a program that has fewer functions compared to Acronis Disk Director. This utility is outdated and not supported by most manufacturers, but is included in the package software on older boot disks; This utility is outdated and not supported by most manufacturers, but is included with the software on older boot disks
- AOMEI Partition Assistant- a lesser-known program for working with hard drive partitions. One of the advantages of this program is the ability to convert the main boot entry from MBR format to GPT format without loss of information. This feature can be useful when migrating from Windows 7 to Windows 8, and is necessary for users working with these systems. One of the advantages of this program is the ability to convert the master boot record from MBR format to GPT format without losing information
In addition to these utilities, you can find other developments on the Internet designed to work with hard drive partitions.
Despite all the variety of utilities for working with hard drives, it is better to choose one, study it and use it in your work, since incorrect use of programs can lead to the deletion of important data accumulated over many years of work. Restoring lost information will take a lot of time and effort, but may not lead to the desired result.
Source: https://kompkimi.ru/sovety/windows-7-upravlenie-diskami
Open msc windows snap-in via command line
msc windows snap-in
Good afternoon, dear readers and blog subscribers, today we will talk to you about how to open msc windows snap-in via the command line, why you might need it and how it will help in the daily practice of a system administrator.
Trust the knowledge gained in this article, in the future they will be able to save you a huge amount of time and nerve cells, not to mention the opportunity to show off your nerdy knowledge in front of your colleagues, just if you actively use linux systems and you know the basic commands in the console, then you will be interested in these too. Always, if possible, try to study beyond GUI interfaces, and also alternative methods settings, because when Windows setup Server, they are increasingly choosing the core mode with a minimalist interface.
What is msc snap-in
And so msc in Windows stands for Microsoft System Console; even simpler, these are windows, or as they are also called snap-ins, for managing certain functions of the operating system. Previously, I already introduced you to the method of creating a convenient mmc snap-in, in which we added everything you need system administrator for daily administration.
And you’ll probably ask, what does the command line and all that have to do with it, but here’s what it has to do with it.
Let's imagine a situation, you have an Active Directory domain in your organization, ordinary users do not have local administrator rights on their workstations, everything goes and works like clockwork, a situation happens that, for example, you need to change some settings for a user, and you need to do it now , so there is no time to look for these settings in Group Policy. What to do, logging in is not an option, since you need to make changes in another user profile, and how to open, for example, the Computer Management or System snap-in.
This is where knowing the names of msc windows snap-ins and the command line will help us.
All you need to do is open the command line as an administrator and enter the desired name of the msc snap-in. Below is the list. As you can see, opening the cmd command line.
exe, for example, I entered a value that opens the control panel with system administrator rights.
MSC Management Console equipment elements
- appwiz.cpl- Installation and removal of programms
- certmgr.msc— Certificates
- ciadv.msc— Indexing service
- cliconfg— SQL network client program
- clipbrd- Clipboard
- compmgmt.msc— Computer management
- dcomcnfg— DCOM component management console
- ddeshare- DDE shared resources (does not work on Win7)
- desk.cpl— Screen properties
- devmgmt.msc- Device Manager
- dfrg.msc— Disk defragmentation
- diskmgmt.msc- Disk management
- drwtsn32—Dr.Watson
- dxdiag— DirectX Diagnostic Service
- eudcedit— Personal symbol editor
- eventvwr.msc— Event Viewer
- firewall.cpl- Windows firewall settings
- gpedit.msc— Group Policy
- fsmgmt.msc - Shared folders
- fsquirt- Bluetooth File Transfer Wizard
- chkdsk— Check disks (usually launched with drive_letter parameters: /f /x /r)
- control printers- Printers and faxes - does not always start
- control admintools- Computer administration - does not always start
- control scheduled tasks— Scheduled tasks (scheduler)
- control userpasswords2 — Account Management
- compmgmt.msc- Computer management (compmgmt.msc /computer=pc - remote control PC computer)
- lusrmgr.msc — Local users and groups
- mmc- creating your own equipment
- mrt.exe— Removing malware
- msconfig— System setup (autostart, services)
- mstsc— Remote desktop connection
- ncpa.cpl- Network connections
- ntmsmgr.msc— Removable memory
- mmsys.cpl- Sound
- ntmsoprq.msc— Requests from removable RAM operators (for XP)
- odbccp32.cpl— Data Source Administrator
- perfmon.msc- Productivity
- regedit— Registry editor
- rsop.msc— Resulting policy
- secpol.msc— Local security settings (Local security policy)
- services.msc— Services
- sfc /scannow— System file recovery
- sigverif— File signature verification
- sndvol- volume control
- sysdm.cpl- Properties of the system
- syskey - Account database protection
- taskmgr- Task Manager
- utilman Utility Manager
- verifier Driver Verification Manager
- wmimgmt.msc— WMI management infrastructure
List of msc snap-ins for Windows Server
Let's look at how to launch Windows Administrative Snap-ins from the command line cmd.exe
- domain.msc - Active Directory domains and trust
- dsa.msc - Active Directory Users and Computers
- tsadmin.msc - Terminal Services Manager
- gpmc.msc - GPO Management Console (Group Policy Management Console)
- gpedit.msc - Group Policy Object Editor
- tscc.msc - Setting up a terminal server (TS Configuration)
- rrasmgmt.msc - Routing and Remote Access
- dssite.msc - Active Directory Sites and Trusts
- dompol.msc - Domain Security Settings
- dсpol.msc - Domain controller security policy (DC Security Settings)
- dfsgui.msc - Distributed file system DFS (Distributed File System)
- dnsmgmt.msc - DNS
- iscsicpl.exe - ISCSI Initiator
- odbcad32.exe - ODBC 32-bit data source administrator
- odbcad64.exe - ODBC 64-bit data source administrator
- powershell.exe -noexit -command import-module ActiveDirectory — Powershell Active Directory module
- dfrgui.exe - Disk optimization
- taskschd.msc /s - Task Scheduler
- dsac.exe - Active Directory Administrative Center
- printmanagement.msc - Print management
- vmw.exe - Volume Activation Tool
- eventvwr.msc /s - Event Viewer
- adsiedit.msc — ADSIedit Editor
- wbadmin.msc - Archiving system Windows data Server
- ServerManager.exe - Server Manager
As you can see, the msc windows snap-in is very useful tools system administration.
I even find it faster to open some snap-ins than to click on a bunch of windows with the mouse, especially if the server or computer is slow or there is no mouse. And in any case, it is always useful to know such things.
Most of everything we use is stored in c:\Windows\System32. If you go to this folder you can find a lot of interesting things.
nbtstat -a pc- username of the user working on the remote PC machine
net localgroup group user /add- Add to group group, user user
net localgroupgroup user/delete- Remove user from group
net send pc ""text"" — send a message to a PC user
net sessions- a list of users
net session /delete- closes all network sessions
net use l: \\computer name\folder\- to plug network drive l: folder on the remote computer
net user name /active:no— block a user
net user name /active:yes— unblock a user
net user name /domain— information about the domain user
net user Name /add- add user
net user Name /delete- delete user
netstat -a- list of all connections to the computer
reg add- Add a parameter to the registry
reg compare- Compare parts of the registry.
reg copy- Copies from one partition to another
reg delete- Removes the specified parameter or section
reg export- Export part of the registry
reg import- Accordingly, import part of the registry
reg load- Loads the selected part of the registry
reg query- Displays the values of a given registry branch
reg restore- Restores the selected part of the registry from a file
reg save- Saves the selected part of the registry
reg unload- Unloads the selected part of the registry
shutdown- shutting down a computer, you can turn off another one remotely.
SystemInfo /s machine— will show a lot of useful information about the remote machine
List of commands for Windows Control Panel items
- control /name Microsoft.AutoPlay - Autoplay
- control /name Microsoft.OfflineFiles - Offline Files
- control /name Microsoft.AdministrativeTools - Administration
- control /name Microsoft.BackupAndRestore - Backup and Restore
- control /name Microsoft.WindowsFirewall — Windows Firewall Windows
- control /name Microsoft.Recovery - Recovery
- control /name Microsoft.DesktopGadgets - Desktop Gadgets
- control /name Microsoft.DateAndTime - Date and Time
- control /name Microsoft.DeviceManager - Device Manager
- control /name Microsoft.CredentialManager - Credential Manager
- control /name Microsoft.HomeGroup - Home group
- Windowscontrol /name Microsoft.WindowsDefender - Windows Defender
- control /name Microsoft.Sound - Sound
- control /name Microsoft.NotificationAreaIcons - Notification area icons
- control /name Microsoft.GameControllers - Gaming devices
- Keyboardcontrol /name Microsoft.Keyboard - Keyboard
- control /name Microsoft.Mouse - Mouse
- control /name Microsoft.TaskbarAndStartMenu - Taskbar and Start menu
- control — Control panel
- control /name Microsoft.Fonts — “Fonts” folder
- control /name Microsoft.IndexingOptions — Indexing options
- control /name Microsoft.FolderOptions — Folder Options
- control /name Microsoft.PenAndTouch - Pen and touch devices
- control /name Microsoft.Personalization - Personalization
- control /name Microsoft.RemoteAppAndDesktopConnections - Remote desktop connections
- control /name Microsoft.GetPrograms - Getting programs
- control /name Microsoft.GettingStarted - Getting Started
- control /name Microsoft.ProgramsAndFeatures - Programs and Features
- сontrol /name Microsoft.DefaultPrograms - Default programs
- control /name Microsoft.SpeechRecognition - Speech recognition
- control /name Microsoft.ParentalControls - Parental Controls
- control /name Microsoft.InternetOptions - Internet Options
- control /name Microsoft.TextToSpeech - Speech Properties
- control /name Microsoft.System - System
- control /name Microsoft.ScannersAndCameras - Scanners and cameras
- control /name Microsoft.PerformanceInformationAndTools - Performance counters and tools
- control /name Microsoft.PhoneAndModem - Phone and modem
- control /name Microsoft.ColorManagement - Color Management
- control /name Microsoft.Troubleshooting - Troubleshooting
- control /name Microsoft.DevicesAndPrinters - Devices and Printers
- control /name Microsoft.UserAccounts — Accounts users
- control /name Microsoft.MobilityCenter - Mobility Center
- control /name Microsoft.WindowsUpdate - Update Center
- control /name Microsoft.ActionCenter - Action Center
- control /name Microsoft.SyncCenter - Synchronization Center
- control /name Microsoft.EaseOfAccessCenter - Ease of Access Center
- control /name Microsoft.NetworkAndSharingCenter - Network and Sharing Center
- control /name Microsoft.BitLockerDriveEncryption - Drive encryption
- control /name Microsoft.Display - Screen
- control /name Microsoft.PowerOptions - Power Options
- control /name Microsoft.RegionAndLanguage - Language and regional standards
Welcome! This blog is dedicated to the Internet and computers, or rather was dedicated to them.
It’s probably immediately obvious that no new articles have appeared on the site for many years. Yes, this is the fate of most blogs. This project was once an ambitious undertaking, and the author, like many others writing at the time, had ambitious plans to become one of the best Russian bloggers. Well, if you look now, of those blogs that were created simultaneously with mine, most have already disappeared into eternity. And I just simply didn’t have enough time to blog. So yeah, it's not updated anymore. Although we once won the “Runet Blog 2011” competition with this site.
I even had the idea of deleting all this, but then I reviewed the old materials and realized that they could still be useful to readers. Yes, some articles are outdated (if I have enough strength, they will be marked accordingly), but the site, for example, can be useful for beginners - here you can read about the basic concepts of the Internet, learn how to set up the Internet, Windows, or even decide to switch to Linux. So take a look at the categories and choose the one that suits you.
And yet, I hope that this is more than just a blog, but a real guide to the Internet. The site can be viewed in directory mode, where all available articles are structured by categories. And, who knows, maybe one day new high-quality articles will start appearing here.
Sander
Picodi.ru is a discount portal from International Coupons, a Polish expert in the field of savings and cheap shopping. The Poles are considered one of the most frugal nations in the world, so it is not surprising that this type of project grew out of the Polish startup kodyrabatowe.pl. How can this portal be useful to the average Internet user in Russia?
Modern Android phones are more than just phones. You get used to the set installed programs, to your call and text message history, photo collection and much more. But time passes, and the device that you were completely satisfied with begins to slow down, glitch, or simply loses its presentable appearance due to chips on the body or scratches on the screen. The question arises of choosing a new phone and changing android phone. And if we now bypass the question of choice, then “moving” to new phone remains a serious problem - I absolutely don’t want to start all the data from scratch. This is what we will talk about today.
Most of the readers of this blog have most likely never encountered version control systems and will not encounter them in the near future. It's a pity. This extremely convenient invention is quite widely used by programmers, but, in my opinion, it could also be very useful for those who actively work with texts. But, probably, now there is not a single version control system that would be easy to start using for “office” ( Microsoft Office) work. Nevertheless, I think that the material presented in the article may be of interest to all readers.
If you have been wondering how to watch movies online and access the Internet from your TV, this article is for you. No, I know that some TVs already have Smart TV functionality, but I have never seen it work properly. Apparently, this is why Google recently demonstrated an absolutely stunning device that immediately became a sensation. We're talking about the Chromecast media streamer, a more advanced and affordable version of last year's disastrous Nexus Q player.
Chromecast dongle, the size of which does not exceed 2 inches, is connected to the port HDMI TV and allows you to enjoy watching streaming web content. To control the streamer, you can use any device (tablet, PC, smartphone) based on the operating platform iOS, Windows, Android or Mac OS.
This article is devoted to the design of the system android memory, problems that may arise due to its lack and ways to solve them. Not long ago I myself was faced with the fact that my phone is on android base began to regularly display messages about low memory when trying to install this or that application. Which was very strange for me, given that according to the description on the market there should have been about 16GB, and I also increased this volume using an additional memory card. However, there was a problem, and I had to tinker a lot before I found the right solution that did not require root access or full recovery phone to factory condition.
Read also...