How to use unetbootin. Creating Live USB using UNetbootin
A bootable Windows USB flash drive is very easy to make. This article will describe three simple quick ways creating a bootable USB flash drive from a ready-made ISO image. All methods are free and popular, although among them there are simpler and more complex options, using different software. Also, all utilities work fully in Windows XP.
If you have a new laptop or computer with BIOS UEFI, A HDD which uses the GPT table placement style, then you can also install on such a computer Windows 7 using a different algorithm. Also, if the device, computer, laptop, netbook, etc. has a USB 2.0 port and USB 3, and you decide to install from a bootable USB flash drive to such Windows device 7, then undoubtedly you should connect the flash drive to USB 2.0 port because Windows 7 itself does not support the USB 3 port type, which are usually marked in blue.

If bootable flash drive will be connected via USB port 3, then try Windows installations 7 will end with the following error:
"Not detected required driver floppy drive optical disks. If you have a flash drive, floppy disk, DVD or CD with such a driver, please insert this media."
Creating a bootable USB flash drive
Now the first thing you definitely need is an ISO image operating system. Secondly, this is the need to take care of the flash drive itself. Since this media will be formatted, the data from the flash drive must be moved to a safe, secure location. It is also important to note that the size of the flash drive must be strictly at least 4 gigabytes.It is imperative to check and make sure that the specific motherboard definitely supports loading such a plan (from a flash device).
- Creating a bootable USB flash drive using means (recommended last, since it is not a very effective method);
- Created by ;
- Utility;
Creating a bootable USB flash drive using UNetBootin
You need to download the program and run it (the program is portable and works without installation).
You need to check the box called ISO image, and then select the letter of the USB drive.

The location of a specific image must be specified manually.

Next, click open.

Now just click OK.

There is a short process of copying system files to the flash drive.

After a short extraction necessary files our bootable flash drive is completely ready.

Creating a bootable USB flash drive using UltraISO
A slightly complicated solution, unlike the one described above, is to use the program Ultra ISO. However, you can quickly understand the program by following the instructions. The functionality of the program is written in understandable Russian, and the trial period under the license is completely functional and suitable for our purposes.
Next, you need to select the Russian language and download the program, which is very simple. Run as administrator, then select trial period use.

In front of us is a regular program window.

The next step is to find our ISO image on your hard drive, which contains the operating system. It is worth recalling that such an image can be created by any other program, and then specified here. In the main UltraISO window, you need to right-click on the file, and in the menu that opens, select the open option.

Next, we indicate our image with the system, in our case it is Windows image 8.1, which is located in the installation folder. Find the image in your place and click open.

You can also now place a flash drive in the slot of a netbook or laptop. You must select the Boot menu in the main window of our program and click on record image hard drive. The inserted flash drive should be present in this window.

Next, click record.

A prompt will appear indicating that your flash drive will be erased, we agree.

Next, we wait for the recording process to finish.

Now you can carry our operating system in your pocket.
Today I want to tell you how you can easily create a Live USB using the UNetbootin program.
For those who don’t quite understand why this is needed, I’ll say that Live USB is a drive that is connected to a computer via USB (in our case, it’s a flash drive) on which an operating system is installed, which runs from this media and does not require installation on the hard drive. . Such flash drives can be used to familiarize yourself with a new operating system and its further installation. They can also be used to restore data or computer performance. In addition, many people use Live USB as a portable operating system, which in some cases can really help out.
Due to some features of installing the OS on a USB drive, it is easier to use special programs, one of them is UNetbootin.
Installing UNetbootin
So, as always, first you need to install the program. Ubuntu users can do this directly from the standard repository with the command:
Sudo apt-get install unetbootin
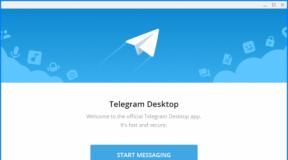
For those who don’t have this option, go to the program’s website and select the desired platform right on the main page. UNetbootin is available for Windows Linux and Mac. Download. After downloading, launch the application.
UNetbootin requires an administrator password, enter it and now you can start creating a Live USB.
Creating LiveUSB using UNetbootin
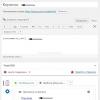
There is nothing complicated here. First of all, you need to select a distribution image.
The program itself can download the system image from the Internet. To do this, you need to select “Distribution” at the top of the screen, then select the required distribution and its version.

You can also create a Live USB from a pre-downloaded image. To do this, check the “Disk image” item, then select the image type, there is an option “Floppy disk” (you never know) and “ISO”. After this, you need to point the program to the path to our file.

Next, select the media type. UNetbootin can install the system both on a flash drive and on a hard drive. We choose a flash drive. After that, select the media itself, for me it is the flash drive /dev/sdb1. And now you can click “OK” and the creation of Live USB will begin.


Upon completion, UNetbootin will offer to restart the computer so that we can boot into the newly created Live USB, or simply exit the application. Everything here is up to you to choose from.

In this article I will look at the creation process Bootable USB flash drive(LiveUSB) in operating systems - Linux, Windows and MacOS. I will burn an ISO image of a Linux distribution onto a flash drive, but you can use the programs described below to burn any Live images.
As a rule, the user is faced with the task of writing an ISO image to a flash drive in order to obtain a LiveUSB as a result. For example, let's say you decide to install Ubuntu. To do this, you download an ISO image with the system, write it to a flash drive, boot from the flash drive, and the Live system or installer starts.
To boot from a LiveUSB flash drive, you must set boot from USB to first place in your computer's BIOS settings. For many motherboards When you turn on the computer, you can call up a menu in which you can choose which device to boot from. In this case, change BIOS settings not required. For example, for me this menu is called up by pressing a key F12.
Creating a bootable USB flash drive (on Linux, Windows and MacOS)
To create a bootable USB flash drive I will use a free program Etcher. It's very simple and clear program. Creating bootable media is extremely simple.
The program is cross-platform and can be used to create bootable flash drives in Linux, Windows and MacOS. It works the same on all systems.
The program can be downloaded from the official website https://etcher.io
Note: IN Linux installation not required, just download the file etcher-1.2.3-x86-64.AppImage and run it.
Let's look at the process of creating a bootable USB flash drive in the Etcher program.

Video - How to create a bootable USB flash drive in Etcher
Creating a bootable USB flash drive using UNetbootin
There is a fairly popular program for Linux UNetbootin, which allows you to create bootable USB flash drives. It can burn disk images, as well as automatically download images of popular Linux distributions (although very old versions of distributions are available for download, so this function is unlikely to be useful to you).
The program is cross-platform and can be used on both Windows and MacOS. I only tested it under Linux. But she has one big drawback! Some flash drives created by her simply refuse to boot. For example, nothing worked for me until I formatted the flash drive in FAT16. I formatted the flash drive in the GParted program, the size of the partition on the flash drive was automatically set to 4GB, the rest free place it was simply not involved.
The process of creating a bootable USB flash drive in UNetbootin is described below.

Possible problems
Missing Operating System error
If you receive the message " Missing Operating System ", then most likely the flash drive does not have the flag set Boot. To install it, restart your computer and log into your system. After this, run the command in the terminal (the flash drive must be connected):
Parted /dev/sdb set 1 boot on
Now restart your computer again.
Error No default or UI configuration directive found
I encountered another error while booting the computer - “No default or UI configuration directive found”. This problem was solved only by formatting the flash drive in FAT16 and re-creating LiveUSB.
Video - How to create a bootable USB flash drive in UNetbootin
Discs are increasingly falling out of use, giving the palm to USB drives. To install an operating system on a computer, it is also easier to use a flash drive rather than a disk. Today's article will tell you how to create a bootable USB flash drive with Windows or any other OS.
Program for creating a bootable USB flash drive
There are a sufficient number of programs that can create a bootable USB flash drive. One of them is the UNetbootin program.
This is wonderful free program, available for Windows users, macOS and Linux. With it, you can create a bootable USB flash drive with Windows and any other OS in three clicks.
Where can I download?
I've been using this program for 10 years now and haven't experienced any problems with it yet. The program is still supported by the developers.
The latest version of the program can be downloaded from official website . The program weighs less than 5 MB.

Creating a bootable USB flash drive in UNetbootin
Before making a flash drive bootable, it is advisable to format it. However, for the sake of interest, I checked the possibility of making a bootable USB flash drive on which the files were already present.
If there is enough space on the flash drive, there should be no problems. The flash drive will successfully become bootable, and the files will be saved. But still this is not advisable.
The program starts without installation. It looks somewhat primitive, but it does its job perfectly well.

UNetbootin allows you to use it as downloaded iso image disk with the system, or download it from an external server directly from the program itself.
To download an image from the drop-down menu ==Select distribution== you need to select the OS you are interested in, and then select the version in the list to the right. The system will be downloaded from the official server of its developers.

Bootable USB flash drive from disk image
Personally I prefer to download iso file and feed it to the program. To do this, put a dot next to the inscription Disk image.
Now we specify the path to the image file. In my case it was a Linux image. But it can also be an image of any other operating system.
If the flash drive was already inserted when the program was opened. Then the program itself will determine it, displaying it in the window Carrier.

Ditto for Linux Ubuntu It is possible to reserve part of the flash drive space for data storage. This is very convenient, because... Ubuntu can start without installation
Ending the process
Click OK and watch the process of turning our flash drive into a bootable one.

The progress of the installation process will be displayed in the program; do not be alarmed if the download bar freezes. Usually this procedure takes 10-15 minutes. It all depends on the writing speed of the flash drive and the size of the iso file.
As soon as the bootable USB flash drive is created, the program will notify you about it.

All you have to do is press the button Exit and remove the USB drive.
When installing the system, in order for the computer to see the flash drive when booting, you need to set it to boot first in the BIOS and when the computer boots, it will boot from the flash drive.
The material was prepared exclusively for the site

Modern users personal computers and laptops are increasingly using external storage devices such as CDs and DVDs. It’s probably not worth talking about their irrelevance, since they have long been replaced by flash drives, which, despite their small size, can store several tens of gigabytes of information.
So, in order to record any operating system on your PC, it is enough to have a small flash drive with a virtual image of this very OS on it. To record these images we use special utilities, one of which is the UNetBootin program.
A little about UNetBootin
UNetBootin is a cross-platform program that runs on Windows systems, Linux and Mac OS X. With this application, the user can record to any external storage virtual image Linux OS in order to later use it for installation and further use of this OS.
The main requirement for correct recording of an ISO image using this utility is that the free space of the drive must exceed the size of the image being ported.
Creating an image
To get started, you will need an external drive, downloaded UNetBootin program and an operating system distribution downloaded from the official website of the developers or from some other site you have verified, if you want a special build.
In order to make a virtual image of the operating room Linux systems, you need to do the following:
- Open the UNetBootin program.
- Place a check mark next to the item Image.
- Click on " … ” next to the line next to it and select the downloaded Linux distribution.
- At the very bottom of the window the program in the item Type put the value USB disk , and at point Disk– path to the flash drive on which the image will be written.
- Click OK.

After these steps, the UNetBootin utility will automatically begin recording the image. You can monitor the entire process through the program window.