How to make a YouTube channel on a computer. How to create a channel on YouTube and make money - step-by-step instructions. Description is reading about cats, not looking at them
Hello, dear friends!
Currently, YouTube is the most popular video hosting site.
Its audience numbers several billion users from almost all countries of the world.
Such amazing success of YouTube was ensured by its accessibility, simplicity, and convenience. Here you can watch various videos, and also share links to your favorite videos on social networks.
If you also have your own channel on this hosting, you can upload your own videos and provide comments on the videos of other users.
In this article I will tell you how to create your own channel on YouTube, and completely free of charge.
What is the channel for?
A YouTube channel is not only a means of communicating and exchanging data with other people, but also an excellent tool for promoting your business or attracting new visitors to your website or blog.
In addition, this is an opportunity to earn money, and quite well. You will be paid money for advertising. Your earnings directly depend on the number and time of views.
Selecting a topic
Before creating your own channel on video hosting, you first need to decide what its topic will be. Think about how you can interest users. This should be what you know best, what you, as they say, ate the dog.
It is quite possible that this is one of the most popular directions today:
- Music videos;
- Humorous sketches, shows, stand-ups;
- Reviews of mobile devices, video games, viral videos, movies and more;
- Walkthrough of video games, video instructions;
- Information, news videos and video blogs.
If you can bring your unique idea to life, then this will be your added advantage. By doing something that no one has thought of doing before, you can become famous!
Process of creation
To add a channel:
You can also create a channel from your phone or tablet, following approximately the same instructions.
Setup and design
Click on the pencil icon at the top of the screen and select “Add Design” from the menu. The background for your channel can be a picture offered by YouTube, a photo from your Google Plus album, or a beautiful image downloaded from your computer.

Once uploaded, you will see how your image will look on different devices. Select “Auto Correction” at the bottom of the screen and adjust the settings.
Read more about channel design
Creating a second channel
You may ask: “Is it possible to create a second channel with a different name?” It is possible and very simple. This is done as follows:

The channel (or channels) have been created, now we can move on to setting them up and designing them.
How to properly create a YouTube channel. I wonder if there is at least one person on the Internet who does not want to create their own channel on YouTube? I doubt. Everyone understands that the popularity of YouTube is growing every day.
It is accessible to everyone, easy to understand the functionality and, most importantly, free. YouTube makes it possible to communicate with each other, regardless of location; quickly transmit information; sell goods and services, promote your own or someone else’s brand, promote affiliate products, attract traffic to websites, blogs, channels.
YouTube provides many interesting features and functions.
What to do to access YouTube
To access YouTube, you need to register a Google account and . If you have already done this or have any registration with Google services, then write the word “youtube” in your browser or click here. A page will open with 2 login buttons: bottom left and top right.
Youtube Login Button

Any login button will lead to this page:

Enter your Google account or Gmail information, which is the same thing. This way you are logged into the YouTube website. But this is not a YouTube channel yet.
What can you do on YouTube?
Can:
— put “Like”;
— mark videos you liked;
— make subscriptions;
— receive recommendations from YouTube.
You can not:
— add videos yourself;
— comment on other videos;
- You won’t be able to create playlists.
In order to do this, you need to properly create a YouTube channel
How to create a YouTube channel
What is important to do BEFORE creating a YouTube channel?
The channel is almost created, there is 1 last step left and now I propose to stop and answer the questions:
What channel will it be: personal or for business or company? If personal, then with your name or with a different name? What is the theme of the channel? What kind of materials will you post: news videos, educational, entertainment, children's, selling?
Important tip:
When choosing a channel topic, pay attention to 2 points:
- Does anyone have such a topic on the Internet and is already promoted? Look, think about it, in any case, you need to know your competitor by sight.
- Money and prospects. Let me explain - can you make money on this topic? The prospects are assessed from this point of view; in 3-5-10 the need for this topic will not disappear? For example: the passion for photography is being replaced in the market by shooting with cameras.
When you answer these questions for yourself, then enter youtube.com in the browser line. Login is located in the upper right corner. Click and enter your Google account and Gmail details. You must confirm your personal information via SMS or voicemail to your phone number. This is done only once during registration. The phone number will not be linked anywhere; you can use the phone number of any person you know.
One more detail, if you are on the YouTube website using a Google account, you can click on the Add video button; YouTube will prompt you to create a channel, as in the picture:

And now you are logged into your YouTube channel.

We all know one of the most visited sites in the world is Youtube! And many people have a question: “How to create a channel on YouTube and upload your first video.”
This is exactly what we will talk about today.
The first thing you need to create a channel is to register an account with Google. The fact is that now the youtube service belongs to Google and in order to use any of their services, including youtube, you need to have your own account.
Go to the website www.youtube.com and then click on the blue “Login” button, which is located in the upper right corner of the browser window. After this, YouTube will prompt you to select an account from the existing ones. Those. if you already have a Google account, then you simply select it and move on. If you do not have an account yet, then you need to click on the “Create an account” link.
How to create an account on google.
So, you clicked on the “create an account” link and went to a page with a registration form. There are two options here:
1. Create an account in Google with your email address or
2. Create a new gmail account along with your account (mail service from Google).

Carefully fill in all the fields and enter the captcha (enter the numbers from the picture)
Be sure to include your mobile phone number, it will be used only for technical purposes, for example, to recover the password from your account via SMS.

Google may then ask you to verify your account. A window will appear as in the screenshot below:

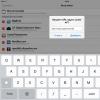
If in the previous step you did not indicate your mobile phone number, then you need to do this now, and please note that you need to enter the number as shown in the example. After you enter the number and click the “Continue” button, you should receive an SMS message with a verification code on your phone. Enter this code in the special field:

Please note that it can take up to 15 minutes for the code to be sent, so don't worry if you don't receive the code right away.

Accordingly, instead of my name, yours will be written there.
After this, you need to add a profile photo. To do this, click on the “Add photo” link.
We select a previously prepared photo on the computer and insert it. You can also take a photo from your webcam.
Please note that along the edges of the selected photo there are special markers (white squares) that you can drag while holding the left mouse button. That. You can customize your google profile photo more precisely.

Click the “Set as profile photo” button and then the “Next” button.
All! Our account has been created, with which, in fact, Google congratulates us :) Now click on the “Back to Youtube service” button.
How to create a channel on youtube
After creating an account in Google, we returned to the youtube service and it offers us several popular channels for subscription. The channels are divided into categories and you can choose the one you like and subscribe to it, after which you will be notified when new videos are released on this channel. If you do not want to subscribe yet, click the “Next” button.
After this, Youtube will offer several more popular channels:

Pay attention to the checkbox below - “I want to receive information about updates on the Youtube website, as well as tips and suggestions.” If you do not want to receive messages from the youtube service by email and not clog up your mail, you can uncheck this box and click on the “Save” button.

The next step is that YouTube “asks” us how we want to use it: name our channel the same as the previously created Google profile or come up with a new name specifically for the channel. Here the choice is yours. For example, if you are a representative of a campaign, then you register a Google account in your name, and name the channel with the name of the company. If the first option suits you, then just click the “Ok” button.
If the second option suits you, then you need to click on the link “To use a company name or another name, click here.”

After this, click the “Ok” button. In this article I will consider the second option, when the channel name is different from the google account name. Those. my account is called “Opekun Alexander”, and I will give the channel a different name, for example “Opekuntestchanel”.

1. Specify the name of the channel;
3. Check the box agreeing to the terms of use of the pages;

1. Make sure your country is selected, if not, select it from the list;
2. Enter your mobile phone number;
After this you will be redirected to the following page:

They write to us that the channel has been successfully added to our account. Pay attention to the blue square in the channel header, because... I created a separate name for the channel, then the photo will need to be specified separately. Those who have chosen to use their channel in the same way as a profile and name the channel with the name of the profile will have their profile photo substituted.
You may also notice small hints in the form of pop-up windows. You can read these tips and click the “Next” button to switch them.
How to add a video to youtube
The channel has been created and now we just need to figure out how to add videos. In the upper right corner of the site there is a button “Add video”, click it.

After this, a window pops up in which we can add a video, but do not rush to do this. Because we just created a channel, youtube allows us to upload videos no longer than 15 minutes. To increase this limit, you need to click on the link “Increase your limit.”

You need to do one more account confirmation:

1. Choose your country
2. Select the item “Send SMS with code”
3. Indicate your mobile phone number

Enter the verification code from the SMS message and click the “Send” button. Next, Youtube congratulates us and informs us that our account has been verified. Click the “Continue” button. We now have the ability to upload videos longer than 15 minutes!
After that, click on the “Add video” button again. Next, click on the arrow indicated in the picture below:


Please note that when downloading a video, the title of the video (marked as number 1 in the screenshot) is filled with the name of the file itself that you are downloading. You can change the title of the video on YouTube, but I recommend that you initially name your video files the same way as you plan to name the video on your channel on YouTube - this will increase its ranking in the site’s search results.
The next point is that you can choose for whom this video will be available:
1. For everyone - this means that your video can be found through search by any Internet user.
3. Personal - with this option, only you, as the owner of the channel, will be able to view the video.
After you have chosen who can see your video, you can also specify a description of the video and tags (keywords) and then click the “Publish” button.
At the very top of the page, the progress of downloading and processing the video is displayed, as soon as it says “PROCESSING COMPLETE”, your video becomes available for viewing on YouTube if you clicked the “Publish” button. If processing is complete and you have not published the video, it is not yet available for viewing.
After processing is completed, you will see the following window:

I, Natalya Krasnova, am again glad to welcome you to the pages of my blog and today we will create our own channel on YouTube. I already have a channel and subscribers, but I made a firm decision to create another one. Do you know why I needed another channel?
It's all because of a comment on my blog. Yes, it was after reading the commentary on the article “” that I had the desire not only to find out what a doorway channel is, but also to create it.
If I have decided to create another channel on YouTube, then it’s time to show you the registration process, and we will only need to register once on Google to open up a lot of new opportunities. “How to make your own channel on YouTube?” - you ask. “Look at the example,” I will answer.
Shall we get started?
1 step. I hope that your favorite browser is open and all we have to do is enter this address in the address bar: google.ru

Step 2. Click on the “Login” button.

Step 4 Fill out the fields of the registration form.
a) Full name, if you are under 18 years old, you can register your mom or dad, but only with their permission. Remember that you can register on YouTube from 18 years of age!
b) Create a username - this name will be your Google email address, so it should be easy to remember.

c) Create a password and write it down in your notebook. Fill in the fields: password, date of birth, gender, mobile phone number, spare email address.
At the last stage, enter the captcha, accept the terms of use and click on the “next” link.

After successful registration, Google congratulates and informs us that we now have the opportunity to subscribe to YoutTube channels, hold video meetings, use a map and much more.
Step 5 Click on the square icon and then on “YouTube”.

Step 6 We went to the YouTube channel, and now click on the “Login” link, the transition is carried out automatically.
Step 7 In the upper right corner you will see a blue icon resembling a picture of a person, click on the icon and go to the “Creative Studio” tab.

Step 8 As you might guess, at this stage you need to create your own channel, so click on the “Create channel” link.

Step 9 Look at your channel from the outside. It requires setup! Upload a photo, think about the text to describe the channel.

We will still talk about how to properly design and set up your channel, so I suggest you subscribe to blog updates and follow the release of new articles.
Until new meetings, until new lessons, .
Almost every user has an account on popular social networks, communities, and video channels. The most popular channel among Internet users is YouTube. on YouTube, how to design and promote your videos, we will look at this in this article.
Why do you need your own YouTube channel?
For different purposes:
- blog promotion and attracting traffic to your resource;
- promotion of your brand and business;
- earnings from advertising;
- promotion to the top due to the link mass.
Thanks to interesting or educational videos, you can get decent traffic from YouTube every month. The main thing is to know some of the features of posting video clips and promoting them in the first day.
If you manage your channel correctly, you can promote your brand and increase sales through traffic. You can earn money through Google Adsense advertising or the YouTube affiliate program, but to do this you need to make your channel popular.
By the way, if you leave links to your resources on YouTube, you can promote your site to the top, and thereby increase traffic or sales. But to achieve these goals, it is not enough to create a channel. Designing a channel on YouTube and promoting videos also requires special attention, but we’ll talk about these nuances below.
Before creating a channel on youtube , decide on its topic. So far, there are 5 areas on YouTube: for entertainment videos (director's and music), for humorous videos (comedy), for scientific, educational (educational) and secular videos (journalistic). In the latter case, not only famous events or the lives of popular people are covered, but also forums.

on youtube
- Create a gmail box in the Google system (www.google.com).
- Visit the page
- Log in using Gmail, then next time you will need to log in using the icon in the upper right corner.
- Create your own channel.
To do this, do the following:
- click on “My Channel”, where you enter your data (automatically all data can be transferred from Gmail, if you want to change the data, then click on the line opposite the photo “change from Google profile”);
- design your channel (create the desired background from the palette in the settings or upload photos from your computer, describe the main purpose of your page);
- upload videos.

Please note that you make any settings in the control panel (you will find this tab at the top of your channel, where is the “Add video” button (triangle)). As you can see, creating a channel on youtube.com is very simple. It's just as easy to add videos.
But there are 2 things to remember about clips:
- select thematic key queries by which users will find your video;
- in the first 24 hours you need to get the maximum number of views for your video to get into the leading positions.
And one more important point - you need to constantly develop the channel: add videos, respond to comments, attract traffic to your videos. This is especially important if you are using YouTube to promote your business, so before creating a channel on YouTube , conduct analytical research to collect information about your competitors. This will help you avoid mistakes and plan your steps correctly.