How to download a system image. Creating a customized operating system image. ISO using ImgBurn
The new backup utilities in Windows 7 are truly impressive. Creating system images is available in all Windows editions 7. Today we will look at a way to create a backup image of your machine without using third-party utilities like Ghost or True Image.
Let's say you've just finished installing a fresh copy of Windows 7 on your computer and configured it the way you like. Now the first thing you need to do is create a disk image that will help you quickly recover in case of failure. An image is an exact copy of everything on your disk. It is best to create it when the system is still clean and organized. This will make the image smaller in size, and will allow you to quickly restore your system in case of unforeseen circumstances.
Creating an image in Windows 7
To create an image, go to Control Panel - System and Security - Backup and Restore.

You can include several in your image hard drives, however this will increase its final size. The drive on which Windows is installed will be enabled by default. Also, the image cannot include the disk where you are going to save your image (unless, of course, you are saving it to disk).

In the confirmation window you will be able to see how big your image will be and what drives will be included in it. If you find an error here, you can go back and correct everything.

A progress bar appears as the image is created. In our example, creating a disk image with 15GB of data on external drive took approximately 20 minutes. However, the creation time varies depending on the system and where the image is saved.

Once the process is complete, you will be prompted to create a recovery disk. To which you must give your consent and ensure that the disk is stored in a safe and secure place.
When it comes to recovery (if it comes), you can use your recovery disk and its System Image Recovery option in System Recovery Options to get your system back.
Vista Ultimate, Business and Enterprise also allow you to create a system backup image. True, Vista Home and Home Premium do not have this feature. The process is similar to creating an image in Windows 7. To begin, simply type backup in the Start menu search box and then click on Backup and Restore Center.

Then click the Back up computer button and you will see a backup wizard that will guide you through the image creation process.

Conclusion
All the utilities described above are extremely convenient and really work well. It's also good that they will be available in all editions of Windows 7, and not just in the higher ones (like, for example, Vista). This will allow you to save your money (approximately $50-80) on third-party utilities.
It is necessary to create an image when the system is still fresh, so that it does not turn out to be huge and allows you to quickly recover in the event of a failure. For example, we created an image after installation operating system, office Office package 2007 and several other programs we use most often. As a result, the image took us 10GB, which we could easily place on an external hard drive.
A disk image is a file that contains the maximum full information O file structure and data from any media (hard drives, optical discs, USB drives, etc.). It can be used for completely different purposes (installation or system recovery, data backup). The following will show you how to create an ISO image. Let's take Windows 7 as the platform used. But consideration of this issue is inextricably linked with what kind of result should be obtained.
How to create an ISO disk image in Windows 7: options
Despite the fact that today you can find quite a lot of image formats, we will focus on considering all the procedures based on the most popular ISO format, which is supported by all programs and systems.
So how do you create an ISO image? Windows 7 is a platform that is perfect for such purposes. Based on further use, images can be divided into several categories:
- installation distribution image;
- to boot and restore the system;
- image backup copy Windows, programs and user information.
Most popular programs
On the market today software, capable of working with images, you can find quite a lot of applications. The most popular are the following:
- UltraISO.
- Daemon Tools.
- Nero.
- Alcohol 120%.
- ISO Workshop.
- Acronis True Image, etc.

With a wide variety of all kinds of software, you should also take into account that Windows systems themselves have good tools for working with images. This applies in particular to Reserve copy and recovery. Like most of the above-mentioned programs, such tools allow you to create images in a matter of minutes. True, if the contents of a hard drive or virtual partition are copied, it may even take several hours. It all depends on the amount of information.
Creating a disk image using Microsoft resources
Few people know that recently developers from Microsoft Corporation have provided users of licensed Windows 7 operating systems with the opportunity to create a system image for recovery in case of unexpected failures directly on the official web resource. How to create an ISO image of Windows 7 in such a situation? As it turns out, it’s as simple as shelling pears. To do this, you need to go to the Microsoft website in the Software section, scroll down the page and see if it really is listed there. license key product (nothing will work without it).

If there is a key, then through the “Control Panel” you need to go to the system and security section, where you select the “System” subsection and activate the security key check (this can also be done through RMB menu on the computer icon where the properties bar is selected). If the key is valid, the browser will begin creating an image directly on the site, with which you can subsequently perform a recovery.
How to Create a Bootable Windows 7 ISO Image
If you don't have a key, you can use another tool. The question of how to create an ISO image of Windows 7 using system tools is resolved through the archiving and recovery section. Here, in the menu on the left, you need to use the image creation item, and after scanning, the system will prompt you to select the option to save data ( HDD, optical media, network placement). If we are only talking about creating a disk from which you can then boot and fix some malfunctions or glitches, you can choose DVD-ROM. However, if you are backing up an entire disk partition, it is better to save the copy on a hard drive ( optical disks may require too much).

Additionally, you can use the creation of a recovery disk from which the boot will be made if a backup copy is saved on the hard drive. In principle, you can use third-party utilities, but when creating an image you should pay attention to one point. Created image must have boot records. For example, UltraISO offers to create an ISO image of Windows 7 through the boot menu (Make Disk Image). In this case we mean a copy hard drive with a working system. From it in the future it will be possible to restore not only the OS itself, but also all installed programs for a few minutes.
Creating an installation image
Finally, one more aspect. Suppose you need to create an image of Windows 7 in ISO format in the form of an installation distribution that could be saved on a hard drive or recorded on optical media. To do this, you will need a real DVD with the distribution and one of the above programs. For convenience, again, let's take UltraISO.

We insert the original DVD into the drive, and running program We use the tools menu, where the image creation line is selected (to quickly call the procedure, you can press the F8 key). Next, select the drive with the distribution, indicate the storage location and the name of the image file being saved, and set the output format (in our case, ISO). After that, click the “Make” button and wait for the process to complete. The file will be saved in the selected directory. Then it can be written to an optical disc.
Instead of an afterword
Finally, it remains to add that when creating images, you should initially pay attention to what kind of data such a file should contain. Depending on the purpose and sequence of actions will be different. In terms of the programs used, the user himself decides what to give preference to. In general, all means are good. However, it is believed that backups can be created both using system tools and using third party programs, but make copies of optical media using Windows tools- it's a troublesome matter. All you have to do is copy files to the hard drive, displaying hidden objects, then write them to disk, etc. Moreover, such a copy will not be an image. To simplify all these procedures, we can speak with 100% confidence about the advantage of third-party utilities.
A disk image is a complete, “photographic” copy optical disk(eg CD or DVD). Unlike a simple copy of a disk, its image is not just a set of folders, but a file that contains information about the disk format, boot data, its structure and the data itself.
Disk image files very often have the extension .iso. Typically, images of boot disks or disks circulate on the Internet in this format. computer games. Let's look at how you can create an iso disk image.
To create an ISO disk image, emulator programs are used that create virtual disk drives on the user’s machine, which, however, are perceived by the computer’s operating system as completely real. There are several such programs, but we will look at how to create an iso disk image using two of them: Daemon Tools and UltraISO.
How to create an iso disk image, Daemon Tools
The program is a simple and free version that allows you to create an iso disk image from any optical disc placed in the drive of your computer.
After installing the program on your computer, the Daemon Tools program icon will appear in the lower right corner of the Desktop. By right-clicking on it, we will see the following picture:
Using the tooltip, look for the “Image Creation” icon (second from the left). After clicking on this icon, a window with the same name will open:

In this window, after we insert the disk into the computer drive, we will mark the save folder and the format of the future disk image file (iso), decide whether we will compress it or not, and whether we will use or refuse to protect the iso file with a password.
Click “Start” and at the end of the processing operation we find the created ISO disk image in the specified folder.
How to create an iso disk image, UltraISO
The UltraISO program is more functional than the free version of Daemon Tools and allows you to create an iso disk image from files stored in computer folders.
The UltraISO interface window consists of two parts, each of which has a conductor structure.

We find in the lower part the file or folder from which we want to create an iso disk image and drag it to the upper part.

Then open the “Properties” window by clicking on the button next to the “Image” field, set in this window the type-size of the desired disk image and the file name format to “standard”. Click OK in the “Properties” window, and “Save As” in the main program window.

In the window that opens, select the file format (ISO file), give it a name, specify the save folder and click “Save”. That’s it, after the processing operation we find the created iso disk image in the specified folder.
Today, many are interested in how to create an ISO disk image of the Windows 10 operating system. Let us immediately say that this is quite simple to do, but to create an image you will need a special utility developed by Microsoft. Moreover, this program allows you not only to update the current system, but also to burn it to removable media (CD or).
You should start by preparing a removable drive - it is important that its volume is at least 8 gigabytes; the creation of such a drive is available for next versions described OS:
- Windows 10 Pro;
- Windows 10 Home.
Now let's proceed directly to the process. Below is an algorithm of the required actions.
Step-by-step guide to creating an ISO disc in Windows 10 using the installer
First, connect a disk (obviously, it should be a DVD-R) or a removable drive to the computer, and then check whether the storage medium has the required amount of memory. Then follow the instructions.
Step one. Click on the "Windows 10 Setup" icon. Then a window will appear in which you need to select the second option (“Create installation media...”) as shown in the image below. After that, click the “Next” button.
Step two. In the next window, this utility will prompt you to set the required parameters, including architecture, language, etc. Having selected everything you need, click the “Next” button again.

Note! It is extremely important that the selected ISO image architecture matches the parameters of the computer itself where it is planned to be installed. Typically, the program allows you to select not only a 32/64-core system, but also both options at once.
If you chose the first option, then you will have two options:
- burn to DVD;
- first create a disk.
In the second option, accordingly, recording is possible exclusively directly to a removable storage device.
Step four. When you select the appropriate item, click “Next”. If recording occurs directly to a flash drive, the operating system will demonstrate the available media.

Note! For those who don’t know, during recording, all information on the flash drive will be deleted.
Step five. When you click Next again, the installation or recording will continue.

Step six. In the first option, that is, when it comes to selecting the “ISO file” item, several folders will be attached at once where the image or drive will be saved. It is quite obvious that there should already be a DVD-R disc containing the required amount of memory. Once saved, you can subsequently record it on any convenient medium.

Note! Such operations are possible only on computers running Windows 7 or higher.
Features of installing Windows 10 from an image
Installing the operating system is quite simple; it does not require any special skills or knowledge. To begin the installation, insert a flash drive or disk, and then, when the computer restarts, press any button after the corresponding message appears (“Press any button to boot...” or something similar, it all depends on the specific type of system). Before this, you need to click boot from disk or flash drive in the BIOS settings.

The next step is that the system will ask you to enter your product key. You will find this key on the package or, if you are just updating the OS, select the “I don’t have a key” option.

Accept the user agreement and decide on the installation type. If you are not an “advanced” user, then it is better not to use a custom installation.


Then you will find yourself in a window for selecting a partition where the operating system will be installed.

When all the required actions are completed, the system will install, after which it will ask you to configure it “for yourself.” More specifically, these settings include:
- installation/configuration of standard programs;
- creating your account.
Here you can decide for yourself whether to leave the basic settings or configure the settings again. That's all, now you know how to create an ISO image of Windows 10. For more detailed information, we recommend watching the thematic video below. Good luck!
Video - Create a Windows 10 boot disk
Any operating system is not one hundred percent protected from unexpected crashes, breakdowns, or malfunctions. Windows 7 is no exception. In order not to lose valuable system settings that you have been customizing for a long time, it is recommended to create a disk image with the iso extension at least once every six months. In this way, you will protect yourself from long and tedious recovery after failures or failure of the operating system. You can burn the resulting file to a DVD disc, memory card, or any other digital media. And at the right time, just download it back. If you still decide to do this, follow the instructions in this article.
Creating an ISO image for Windows 7 through the official Microsoft website
Not long ago, a software developer company made it possible for users to independently generate image files directly through the official website. To do this, follow the link: https://www.microsoft.com/ru-ru/software
Before you start, make sure that your storage device has more than 4 GB of memory, as well as a stable Internet connection:
- follow the link above and check out a number of tips and instructions,
- scroll down the page and you will see the input field for your Windows 7 product key,
- now minimize the browser and go to the control panel,
- select the "System and Security" tab,

- in the window that appears, click on the “System” section,

- you will be immediately redirected to a page where at the very bottom is the activation key for your product. Carefully rewrite it in the browser line and click “Check”

- wait until the system checks your Windows 7 and the relevance of its license. The process will take from a minute to five. If everything is in order with the key, then the utility in the browser will immediately begin creating an ISO image of your entire system. If there is something wrong with the key or this method does not suit you for other reasons, proceed to the second step of the instructions.

Creating an ISO image of Windows 7 without third-party programs
- You can create an image inside your computer without installing unnecessary software. To do this, go to the control panel again and find the “Backup and Restore” section.

- In the window that appears on the left, find the “Create a system image” link. Click on it.

- Wait a few minutes while Windows finds all the ways to create and burn the image.

- The system will automatically open before you all possible options for recording the image on media. Most likely, you will have three options: “hard drive”, “ dvd media" and "network placement". If you have a DVD, insert it and select the second method.

- If your computer only has one disk, as in the screenshot below, then you won’t have to select it. If there are several disks, then you can select one of them or all of them. Click on the “Archive” button to get started ISO recording images to disk.

- If you chose the third option: online hosting, then the process will be slightly different. Please note that the file may not be protected in a network location.

- Enter the network location address.

After pressing the “ok” button, copying will begin. It is also possible to manually record the image through programs such as Daemon Tools. The process is very similar, but takes a little longer. To do this, you need to download the program, mount the image in it and burn it to a digital medium.
If you were unable to create an image of Windows 7 after all the above points, then perhaps it will be easier for you to download ready-made ISO images from the Internet.
You can learn a few interesting words about Windows 7 images from the video below:
A disk image is a file containing full copy structure and content of data located on the disk. It stores all the information that duplicates the location and contents of a specific data storage device. The order of data sectors is repeated on the image, but the structure built on it is ignored.
The original purpose of creation was backup disk data, where the exact original structure was preserved. Nowadays, due to the spread of optical media, images in as ISO files, which can be used instead of CDs. ISO has less data - no service information.
Using archive programs that support opening this type of data, you can extract and view the contents of this file. How and with what tools you can reproduce a disk image will be discussed further.
Creating an image using ultraISO
One of the most accessible methods for creating an ISO is to use the UltraISO utility. The program is paid, but you can use the trial version, which you download from the official website.

The essence of use is as follows: yes two main fields– the directory tree of the mounted image on the left and the data stored in them on the right. Below are the directories and files stored on the computer.
Set the name future copy, for which we left-click on it, property – Rename. Introducing a new name.

Then we drag folders and files from the storage area on the computer to the image file area. To find the ones you need, use the directory explorer presented below.

Please note that at the top it is displayed overall size documents.
Actually, to complete the operation, all that remains is to save: File – Save as.

From the proposed formats we take ISO and save.

The saving process will appear, after which you will find a copy in the location you specified.

Burning an image using Daemon tools
An equally popular image burning program is Daemon Tools.
There are several variations of this software, including the free DAEMON Tools Lite. After installing the free license, you will have a virtual DVD drive.
After launch, click on the button below to create a copy of the disk.

IN settings we refer to drive unit, where the disk and folder where the image will be saved is located.
Specify copy type MDS or ISO.


Mount You can check it in a virtual drive.
Using Ashampoo Burning Studio Free
The free version of this program is free and will allow you to burn a disk image. Download from off. site, simple and straightforward installation.


After installation, the application will launch on its own. Choose Disk image – Create.

If we create it based on a real disk, first insert it into the drive.

Specify the storage location and click Further to start the process.

Once the procedure is complete, you can open the folder containing the file.

How to create a copy of a disk using CDBurnerXP
To create an ISO in the CDBurnerXP utility, select from the menu File – save project like ISO.

Specify the directory, where to save the file and click Create ISO.

Can be customized options, such as: name, description, date, identifier, copyright and other settings. Once you open Boot Options, you will see a dialog box with additional options.

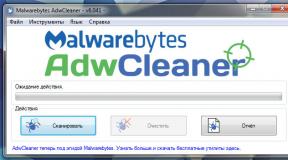
ISO using ImgBurn
ImgBurn handy tool for recording ISO images. Everything is done very quickly and quite simply.
After downloading and installing the program, you will see the following window.

As you can see, here you can: write down image to disk, so make it from existing files.
In this case, we are interested in the latter.
Special additional settings you don’t need to specify (the only thing is, if you want, you can change the recording speed and number of copies), specify the drive from which you want to read data and click Reading

The copying process will begin, after which a message will signal to us that it has been successfully completed.

Free DVD ISO Maker
The program is free, easy to use and simple.

After launch you will need to select Select CD/ DVDdevice, that is, the drive for reading (specify the path). Next is the place where we will save the resulting file. Then click Covert and wait for the final completion of the copying procedure.
We use ISODisk
It is also free, download it from the official website. 
The interface, although in English, is quite intuitive. Some users do not recommend using it for mounting virtual drives, but it copes with the task of creating an ISO with a bang.
If something suddenly happens to your operating system, it can lead to a huge number of problems. In the best case, you will have to reinstall it, search on the Internet for drivers and installers of the programs you need. In the worst case, there is a risk of losing everything personal information, unique photographs, important documents and projects. Typically, restoring the OS is unlikely to help in this case - it only works with Windows settings. Therefore, to save your data, it is important to know how you can create a backup disk image of your Windows 7.
Types of images
You don't need to have the DVD itself for this. There is specialized software (for example, the UltraISO utility) with which you can do everything you need right on your computer. You prepare a set of folders and files, and use the program to create a disk image.
The second type is a backup copy of the operating system. It can be done even using standard Windows tools. It is needed to restore your OS in case of unforeseen emergency situations.
In fact, this is a cast of the hard drive. The computer scans the entire contents of the specified HDD and packs it into a special archive. If something happens, you can always restore everything back.
Windows Backup
To create a backup of data on disk, you do not need to install any additional software. You just need to do the following:

The whole process can take quite a long time. The volumes of stored data are usually large. In general, the duration depends on the amount of information being copied, the generation of USB or SATA/SAS interfaces, network speed (depending on where the backup is saved) and computer performance.
Recovery disk
After completing the backup process, the system will prompt you to create a special recovery disk. This is a set of useful programs that can help users if their OS stops starting. You can find recovery utilities there boot sector MBR, sets of system files required for startup, and so on.

Creating an ISO image
If you want to burn DVD or CD content to digital ISO format, you will need a special program. The simplest and most reliable example of such a utility is free application ImgBurn.
How to create a windows 7 iso image?
There are many ways to create Windows ISO images 7, but along with them, there are also many programs for creating the above ISO image. A list of programs with a brief step-by-step description will be below. I propose to consider the five simplest and quick ways creating ISO images.
We create an ISO image in the UltraISO program.
I'll spend short description UltraISO programs. This software is one of the most popular for working with ISO images for many types of media digital information, one way or another, related to images, be they disks, flash drives, or the creation of bootable media. So, provided that this program is available and installed on the computer, you can create an ISO image step by step and answer the question: how to create a Windows 7 iso image as follows:
2. Create an ISO image in Linux.
Considering that to create an ISO image, everything that may be needed is already present directly in the OS itself, then it will not be difficult for you to create an ISO image file on a Linux system:
- Run directly on Linux command line(other names: terminal, console);
- Enter the following: dd if=/dev/cdrom of=~/cd_image.iso - this action will create an image from the disk that is inserted into the drive. (However, if the inserted disk was bootable, then so will the image);
- And to create an ISO image from files, it will be enough to use the following command: mkisofs -o /tmp/cd_image.iso /papka/files/.
3. Create an ISO image in Free DVD ISO Maker.
One of the simplest and most intuitive programs for creating an ISO image. In addition, it is free on the Internet:

The program will immediately begin converting the file. Once the conversion is complete, you can enjoy the converted ISO image file.
4. Create an ISO image in ISODisk
As before, I will give a brief description. The program is completely free and easy to use. Below I will give step by step description using the ISODisk program and creating an ISO image in it.

5. Create an ISO image in CDBurnerXP.
To one of the freely distributed, simple and convenient programs in Russian, refers to the above CDBurnerXP program for creating ISO images. The sequence of steps from the beginning to the final completion of creating ISO images is as follows:

You can also create ISO images in more complex programs with powerful functionality, but is it worth bothering, wasting time and delving into complex programs when the goal is just to convert a file into an ISO image. But if you are still interested, I will give a list of these programs below:
- PowerISO;
- BurnAware Free;
- ISO recorder 3.1;
- ImgBurn;
- Ashampoo Burning Studio Free.
I hope that the question: “How to create an image Windows ISO 7? you got the answer. Happy conversion!
If the computer is under Windows control 7, then to create a system image it is not necessary to install additional programs. You can use the “Data Archiving and Restoration” service.To do this, you need to connect an external drive or flash drive formatted in NTFS to your computer, and then go to the “Control Panel” and select the “Backup and Restore” section. A dialog box will open, on the left side of which you need to select the “Create a system image” item.
Now you have to answer the system’s question “Where should the archive be saved?” Using a local hard drive is not recommended. In the event of a virus attack or illiterate user actions, it is often impossible to restore the system from it. It is better to choose one that is pre-connected to the computer external storage. Can also be used DVDs, but this is less convenient.
Under no circumstances may the resulting archived copy be edited. Any change to the received data will make it impossible to restore the system from this archive file.
Now you need to select the disks that will be archived. If you have enough space on your external drive and you have a lot of free time, it's best to check all local disks. Then you can be sure that all your data will be recovered. Otherwise, choose to archive system disk C.
In the next dialog box, to confirm the selected parameters, click on the “Archive” button. This will start the system archiving process and in the dialog box you will see the green “Archive saving in progress” indicator moving. It shows what stage the process is at.
When the creation of the system image is completed, another program window will appear asking you to create a “System Repair Disk”. If you have not done so before, you must agree and click the “Yes” button. After all, if the operating system does not boot, then without this disk it will be impossible to restore the created image.
When archiving is complete, a notification “Backup completed successfully” will appear in the “Create a system image” window. Click the "Close" button to exit the program.
How to create an operating system image using Acronis True Image
Compared to a standard archiver, the application has advanced capabilities. Launch the program and in the main window click on the “Create archive” item. Now you need to choose which disk partition will be saved. To create copy of Windows, you need to click on the “My Computer” menu item and select the hard drive on which the operating system was installed. Typically this drive is the C drive.To archives with last state operating system were always at hand, it is recommended to set an automatic backup schedule in the program settings.
The next dialog box will describe the various archives that can be created when Acronis help. Simply review the program's offerings and click Next. Now you need to specify the location where the future archive will be saved. It is better to take care of creating a folder for archive files in advance. As in the previous method, the optimal solution would be to record the archive on external media.
Next, you need to select one of the archiving types, described in the previous window. The best option is “Creating a full archive” because it is completely autonomous and does not depend on other copies. In the Backup Options dialog box, check the first option, “Use default settings,” and click Next.
Over time, you may accumulate different Windows images. For example, you can create an archive of an operating system with or without drivers, a “clean” image or with already installed necessary programs. Therefore, in the next step, write a description of the archive so as not to confuse it with others. Click “Next” and Acronis will begin the task.
