How to save an excel table. Excel program - saving methods and its parameters. To use the Save command
This question arises if you come across some data presented in the form of a table on the Internet and want to save it in the format Microsoft Word(possibly pre-edited). If you simply open a saved HTML page in Word and then try to save it “as Word document", then you will retain the original page format, which is hardly acceptable as an independent document, and you will be tortured to clean it of all unnecessary things.
The simplest thing is to transfer the table via the clipboard. This can be done directly from any browser or by first saving the page in disk file and then opening it in Word. In the latter option, it is easier to select exactly the table without capturing any unnecessary elements - when you hover the cursor over the table, all versions of Word after XP are shown next to the table in the left top corner icon, which, when clicked, will highlight the entire table (you can also click on the keyboard shortcut
You can change the appearance of the frame of such a table by selecting a new style for it. In Word 2003, this is done through a menu with the non-obvious name Table | Auto-format the table and then select one of the frame styles from the list (the simplest is called Table Grid 1). In new versions, this is even easier, because several table styles are displayed directly on the Design tab, and the remaining several dozen are available through the lower button to the right of them (the cursor points to it in Fig. H.3). There is also a very simple table with thin black lines.
Rice. H.3. Office 2007 Table Styles
Usually this is not enough - you also have to change the font, set it to black, remove hyperlinks (color fonts when printed on a regular black and white laser printer will be displayed in ugly shades of gray in a fine grid), format paragraphs if necessary. But this is still incomparably simpler than creating such a table from scratch, moving it cell by cell.
When a new document is created, it is located in the computer’s memory, and if it is not saved to disk, then after closing the application (in this case Excel), this document will disappear and it will be impossible to restore it. Sometimes a document can indeed be “disposable,” that is, it is created only to be used once (for example, printed). However, in most cases, the created document needs to be saved so that you can work with it in the future. In addition, as a rule, it is necessary to save a document that already exists on disk if changes have been made to it. To save a document, do one of the following: - select the Save tool from the Standard panel; - press the combination Ctrl+S (Save) or Shift+F12; - execute the Save (File) command.
If a newly created document is saved for the first time, a saving window appears in which you must: » 1) select the drive on which the file will be saved, for which you should open the closed Folder list and click on the line with the drive name; 2) go to the directory where the file will be saved; 3) in the File name input field, enter the name of the file to be saved; 4) press the Enter key or click the Save button. To go to the desired directory, you can use the following methods: entering the directory - double-clicking on the directory (by name or picture) in the list of directories and files; exiting the directory (moving to a higher-level directory) - click on the Up tool or the combination Alt+2; » return to the previous (last) directory - click on the left section of the Back tool or the combination Alt+1; “return to one of the previous directories - click on the right section of the Back tool and click to select a directory in the list that appears. It is not necessary to enter the file extension when entering the name; it will be assigned automatically. The Excel workbook file will have an xls extension.
To specify the name of the saved file, you can use the closed File name list, in which previously typed document names are saved. Properties is a form in which the list is presented as a list, and when you click on a file from the list, a brief description of its properties appears to the right of it (see section 3.2.5). You can also select a view form by clicking on the left section of the View tool or by pressing Alt+b. The forms of presentation will change successively. The most commonly used and convenient form is the List form. The Table and Properties forms are applied as needed.
The use of other forms is not of great practical interest.
Writing Excel tables to a computer is called saving. This is a process in which we make a file from a table and add it to Local Disk. Then the file with the table can be opened on a computer, transferred to a flash drive, and sent over the Internet.
How to save an Excel table
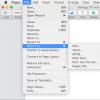
1 . Click on “File” in the upper left corner of the program.
If there is no such inscription, click on the round button with colored squares. It is also located in the upper left corner of Excel.
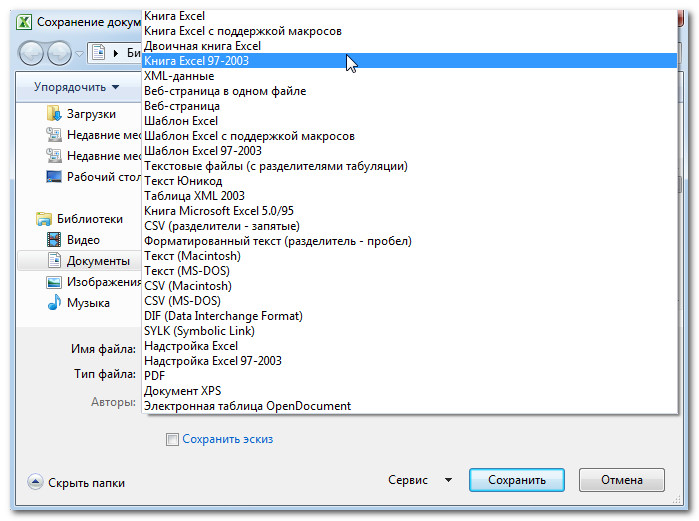
2. From the list, select "Save As".
![]()
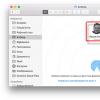
3. A small window will open. Through it you need to select a location on the computer where you want to write the table. This can be done through the left side.

Then I open the “Reports” folder.

If desired folder no, you can create it right in the window. To do this, click on the “New Folder” button at the top.
I'm checking to see if the save location is correct. It will be written at the top of the window.
4 . Type a name for your file or leave it as your computer suggests. The name can be changed at the bottom, in the “File name” line.

The window will disappear - this will mean that the file with the table has been written to the specified location.
Now you can close Excel and try to find the recorded file on your computer. To do this, open the location you selected when saving. There should be a file with the specified name or the standard name “Book 1”.
Important! When compiling a table, it is better to save it from time to time. To do this, use this button in the upper left corner of the program:
Clicking on it will overwrite the table. That is, the previously recorded option will be replaced by a new one. This is necessary to avoid accidentally losing data. After all, if the computer crashes (freezes, power outage), then there is a high probability of losing the table.
In this tutorial you will learn how to use the Save and Save As commands, and you will also learn how to save a workbook in compatibility mode. Excel 97-2003, and how to save the book in the format PDF.
Whenever you create new document in Excel, you need to know how to save it for later access and editing. Excel allows you to save documents in several ways.
To use the Save As command:
To use the Save command:

If you are saving a workbook for the first time and select Save, the Save As dialog box appears.
To use AutoSave:
Excel automatically saves your workbooks as you work to a temporary folder. If you forget to save changes or Excel experiences some kind of malfunction, you can restore the autosaved file.
- Open a workbook that was previously closed without saving.
- Click the File tab and select Details from the pop-up menu.
- If autosaved versions of your book exist, they will be shown in the Versions. Click on the file to open it.
- A yellow warning will appear under the book's ribbon. To restore this version of the book, click Restore and then OK.
By default, Excel automatically saves the workbook every 10 minutes. If you worked with the table for less than 10 minutes and closed it without saving or there was a crash, then Excel will not have time to autosave.
If you don't see the file you're looking for, or you're looking for a file that doesn't have previous versions, then you can view all autosaved files by clicking the Manage Versions button and selecting Recover Unsaved Workbooks from the drop-down menu.

To save a workbook in Excel 97-2003 Workbook format:
To save a file as a PDF:
Saving your book as Adobe Acrobat The document, called PDF, can be especially useful if recipients don't have or use Excel. Save to PDF format allow recipients to see the contents of the book, although they will not be able to edit it.

By default, Excel saves only the active worksheet. If you have several sheets in a book, and you want to save them all in one PDF file, then click on the Settings button. The Options dialog box appears. Select Entire Book and press OK.
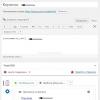
XLSX and XLS formats- main toolbar Save in other formats... File>Save Document As>Microsoft Excel 97-2003 workbook.
Advice. Save>XLSX dialogue Settings(menu Service>Settings…).
Document preparation
The choice of the design saving mode depends on how you will use the created document in the future:
- Rich text
The resulting document will retain the font style and size, the division into paragraphs, but the location of objects on the page and line spacing. This will produce solid left-aligned text. For text in which the reading order is from right to left, the alignment will be right.
Comment. Any text with a vertical orientation in this mode will be displayed horizontally.
- Simple text
In this mode, text formatting will not be preserved.
Text
- Save numeric data in "Numbers" format
Specifies that when saving recognized text in XLS format, numbers will be saved in the "Numbers" format. This format in Excel is used to perform arithmetic operations on cells containing numbers.
- Save headers and footers
Check this option if you want the header and footer text to be preserved. If this option disabled, header and footer text will not be saved.
- Create a separate table for each page (XLSX only)
Picture quality
When saving to XLSX format, you can also save illustrations. If the recognized text contains a large number of illustrations, then the size of the final file can be very large. The quality of pictures and the size of the resulting file depend on the selected value in the drop-down list Picture quality.
Advice:
- To set parameters for saving pictures, select Custom…. In the dialog box that opens Custom Settings select the required values and click the button OK.
- If you do not want to save illustrations in the recognized text, make sure that the option Save images (XLSX only) not marked.
CSV format
- Click on the arrow next to the save results button on the main toolbar and select a saving format from the list. If required format not in the list, select item Save in other formats..., and in the saving dialog that opens, select the required format. You can also save documents using the menu command File>Save Document As>CSV document.
Advice. If necessary, you can configure additional options save to bookmark Save>CSV dialogue Settings(menu Service>Settings…).
This bookmark contains the following groups of settings:
Text saving options
- Ignore text outside table
Specifies that only tables will be saved to the file.
- Separate pages with end-of-page character (#12)
Specifies that when saving recognized text in CSV format, the pagination will be the same as in the original document.
- Delimiter
Specifies the character that will separate columns of data in a CSV file.
Encoding
Program ABBYY FineReader automatically selects the code page. If you want to change code page, select desired value in the drop-down list in the section Encoding.
Read also...
- Cadaques in Spain. My review and photo. Cadaques, Catalonia Cadaques Spain how to get there from Barcelona
- Cart for an online store at the front or Writing modular javascript
- Falling snow on jQuery or html New Year greeting card template
- Where to see what version of Android is installed on an Honor and Huawei phone How to find out the Huawei serial number