My Beeline download for Nokia. Review of the “My Beeline” application for Windows Phone. Introduction to Controls
VimpelCom launched the My Beeline mobile application in March 2014. After a short time, it began to support tablets and received recognition from both experts and ordinary users, who called “My Beeline” the best mobile service among telecom operators. However, it was only available on Android and iOS. For owners of OS devices Windows Phone I had to wait for the application for more than six months. And now, finally, we can test it.
Object: mobile application "My Beeline"
Publisher: OJSC VimpelCom
Version: 1.1.1.0
Update: 01/14/2015
Device: Nokia Lumia 830
OS version: Windows Phone 8.10.14157.200
First entry
To enter the application, a new subscriber must register an account in the Beeline Personal Account. The login will be a phone number in ten-digit format, and a temporary password will be sent via SMS in response to the USSB command *110*9#. If the subscriber already has an account in the Beeline Personal Account, then the login and password for it are also valid in mobile application.

After registration, the system immediately asks you to change your password. It is important that it is tied to the SIM card and, accordingly, to the phone number. Recovering your password (if you have forgotten it) occurs in the same way as receiving it initially - using the command *110*9#.
You can also log in using a different phone number as a login (not corresponding to the one on which the application is installed). But at the same time, the developer warns, the automatic login function will not work, since it is connected to the SIM card.
Introduction to Controls
The appearance of the application leaves no doubt that serious and painstaking work was done on it: the recognizable brand book is effectively integrated into a functional and intuitive interface, implemented according to the “nothing superfluous” principle. The same applies to the widget of two possible sizes placed on the main screen: looking ahead, let’s say that it can be configured to show the balance, which means that there is no need for the “Balance on Screen” service (which, however, Beeline has) also free).

Navigation in the My Beeline application is reminiscent of working in the interface of the Windows Phone OS itself or in the Windows Phone store: the same movements along two axes - horizontal and vertical. As a rule, sections switch horizontally, and the lists (tariffs, options, etc.) in each of them “move” down.
Main screen- informational, it contains data on the number balance (for a prepaid payment system), expenses or invoice amount (for a postpaid system).
In addition, on the main screen there is a link for replenishing the balance (using a bank card, at the point of payment, using the “Trust payment” or the request “Top up my account”) and a window useful advice, clicking on which takes you to the “Questions and Answers” section.

Menu sections
The menu consists of five sections: “Finance”, “Tariffs”, “Services”, “Internet” and “Offices”. Settings and support functions - “Settings”, “Help”, “About the application”, “Exit” - are cleverly placed on a pop-up tab at the bottom of the screen.
The “Finance” section partially repeats the information posted on the main screen of the application: balance status and available balance of SMS, Internet traffic and minutes voice calls included in the package. In addition, here you can find out the history of account replenishments and order details.
It is possible to order details for a fixed period (day, week, two weeks, month), or specify the desired one - within the last six months. It will be saved in the subscriber’s Personal Account and sent to the email address specified in a special window.

The “Tariffs” section contains not only the parameters of the user tariff plan, but also data on all currently available Beeline tariffs. For greater convenience, there is a “Recommended” tab - you should assume that these are plans that are selected by the system based on statistical data on subscriber activity. When you click on the name (it is highlighted in an orange frame), an expanded description of the tariff appears.

The “Services” section is, for obvious reasons, the most information-rich. Everything is collected here available services operator - connected, recommended and full list: “Possibilities at zero”, “Call management”, “Contact management”, “Mobile payments” “Cost control”, “Mobile Internet”, “Roaming”, “Information and entertainment”, “International and long-distance communications”. Accordingly, when you click on the description of a service, its details open. The big plus is that if the service is paid, it is immediately visible. It should be noted that compared to the Personal Account, the grouping of services in the mobile application seems much more convenient and easier to search.

And perhaps most importantly: each service can be activated directly from the application. And in the case of the “Top up my account” and “Call me” services, you can send directly from the application to desired number request.
The “Mobile Internet” section, in fact, partially duplicates the information in “Tariffs” - all possible options for using mobile Internet from Beeline are collected here.
The “Offices” section - an interactive search for the nearest operator service points - is another very relevant and convenient service, to use which you need to enable the geolocation function on your smartphone. The application displays a list of nearby offices in a list and on a map. Clicking on the description of a service point opens its detailed description: location on the map, opening hours, subscriber operations carried out. By the way, despite the warning message when downloading information “This may take several minutes,” the download itself (albeit on a 4G network) took about 15 seconds.
Settings and help
Let's move on to the description of the sections hidden in the lower pop-up tab.
The “Settings” section is still quite laconic. Setting permission to automatically log into the application (without constantly asking for a login and password) seemed self-evident: during testing, I had to log in and out of the application several dozen times a day. Allowing background auto-update of the balance on the application tile, as mentioned above, will replace the “Balance on Screen” service, if necessary. You can also change the password for the application (and, accordingly, for your Personal Account) in the settings.

The “Help” section includes “Questions and Answers”, forms feedback“Ask a question” and “We are in in social networks" The last item will open in the browser official group or the page of OJSC VimpelCom on Facebook, Twitter, VKkontakte or Odnoklassniki.

The questions and answers section pleased me: there was a whole subscriber’s guide, in which, in addition to questions about the application (authorization, settings, FAQ, etc.), special attention was paid to tips on using communication services in roaming.

Summary
“My Beeline” is really easy to use: in less than a minute you can use all those services for which you previously had to call a call center or go to a service point. The controls, of course, are adapted for a smartphone - by the way, why the application is better than a website in mobile browser. I managed to create an account and log in to the system in about 10 minutes, despite the fact that I had never encountered Beeline services before.
I noticed how intelligently the mechanism of hyperlinks between sections of the application is implemented. For example, the “Top up account” button will send me, in particular, to the service “ Trust payment» section “Services”.
I read the reviews about the application - surprisingly (or is it not surprising?) There are a lot of enthusiastic ones. But there are also valuable suggestions: customize the background of the tile (they want transparent) and bonus program, the ability to switch between numbers and block a number.
Quite recently, VimpelCom released official application"My Beeline" for Windows users Phone. Using this application, which is discussed in this review, you can access all the necessary functions of your personal account from your favorite smartphone.
The application was originally written for Windows Phone 8.1 and, as a result, uses all the capabilities and conveniences of this operating system. When you first launch, as expected, the system asks for your authorization data, after which you are taken to the main screen.
Like everyone else Windows Phone apps, the main page of the My Beeline application is divided into several tabs, the composition of which will depend on the type of your account. For example, if you are a regular user, then home page you will find five main tabs.
Main. The page with the main information is made very conveniently and provides the most necessary information - account balance and a button for quick replenishment. With its help you can top up your account via bank card, view available payment points, use the “Trust payment” or “Top up my account” function.

Below is information on the remaining Internet traffic, SMS messages and available minutes. You can find out key details about your account without scrolling through different sections. In addition, the remaining balance is displayed on the application tile. To do this, go to settings and activate the “Balance on Tile” function. Please note that it will only be available if you have activated automatic login to the application.

Rate. As you can guess, the tariff tab provides basic information about the activated tariff. They are just one tap away from the main page of the application and display literally all the details, as well as a link to a similar page on the Internet. From the same tab you can go to the section with a complete list of tariffs and main information about them. You will also find useful the section with recommended rates, which the system automatically selects specifically for you. The section contains a search to quickly navigate to the tariff you need.

Services. Here is a list of services you have connected with detailed description each. As with tariffs, a full list of services, as well as recommendations, is available under the “All services” button.
Internet. Because the modern smartphones dead without the Internet, it was given due attention in the application. You will find information about your Internet connection on a separate tab on the main screen of the application. There you can find the cost of the connected service and the amount of traffic you have left. If you feel like you need to increase the limits, you can select any other tariff from the “More Internet” menu. You probably noticed that the principle of the My Beeline application is to display basic information first, and more detailed information is available in the submenu. This is very convenient because the user is not overloaded with an abundance of information and can easily navigate the application.
Finally, on the last tab you will find the main menu of the application, where all of the above tabs are located in the form of links for quick navigation. By going to the “Finance” section, you will find the opportunity to view the history of your deposits and order details of your account. It is worth noting that there is a section with notifications, which can be accessed by clicking the small circle on the main page at the top.
page above.

If you need to contact the operator's office, go to the "Offices" section. You can find an office near you there. The application has a convenient help system, which is divided into sections “Questions and answers”, “Ask a question” and “We are on social networks”. If you do not find the answer to your question in the application, you can ask support directly in the application by sending a request by email.

In our opinion, the “My Beeline” application turned out great and will satisfy the needs of subscribers of any payment system. Besides all that has been said, the application works very beautifully, and appearance and design delight with the corporate design and at the same time, the preservation of the canons of Windows Phone design. There is also optimization for large diagonals and resolutions, in which elements become smaller for more effective use screen space.
We didn't like the following:
- There are no wide and transparent tiles.
- There is no black app theme.
We really hope that the developers will fix this in future updates. We highly recommend downloading the app
Many users cellular communication Beeline has already appreciated the advantages of the Personal Account. However, it is not always possible to access the operator’s website via a computer, but use Personal Area through mobile devices not very convenient. To provide subscribers with access to online services anywhere and at any time, the company has developed the My Beeline application.
Where to download and install the application?
You can download the “My Beeline” application to your smartphone or tablet from three sources (depending on the operating system of your mobile device):
- Download from App Store(for iOS);
- Download at Google play(for Android);
- Download from Windows Store(for the system of the same name).
Installing the application is completely free.
You can also download the Android application from us:
Version: 2.0.0
Android: 2.2 and higher.
Russian language: Yes
Size: 3.92 Mb
How to login to the application
When you launch the My Beeline application, user authorization must occur:
- If you log in via Mobile Internet, authorization will be automatic;
- If the launch was made via Wi-Fi, you will need to enter your username and password;
- iPhone owners, except the above methods, the TouchID login function can be configured.
Application features
“My Beeline” is an application that provides access to control mobile services one touch. The service provides subscribers with a whole range of opportunities:
- Get information about the current tariff, find out the date when the next subscription fee will be charged.
- View information about the balance of the free SMS package, call minutes and Internet traffic.
- Receive data about connected services and manage them at your discretion.
- Connect or disable the necessary Internet options.
- Find out your mobile account balance and top it up instantly through the application.
- Get information about current services and offers suitable for a specific user.
- Choose another tariff plan, compare it with the current one and make the transition.
- See information about transactions performed and write-offs.
- Order online details of balance replenishments and financial expenses for individual items for a specified period.
- Use the services " Mobile transfer", "Call me" or " ", without having to enter special codes and dial the subscriber's number entered in the phone book.
- Solve the problem that has arisen by looking at the “Questions and Answers” section, where the most frequently encountered questions and options for solving them are collected.
- Ask a question to a specialist technical support Beeline without leaving the application.
- Find the nearest company offices using the interactive map.
- Go to the operator’s official page on social networks to promptly learn about all promotions and news from the Beeline world.
Obvious advantages of the application
- Easy access to all functions of your Personal Account;
- Convenient and intuitive interface;
- Low system requirements;
- Quick control of expenses for mobile communications and the Internet;
- Easy tariff change;
- Manage operator services in one touch;
- Get expert advice without leaving your home.
The My Beeline application was created specifically to save time for active users of Internet resources. Now you don’t need to wait for the operator to answer the support phone line or remember and enter USSD codes. Everything you need is always at hand in your mobile device.
How to delete an application
You can remove the My Beeline application from your smartphone or tablet in the same way as any other application. For example, through the Application Manager function menu by selecting the “Uninstall” option.
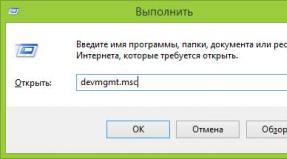
Smartphone users often have problems setting up Internet access, especially owners of Microsoft Lumiya based on Windows Phone. Previously, this phone was called Nokia Lumia. The interface of such smartphones differs from other conventional models. Therefore, new Lumiya owners cannot immediately figure out the smartphone settings, although there is nothing complicated about it.
The question of how to set up the Internet on a Lumiya phone is asked by many users. Therefore, let’s look at it in more detail and understand the settings step by step.
- Necessary activate mobile transmission traffic. To do this, go to settings and select “network and wireless connection", then " cellular network and a SIM card." Next, set the switch to the “on” position.
- Set up an access pointAPN. To do this, open the menu and go to settings, then follow the same path as in the first step, and then - “SIM card parameters - Internet access point - add access point.
To create a new access point, you need to enter information in four fields. Two of these fields must be filled in. We will consider the parameters to fill out below. Select your cellular company from the list and enter the data in the required fields of your Lumiya smartphone. In the field where you need to enter a connection name, you can write a name cellular company, although you can enter any name.
Access Point Specifications
For example, let's take the MTS operator:
- access point name - internet. mts. ru;
- username – MTS;
- Password – MTS.
- Reboot the device. It is needed for all changes to take effect. To do this, turn off and then turn on your smartphone. After this, the Internet will work.
With these simple steps you can configure the Internet to Nokia phone Lumiya.
To obtain free settings Internet in automatic mode for each operator, you need to perform the following steps:
- for MTS you need to call 0876 or send an SMS with an empty field to phone 1234. You can also visit the operator’s website and go to the “private clients” - “help” - “settings” tab. Next, you need to order auto-configuration of the Internet for Lumiya. This procedure is performed without payment;
- for Beeline operator: Auto settings can be obtained by calling the service center upon request * 111 #, or call 0674. If you have information on setting up Wi-Fi and Internet access, then it is advisable to install the Beeline program for Windows Phone and request auto-configuration of the mobile world wide web on your smartphone;
- for Megafon clients: You can set up the global network on Lumiya by calling 0500, or by requesting an SMS with a message “1” to number 5049;
- for Tele2 subscribers: call 679 and you will receive required characteristics in auto mode.
If the settings do not arrive automatically and the mobile network does not work, then you need to configure the properties manually.
Setting up the Internet on Nokia Lumia 630
Some brands of Nokia smartphones may have different menus, although they operate on the same operating system. Some users do not know how to set up the Internet on this gadget. Let's consider this issue in more detail.
For a phone with two SIM cards
The setup is as follows:
- Activate data transfer: go to settings – cellular network plus SIM cards – data transfer (turn on the slider). There you also need to go to the “SIM card for data transfer” and select the SIM card that is most suitable for working on the World Wide Web - this is the first or second.
- Creating an access point. Again go to “settings” - “SIM cards” - “settings of SIM card No. 1 or No. 2. Select the SIM card for which data transfer is activated. Next, an access point is added. The data is entered in the provided fields. The changes made must be saved and the smartphone rebooted.
If you have a Lumiya with one SIM card, then setting up the Internet is much easier. You need to go to settings, then profile settings, adding a new profile. The fields are filled in and changes are saved. Then the smartphone reboots.
After reviewing this information, you can easily set up access to the World Wide Web yourself. If you find it difficult to understand the phone menu, you can clearly see this in videos from YouTube.

To set up access to the World Wide Web on the Lumia 535 smartphone, you need to perform the following steps. First you need to connect the “data transfer” item. Find out how much money is in your phone account.
These funds should be enough to activate access to the global network. You need to go to the settings of Microsoft Lumia 535, select " mobile networks" Then you need to specify the selected access point. You must select such a point from the list. Which is created for your telecom operator.
If nothing has changed and there is still no access to the network, then try creating another point and repeat the steps discussed above.
To set up Internet access on a Lumiya phone that runs on operating system Microsoft Windows Background, no difficult operations required. Just go to the settings and follow steps that are intuitive to all users.
After rebooting the smartphone, Internet access will be activated, and you can easily work on the world wide web, just like on a computer, perform various tasks, surf websites, receive email, communicate in instant messengers, etc.
If you are interested in installing the My Beeline application on your computer, then you are on the right track. I’ll show you how you can download My Beeline onto a regular PC.
Absolutely all functions are slowly moving into the digital world. More and more often we can see how things that are common to us become incredibly accessible and convenient thanks to mobile technologies.
We have one of them for review today and I think it would be very logical to first consider its functions. And then I’ll show you the launch on PC.
My Beeline - what is it?
Today, almost every telecom operator has its own application. Beeline also decided not to be on the sidelines and made its own program that makes life easier for users. 
You probably remember how we called the operator to change our tariff or find out any information at all if something happened. It's the twentieth century and everything has changed.
Now you just need to go to the application store and download it to your phone necessary software. Go in and change your tariff in a matter of seconds. And this is just the beginning.
Also among the functions we can note simple check balance down to the smallest detail. This can also include replenishing your account using a bank card. 
In order not to talk about functions for a long time, here is a short list:
- balance control;
- replenishment history;
- find the nearest salon;
- contact the operator;
- much more.
There are absolutely all functions for all occasions. You probably can’t just change your SIM card, because to do this you just need to visit the nearest salon.
Download My Beeline on PC
Now it’s time to move on to the part where there will be information on exactly how you can download My Beeline to a laptop or computer, depending on what you have. 
The essence of today's material is incredibly simple, because there is only one way to open such an application - using an Android emulator.
BlueStacks (www.bluestacks.com) and Nox App Player (www.bignox.com) are the best options if you're looking for a free option. There are no ads in them, but you can turn them off for money.
Briefly about the installation:
- one of the emulators is installed;
- Next, we enter the Google profile and this will happen on the first launch;
- search for “My Beeline” and you can find it directly through the search for the emulator itself or simply go to the Google Play application;
- “Install” button and the process begins.
To type text, you will use the most standard option - the keyboard. Well, that’s basically it, there’s nothing more to say here.
conclusions
All information on the appearance of the My Beeline application on any computer is only here and the instructions are above. In short, you need to download an Android emulator.
You can install programs from other operators in exactly the same way. So let's take advantage of this opportunity, why not.