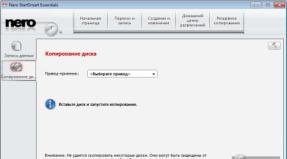
An error occurred in the Android system, what should I do? Rollback to factory firmware. Clearing app data and cache
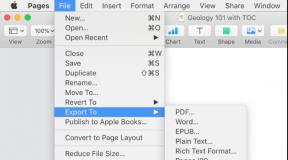
Some users, while using their Android devices, encounter a situation where a failure occurs: “In app com.android.phone has encountered an error,” and the device is slow or unresponsive. This is a problem with the standard phone application or in other words “dialers”. In this article we will talk about how to fix the error different ways. For convenience, they will be shown in detailed form. step by step instructions, each stage of which will be accompanied by screenshots.
As we have already said, the cause of this error is the standard “Phone” application, or rather its malfunction. This is the one you use for calls. Problems can be caused by a dirty cache, a violation system files etc.
There are several main reasons for the error:
- wrong set time and date;
- failures in the operation of the Sim Toolkit program;
- malware action (occurs infrequently);
- conflicts in the operation of Android programs.
One way or another, below we will figure out how to fix the problem. More will be listed first simple ways. If they don’t help, then move on to more radical measures.
Solving the problem
Clearing app data
In the operation of any program, including Android, so-called junk files accumulate over time. This is temporary data that, in fact, is no longer needed for work. That is why it is important to remove them in a timely manner. This is what we will do now.
- In order to clear the application cache, you need to launch the OS settings. Move the notification shade down and tap on the gear icon.
Attention! All instructions below are shown on Google Android 7 in its “pure” form. People use it most often. In other editions of the system, the process is similar. If we described all OS versions, the size of the article would reach unimaginable proportions.
- Scroll the contents of the window a little lower and select the item marked in the screenshot.
- Here is a list of your programs. We need to find exactly the standard “dialer”, the one that, in fact, gives the error.
- There is a stop button in the application menu. It must be pressed. Otherwise, access to the cache may be blocked and our cleaning will not bear fruit.
- We will be shown a request to stop the program. We agree by clicking “OK”.
- Next we move on to the application storage. This is where the tools for cleaning temporary files are located.
- There are 2 buttons here. Clear data and clear cache. Ideally, you need to press them one by one. However, after applying the first one, all dialer data (call list, speed dial, etc.) will be erased.
- Again, we will be shown a notification that the data will be deleted. We don’t pay attention and click “OK”.
After this, be sure to restart your smartphone and continue using it. If the com.android.phone error appears again, proceed to the second solution.
You should also understand that the method described above can help solve problems in other applications.
Disable network date and time
Another option that can solve our problem is setting the date and time on the device. The fact is that sometimes we use synchronization of such data with the network, but we forget to specify the correct time zone. As a result, we get an incorrect date or time. Sometimes this function simply does not work correctly. The required sequence of actions will be discussed below.
- Let's go again to the settings of our device, or rather, its operating system. To do this, open the main menu and click the shortcut indicated in the screenshot.
- You can see the required settings item in the screenshot below. Tap on it to open additional functionality.
- So, here is the trigger for switching automatic and manual settings time. Turn it off and set the date and time manually.
After everything, restart your smartphone. If the error appears again, then the reason for it is not the wrong time, and its synchronization with the network can be activated again. You, in fact, should read the article further.
Removing suspicious software
In the lion's share of cases, the malfunction and the corresponding error in com.android.phone were caused by violations related to the installation of any programs. In other words, you recently installed an application on your phone and after that the errors started. This is very easy to fix, and how exactly is written below. Moreover, this can be done in two ways at once. See for yourself which one to choose.
Via Google Play
The first option is more convenient. After all, it looks the same on any firmware and OS version. Therefore, it will be he who will be given initially.
- To remove a program via Google Play, we must first decide what we need to delete. Remember, after which problems with the operation of the dialer began. What did you install on your phone on this day or hour. In our case, for example, this is a strange program called “Root Master”. It is with her example that we will demonstrate the removal.
- Initially, go to the main menu Play Store. Its icon is located in the upper left part of the window.
- Here we are interested in the top point. Click on it.
- At the top of the interface, go to the “INSTALLED” tab, and select our application from the list that appears. Naturally, we tap on it.
The program menu will open, in which there will be a “DELETE” button. Click it and the process will be completed.
All of the above steps are shown using a tablet as an example. They look similar on phones.
Via the application menu
You can also delete any program through the application menu. If for some reason the Play Store option did not work for you, read on. However, in each smartphone and OS version, the interface, name and location of control elements may change slightly.
- Initially, you should go to the settings of our device. We have already shown before how this is done.
- In the menu that opens, look for the item indicated in the screenshot below and click on it.
- In the same way as in the case of the Google store, scroll down the list of programs and select the one to be deleted.
- Then everything is clear. Tap on the button called “DELETE”.
- Naturally, we answer the request for uninstallation in the affirmative.
As a result, the unnecessary program will be erased, and all we have to do is reboot the smartphone.
Virus cleaning
As mentioned in the introductory part of the article, the com.android.phone error can be caused by the activity of viruses. In order to fix this, we have prepared this section for you. Especially dangerous viruses become available for Android devices with Root rights. They can even turn such devices into “bricks”.
- Initially, we will need an antivirus. You can and should download it from the Play Market. We are launching a store.
- We start writing the name of the antivirus (we recommend Avast!) and tap on the one that appears in search results point.
- Next, select the element we need from the search results. We've circled it in red.
- On home screen applications, click the “INSTALL” button.
- We are waiting for the download and installation of all the necessary files to complete.
- Our antivirus is ready to work. Launch it via a shortcut on your home screen or a button in the Play Store.
- When you launch it for the first time, you will see a button labeled “START USING.” Naturally, we press it.
- This defender comes in two versions. The first one is completely free, but it displays advertisements. In fact, this will not interfere with us. If you don't mind paying for a subscription, you can purchase the version without ads.
- To start scanning for viruses, click the button marked on the screen.
Please note that before starting scanning you need to close all running programs.
- Naturally, we will need to grant access to Avast! to all files of our Android. Click “ALLOW”.
- The search for malicious objects will begin. Depending on the number of files and the performance of a particular phone, it may take different times.
As a result, no viruses were found on our smartphone. The program only indicated a dubious vulnerability. If this also happened to you, move on to the next method.
Note: after the antivirus has finished its work, it is better to remove it in order to reduce the load on operating system and the hardware component of the phone as a whole.
After applying the method, do not forget to restart the device.
Third party dialer
If none of the above helped, you can do something smarter and just download a normally working phone application. Yes, there are quite a few of them for Android. Let's look at how this is done. You may like the new application more than the standard one.
- Let's turn to Google Play for help again. Its shortcut can be found either on the home screen or in the application menu.
- IN search bar We write “exdiaer”, and in the output that appears, select the marked element.
- At the next stage, simply press the green button that says “INSTALL”.
- We allow the application its access. Otherwise, it simply will not be able to make or receive calls.
- As a result, the program will start and look something like this:
Ready. Now you can use the third-party functionality of the new dialer, and if it doesn’t suit you, use one of the many other options.
Reset to factory settings
If none of the options described earlier helped you, you will have to move on to more radical measures. This is resetting the settings, flashing it or working with Recovery. Let's start with the first one.
- Let's go to the settings of our smartphone by selecting their icon in the application menu.
- Once again we confirm our plans and tap on the button that says “ERASE EVERYTHING”. It may be called differently for you.
- Turn off the device.
- Press and hold the volume up button and the power button at the same time.
- As soon as the logo appears on the screen, we throw them.
After this, the smartphone will automatically reboot and return to its factory state. This should help solve your problem. This option does not work only if the OS files themselves were modified via Root access.
Cleaning via Recovery
There is another, even tougher, option. This is working with stock recovery. Depending on the firmware and smartphone model, they may look different, but the essence is similar. We will show everything at Samsung example, you will already understand your device, for example, Lenovo, Sony Xperia etc.
Clearing cache
Previously, we cleared the app cache through the phone's app manager. Below you will find a more specific option - working with Recovery. How to get into the mode specifically on your phone - look online. Let's just say that in most cases you need to act like this:
If everything is done correctly, you will see the following:
Let us explain what needs to be done next. Navigating through the Samsung menu is done using the volume rocker. Select by using the power button. We need the item marked on the screen. After selecting it, confirm the action. The device will reboot and the cache will be cleared.
The following points are also present here:
We will talk about resetting to factory settings from recovery below. You can try clearing the cache and rebooting the device. Perhaps after this the problem will disappear.
Hard Reset
This function is translated as hard reset. This formats system partition and user data (not on all devices). In exactly the same way as in the previous case, you need to select it from the standard Recovery.
Before proceeding with the operation, be sure to save your data.
Rollback to factory firmware
If none of the above helped you and the device still gives the same error, all that remains is to reflash it. How to do this specifically on your phone model and firmware version, you need to find out on the Internet. This problem is the topic of a separate article and we will not fully consider it. We will only show the method using the example of Chinese Xiaomi smartphone Redmi Note 4x. It is described in.
Results and comments
As a result, we have completely figured out how to deal with the error that occurred on Android, and we know how to fix it in different ways. As already mentioned, follow our instructions in order and, if the previous point did not help, move on to the next one.
If, after all the methods, something does not work out and the device writes that the process has stopped, describe your situation in the comments under this material. We will definitely read them and try to help everyone if possible. In any case, we hope that the article will be useful to you. After all, all of the above methods are free.
Video
For greater clarity, we suggest watching a training video on this topic. Perhaps you will find something in it that will help out in your situation.
There is no need to worry, because... solving the problem is not as difficult as it might seem. And knowing the cause of the problem, it will be much easier to get rid of it.
How to fix com android phone error
There are three methods to solve this problem. However, there are special cases when these solutions are not entirely relevant. We are talking about cyclical failures and an error after the update. How to fix com error android phone in such situations - immediately after analyzing the main three options for getting rid of the error.
Method One: Clearing the Cache
 Clearing the cache using the example of the Google Play application
 The essence of this method is to delete temporary data. Sometimes they become the cause of such a failure, because... contain various types of errors.
You can clear the cache as follows:
- Open Settings.
- Scroll down until you find “Applications.” Enter this submenu.
- At the top, tap on the “All” tab, scroll down to the “Phone” application.
- Perform a cleanup by clicking Clear Cache. It is recommended to additionally click “Erase data”, but after this the factory configuration of the “Phone” will be installed.
- Reboot your device.
- After these steps, the error in the com android phone application will most likely disappear. If the problem does not go away, then there are two more solutions left.
Method two: replacing the application

As a rule, the error is relevant only when using a standard calling application. Therefore, those who wish can find salvation from the problem in the new “dialer”. Even third party applications for making calls allow you to store information about calls, make calls and edit contacts.
You can install the corresponding application from Google Play. Just enter, for example, “dialer” into the search. All that remains is to choose and install the most attractive application.
Method three: factory reset

The last method to solve the problem is. It's tough but effective solution almost any problem with a smartphone. If you execute it, then all user data (Contacts, SMS, application settings, calls, files in internal memory) will be erased and the phone will return to its original factory settings. If there is a need to save your data, you will need to do backup copy using special utilities.
How to reset:
- Open Settings.
- Find "Recovery". This item can be located either in the main list of settings or inside one of the submenus.
- Click "Reset settings" and agree to delete all data.
- Wait until your smartphone reboots.
- Sign in to your Google account.
In cases where the device cannot be turned on after an error, you can reset it from recovery. To do this, when you turn on your smartphone, you need to simultaneously hold down the volume keys (the login method depends on the brand of the device), and then find “factory reset” in the menu that opens.
com android phone app error is cyclical
Some are faced with a more complex case - when the error window appears repeatedly with a frequency of only a couple of seconds, which seriously complicates the use of the device and getting rid of the problem.
- Download the full firmware file (Full OTA) from the official website or a trusted forum (for example, 4pda).
- Place the firmware in the root of the memory card.
- Turn off your smartphone and enter recovery.
- Find the item “install update from sdcard”. Select the update file and agree to installation.
- After installation, it is recommended to enter recovery again and perform a factory reset from there.
Com android phone appears after OS update

If an error occurs in the Google Play Services application, you can fix it by resetting the cache, adding your Google profile again, or reinstalling updates. These are general troubleshooting methods, but depending on the error number, other methods may be needed.
Bug fix
So, an error occurred in the “Google Play Services” application, let’s see how to fix it and return Android to a normal, working state.
- Reboot your device. This simple recommendation helps eliminate some system failures without unnecessary hassle.
- Make sure that mobile traffic not over, the Wi-Fi connection is stable, there are no problems with communication.
- Run Play Market, find the “Google Services” application, open its page and click “Update”. The firmware will be updated to the latest version.
If these measures did not help fix the problem, then you will have to do a little digging in the phone’s settings and work with the cache and application updates, as well as your Google profile.
Reset cache
The cache stores data for quick launch applications. Sometimes, along with the “correct” data, there may be incorrect information that will interfere with the launch, causing an error. Let's fix this flaw:
- Go to settings, open the “Applications” section
- Go to the “All” tab, find Google Services.
- Open the program page, click “Stop”, then “Clear cache”.
- Repeat the operation for the Google Services Framework application.

After clearing the cache of these two programs, reboot and make sure that you were able to fix the problem that was preventing you from using your mobile device normally.
Re-adding a profile
If nothing has changed after clearing the cache, try adding your Google account again.
- Open settings and find the “Account” field (or the “Accounts” section).
- Find the Google profile you are using and open its synchronization settings.
- Call up the additional menu and select “Delete”.

After deleting your account, restart your device, open settings and in the “Accounts” field, click “Add”. Select account Google entry and enter your email and password for your existing profile or create a new account.
Reinstalling updates
Another way to fix the error is to uninstall the Services updates and then install them again. The "Uninstall updates" button is disabled by default, but this is easy to fix:
- Open the "Security" section.
- Go to the “Device Administrators” submenu.
- Uncheck the box next to “Remote control”.
- Confirm deactivation of the function by clicking “Disable”.

After disabling the “Administrator”, you can go to the “Applications” section, open additional settings Services and remove updates. Be sure to reboot to save your changes.

To reinstall updates, launch any built-in application. It will not open immediately, but will prompt you to install Google Services updates first. Agree with the installation and wait until the procedure is completed.
Reset
If the above methods do not solve the problem, use extreme measures - reset the settings.
- Open the "Backup and Reset" section.
- Select Reset Settings. Not network, but all Android settings.

Please note that on Android, resetting the settings also means deleting user data from the internal memory of the device. Therefore, in order not to lose important information, make a backup before resetting.
Correcting errors by numbers
Almost all Android errors have a serial number, with which you can find out why the problem occurred and what to do to fix it. As a rule, to fix errors in the Google Play Service, it is enough to use one of the methods listed above, but sometimes you have to look for other ways to solve the problem.
Error 24
A failure with this number occurs when the application is reinstalled, when its data overlaps with information about the previously installed application. To fix this problem you need Root rights and Root program Explorer, through which you can get to the sdcard/android/data directory and delete unnecessary files applications.
Error 101
Message number 101 appears due to insufficient space on the device. To fix the problem, clear your memory, delete the Play Store and Google Play Services program cache. Clearing the cache in Services also corrects errors with numbers 413, 491, 492, 495, 504, 911, 919, 920, 921, 923, 941-942.

In some cases, it is necessary to add a reinstallation to clearing the cache Google account, turning Wi-Fi off and on, uninstalling updates Google services and Play Market, reset settings.
There are times when the Play Store does not load applications (via Wi-Fi for example), Android writes that “there is no connection”, or a message appears stating that Google app Play Market has encountered an error. Android smartphones such as Samsung and Lenovo do not download games.
Let's figure out why this happens, how to deal with these issues and what to do to forget about them forever!
Instability during the operation of the Play Market and its complete inoperability can be caused by various reasons. Virus, technical problems on the server, failure of add-ons, constant application crashes, and other errors can lead to partial or complete inoperability of the program.
Returning to factory settings in the Android OS is not always an acceptable option, in which the user will have to install applications again, and SMS and phone book contacts that are not duplicated on the SIM card will disappear without the possibility of recovery!
Solution
First, restart your device and check if you have access to the Internet. Many bugs can be fixed with these simple steps. Launch Play Market and if the problem persists, move on to other options.
Let's look at the easiest way to resume the Play Market on Android.
Method #1 - delete account data
Method #2 - clean the hosts file
If the error that occurs does not disappear, we perform the following algorithm.

A possible solution to correct errors may be updating or completely reinstalling the program. In some cases (extremely rarely), you can use the date setting on your phone/tablet.
Try deleting your Google account, rebooting your device, and restoring it. Make sure your mobile phone there are no programs (for example Freedom, designed for hacking games) that block the operation of the Play Market for the Android OS.
Many users of various mobile devices, using the Play Market, are faced with a common notification with the text “No connection” when accessing the Internet via Wi-Fi.
Method #3 - remove the proxy
If all other programs and browsers are working, but the Play Market does not see the connection, try disabling the proxy using the following sequence of actions:
- Menu;
- Settings;
- Wi-Fi;
Select and hold the network you are connected to, click “Change network”. Next, click the “Advanced Options” switch and set “Proxy Server Settings” to “None.”
If proxies were turned off, go to the Internet connection properties. Check "Advanced Options", "IP Settings" should be static. Set DNS1 to 8.8.8.8 and DNS2 to 8.8.4.4 and save. Disconnect from Wi-Fi and reconnect.
Method #4 - setting up a router
Another method to solve the problem is to change the MTU: open the router settings, find the Network – WAN tab. For MTU Size, specify one of the following values: 1500/1460/1420. You can check with your internet service provider for the correct amount. Save, reboot the router, check if the Play Market is working.
Factory reset
If none of the methods solved the error, make sure that all the necessary data is duplicated on the SIM card and memory card and reset to factory settings. This cardinal method will 100% return the working Play Market.
Be careful when installing suspicious software that works by finding bugs, blind spots and shortcomings in Android. Anything can harm not only stable work Play Market, but also to the entire system!
List of possible Google errors Play Market
- 403. An error that appears for users from Crimea. In this case, you can use a proxy, or change your account (as an option), since the Play Market in Crimea no longer works;
- 495. Appears when downloading any files from the store;
- 941. During the process of updating applications, this error may appear;
- 491. If this message appears, you need to change your Google account;
- 498. The device cache is full, so it needs to be cleared. This is done very simply, go to: settings - applications and remove the “unnecessary” from the selected application. You can use some software that will clean the system;
- 919 (923, 492). The device memory is full. Solving the problem is easy, you need to remove unnecessary things from your phone or tablet;
- 927. The application store may be currently being updated. We wait a few minutes and repeat again;
In this article, I tried to write about all the problems with the Play Market and ways to solve them. I hope that they will help you and you can use the application with peace of mind.