A program for changing Windows 7 desktop icons. A beautiful panel with floating shortcuts for the desktop
Possibilities
- search and organize shortcuts, folders and files stored on the local computer;
- grouping files by type and focus;
- creating special zones (sections) for placing icons;
- setting up the zone placement area;
- changing the appearance of zones with icons;
- hiding and returning all icons to the desktop;
- maintaining the proportions of the created zones when changing screen resolution parameters;
- automatic sorting of icons into standard categories.
Advantages and disadvantages
- free;
- Russian-language menu;
- convenient and compact placement of many icons on the desktop;
- creating your own categories for grouping;
- quick hiding of all icons;
- regulation of the appearance of blocks.
- lack of a function for sorting icons within blocks;
- periodic spontaneous changes in the position of icons after closing full-screen programs.
Alternative programs
XWidget. Free app for desktop decoration. Contains a large library of ready-made widgets that can be customized to your taste. Offers the ability to edit and create your own widgets in a special editor. Can display weather, date and time.
IconTo. Free utility to change the appearance of folder and disk partition icons. Allows you to use built-in icons different styles. Can extract and separately save icons from resources.
How to use
After Fences program will be installed on your computer, you will see the following window:
Interface
Here you can select a ready-made layout for placing zones or click the “Create fences yourself” button.
To create new section, hold down the right button on a free area of the desktop and drag the mouse slightly to the side. When the selection appears, release the mouse and use the “Create new fence here” button. After this, the program will prompt you to set a name for the new block:

Name of the new block
For example, you can create a “My Computer” block by transferring the corresponding icons (“My Documents”, “Network Neighborhood”, etc.) or other thematic blocks into it.
in order to change appearance created section, right-click on it to call context menu. With it, you can not only customize the view, but also rename/delete a section or hide all desktop icons.
After selecting “Customize Fences”, a settings window will appear. Go to the "View" tab. In it you can adjust colors, brightness, transparency, saturation:

Setting the view
Fences useful program, which will allow you to give an orderly structure to numerous folders, files and shortcuts that occupy all the free space on your desktop.
operating room Windows system 7 allows you to customize the design and other details for each user personally.
The main page that most often catches the eye and performs the function quick access to applications and files - the desktop, which is also subject to detailed editing, and its main components - shortcuts - can be changed: reduced or enlarged, assigned other properties and an icon.
What is a “Shortcut” and what function does it perform?
A shortcut is a direct link to the executive module of a program. That is, in the folder in which you installed something, there is special application, by running which you can open the program itself. In order not to search for this application in numerous folders every time, create a shortcut for it on the desktop or in another convenient place.
For even faster access to applications, there is a taskbar that does not disappear when opening windows or programs, and all shortcuts on it are launched in one click.
 The taskbar contains the most important shortcuts
 To see which application a desktop shortcut belongs to, right-click on it, and then select the “File Location” section.
 Click on the “File location” button
 To find out the same information about a shortcut on the taskbar, right-click on it, then right-click on its name or icon and click on the “Properties” option.
 Go to the properties of the shortcut located on the taskbar
 In the window that appears, the path to the source application will be indicated in the “Object” section:
 The file location is in the "Object" section
 Zoom out or zoom in - adjust the scale
If there is no more space on the screen, and it is not possible to remove unnecessary shortcuts, then you can reduce their size. If for some reason you are uncomfortable using standard size labels, you can enlarge each of them. But remember that after changing their sizes, the routine may be lost, since the grid format will change, and you will have to re-arrange the labels.
Through editing desktop properties
To change the size of shortcuts through the built-in desktop settings, do the following:
Using the mouse wheel
There is another way to edit label sizes, which gives you many more than three scale options:
Video: big and small - how to change the size of icons on the Windows 7 desktop
How to remove arrow icons
To remove the arrow from a shortcut icon, do the following:
There is a second way to achieve your goal:
Video: how to remove shortcuts from the desktop
Removing a shield icon
The shield icon indicates that the application only works if you have administrator rights. To disable User Account Control and along with it the shield icon, follow these steps:
How to change properties and appearance
If for some reason you are uncomfortable with the appearance of the shortcuts of your installed programs, then use these instructions:
To change shortcuts system programs such as "Trash" or "My Computer", follow these steps:
Video: changing the icon
How to remove one shortcut or hide all at once
To delete a specific shortcut, right-click on it and select “Delete”.
 Removing the shortcut
 If you want to hide all shortcuts at once, then do the following:
How to recover
If you haven’t emptied the Trash application since deleting the shortcut, go to it and click on the required file right-click and select "Restore". If the Trash has been emptied, the shortcut cannot be restored.
 Restoring the shortcut
 What to do if shortcuts delete on their own
The reason for such incidents may be an error in the application to which the shortcut led. After each reboot, Windows checks all the shortcuts on the desktop, and if any of them lead to an application with an error, it automatically deletes it. But if this function does not work correctly or interferes with you, then there are two options:
Reduce the number of shortcuts on the desktop to four, as a result of which system self-cleaning will stop working. This can be done by grouping all shortcuts into folders, or by deleting unnecessary ones.
The second way is to disable the self-cleaning feature by following these steps:
To make your computer work pleasant and convenient, try not to clutter your desktop with shortcuts and files. If possible, group them into folders, this will help you not worry about the quantity for as long as possible free space on the screen. If this is not possible, then reduce the scale of each label. But remember that the system can independently decide to remove a shortcut from the desktop if it is sure that it does not lead to a running program.
contemplatorShortcut panel on the desktop. There are probably almost no people who would not want their computer desktop to be not only comfortable, but also beautiful. Personally, I love decorating as much as I can. It’s much more pleasant to work when at least something pleases the eye.
I have this nice and very convenient panel installed on my desktop with shortcuts to the most necessary programs. When you hover the cursor over it, the icons seem to float to the foreground and increase in size. This panel is called - RocketDock.
Shortcut panel on the Desktop. Installation

The panel is installed easily and simply. Just type in the search engine the phrase “ program RocketDock download", go to the website with the program and download it to your computer. Then run installation file, and follow the installation instructions.

Your new panel will appear at the top of the Desktop.
Setting up the desktop shortcut bar
In order to configure your panel with shortcuts, you need to right-click on an empty space on the panel and select the item from the drop-down list Setting up the panel .

A window will open Setting up the panel .

Customize the panel to your taste. Pay special attention to the tab Style. Open the list Subject, and choose a style that suits your Desktop.

Don't forget to save your settings with the button OK .
In order to add a program icon or folder, you just need to drag it directly onto the panel. In the same way, you can swap icons.
The panel can be made invisible. To do this, again right-click on the free space in the panel and check the box next to the entry Automatically hide panel . Now it will only appear when you move the mouse cursor to the place where the panel should be.
By the way, you can place it at the top, right, left or bottom of your Desktop.
Now all your icons will be placed on the shortcut bar, and your desktop will be clean. And the most convenient thing is that all shortcuts will be available to everyone open windows. Whether it's a browser window, Photoshop, text editor Word or Excel spreadsheets.
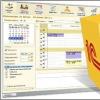
You can download animated icons from the Internet and replace uninteresting shortcuts with them. Often on sites with the program they offer to download for free entire sets of such icons on different topics. Like these


Use and enjoy.