Hide the administrator account. How to hide a user account from the Windows Welcome screen. How to use a hidden account
- In Windows 7. Has the "Change user" option become unavailable?
The problem is solved using Group Policy settings:
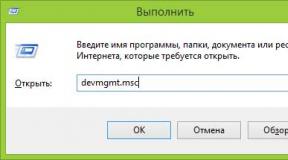
go to gpedit.msc, select:
Policy local computer-> Computer Configuration -> Administrative Templates -> System --> Login
"Hide access points for" option fast switching users" is forcibly set to "Disable". - How to enable super administrator in Windows 7?
For security reasons, Administrator is disabled by default in Windows 7, so in order to enable it you must do the following: First way
Launch lusrmgr.msc
Local users and groups -> Users -> Administrator, Select “Properties”
In the "General" tab, uncheck the "Disable account" checkbox. Apply. OK. Second way
Via command line running as Administrator
net user Administrator /active:yes Third way
By launching secpol.msc
Security Settings -> Local Policies -> Security Settings -> Accounts: State of the "Administrator" account, Select "Properties", Enable.Important!!! Don't forget to set a password for security purposes.
In the standard way, log in to the Administrator and set a password in the user settings.
or via command line
net user Administrator password - How to hide the administrator account in Windows 7?
In order not to disable but simply hide the Administrator account in Windows 7,
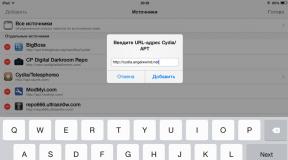
necessary via editor regedit registry create a branch:
HKEY_LOCAL_MACHINE\SOFTWARE\Microsoft\Windows NT\CurrentVersion\Winlogon\SpecialAccounts\UserList
add the "Administrator" parameter of type DWORD with the value 0. - The "Run" button is not displayed in the launcher, how can I enable it?
If you do not see the Run button, you need to enable it by right-clicking on the Start panel properties.
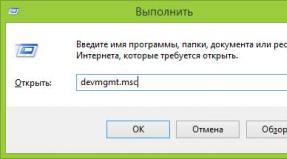
Select the Start Menu tab -> Settings -> Run command, check the box. You can also access the Run command using the hotkeys Win + R. - (product key) installed Windows 7?
Due to product key protection, using windows You cannot view it completely, but only partially. To do this, you need to run the command slmgr.vbs /dlv
It will show the last five digits of the key. To view the product code in full, you can use the EVEREST or aida64 programs, as well as ProdKey.
P.S: You can also find out the product key using the Windows.8.Product.Key.Viewer program, it shows the keys even for Windows 7 and XP
As in other Windows OS families, after installing them, we create our own account or log into an account that has already been created. So we get some rights. But not everyone knows what's in progress windows installations An interesting administrator account is created. To avoid problems it is disabled. Now we will talk about how you can enable this account in Windows 10 and how to disable it later.
So, since Windows XP, this account was simply hidden and users did not see it, then, starting with Vista, the administrator account was blocked. It provides unlimited possibilities, that is, you have access to absolutely all functions, it does not work, and running programs as an administrator is not required.
Even if the account is blocked, there are ways in which we will try to enable it.
Via command line
This method is the fastest and most convenient; it will be easy for those who have already worked with the command line. So, run it with administrator rights and run this command:
net user administrator /active:yes
If the command is not completed, a message may appear: name not found, then most likely the account has a different name. To display all accounts, you need to enter the following command on the command line:
net user
As you can see, our account is called “Administrator”, then to activate it we enter the command:
net user Administrator/active:yes
net user Administrator *

Local users
So, open the Local Users and Group window. You can type the name in the search or press the keys Win+R and enter the phrase in the window that opens lusrmgr.msc. A window will open in which you expand the “ Users”, double-click on the administrator account, if anything, it says “Administrator”, then uncheck "Account is disabled" and save the changes.

As you can see, everything is also very simple, the main thing to remember is that user and group policies are not available in home Windows edition 10. And from the window where you enabled the administrator, you can also set a password for the account.
Local Policy Editor
Now let’s use the local policy editor, open it like this: click Win+R, and then enter gpedit.msc. Or, you can enter this command: secpol.msc. Next, we follow this path: Computer configuration → Windows Configuration → Security Settings → Local policies → Security Settings. Now we search and edit the policy “Accounts: Administrator account status”. And click enable or Enable.

How to disable the administrator account
In order to disable the admin account, it will be most convenient to use command line. Open it as administrator and enter the command again, only now instead of yes, it will be no:
net user administrator /active:no
If the OS version is Russian, then the command is as follows:
net user administrator /active:no
That's all. And in the following articles we will look at how you can use this account.
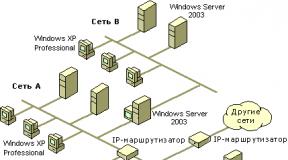
In one of the recent articles about I already talked about the fact that in Windows XP the organization of this very public access to folders and drives of the computer is performed at the user level. Those. on the computer on which we are sharing a folder - you need to create Accounts all users who will access this folder from their workstations.
Let's say I shared a folder on one of the organization's computers that three different employees need access to. I create accounts for these employees on the same computer (for example, Olga, Natalia, Svetlana
).
As a result, after turning on the computer, I see the start window where all these accounts are displayed:  Because I log in to this computer only under account Admin
, and other existing users are unlikely to ever use this machine, then I don’t need to see all the accounts every time I turn it on. You can hide them in the following ways:
Because I log in to this computer only under account Admin
, and other existing users are unlikely to ever use this machine, then I don’t need to see all the accounts every time I turn it on. You can hide them in the following ways:
1 way. Go to “Start” – “Control Panel” – “User Accounts”. Click on the line “Change user login” - in the window that opens, uncheck the “Use welcome page” checkbox: 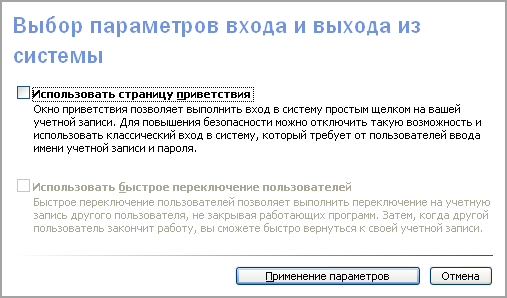 As a result, when you turn on the computer after the system boots, it will appear. But you will have to enter your username and password yourself:
Method 2. Because I would like the user Admin still displayed on home page, then the method described above is not suitable. In this case, you can do this: make all other accounts except Admin – hidden. To do this, go to the registry editor (“Start” – “Run” – regedit).
Opening a thread HKEY_LOCAL_MACHINE\SOFTWARE\Microsoft\WindowsNT\CurrentVersion\Winlogon\SpecialAccounts\UserList .
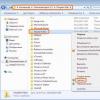
In the right column, right-click on an empty space and select “New” – “DWORD Value”:  For the parameter name, enter Username, which needs to be hidden (for example, Svetlana
). Parameter values can be: 1 – the user will be visible; 0 – the user will not be visible. We put the value 0
:
For the parameter name, enter Username, which needs to be hidden (for example, Svetlana
). Parameter values can be: 1 – the user will be visible; 0 – the user will not be visible. We put the value 0
: I create three such parameters here ( Svetlana, Olga, Natalia
):
I create three such parameters here ( Svetlana, Olga, Natalia
): After this, you can restart your computer - you will no longer see hidden accounts in the welcome window.
Be aware that with this method of hiding users, they will not be displayed even if you go to “Start” - “Control Panel” - “User Accounts”. In this case, you can manage accounts through the “Computer Management” console – “Local users and groups” – “Users” (right-click on the “My Computer” icon – “Manage”).
By the way, if you suddenly want to log into the system as a hidden user, just press the key combination twice Ctrl+Alt+Del on the welcome page. It will open in Windows, where you can enter your username and password.
3 way. Can be customized. Those. after turning on the computer, the specified account will automatically load without requiring you to enter a login and password. But in my case it is not advisable to use this method, because then it turns out that any user who turns on the computer will be able to log in and work under my administrator account.
Thus, the second method described in the article is the most optimal in my situation. But it wouldn’t hurt to know other options for solving a similar problem.
This article will tell you how to hide a user account from the Welcome screen in Windows 10/8.1/7. As an example, we will try to hide the user 'site':
Hiding a user account
Warning! Before hiding the administrator account, make sure that there are other administrators on the system. If you hide the account of a single administrator (or all administrators) using the following method, you will no longer be able to gain access to write values to the registry. Accordingly, you will not be able to return the hidden administrative account to the welcome screen. In this case, to solve the problem you will need to edit the registry using an offline editor.
1 Click Win+R.
2 Enter cmd.
3 Press Enter or OK:

4 Enter the command net users.
5 Click Enter.
6 Copy Name the account you want to hide. (how to copy data from command line)

Keep in mind that Name And Full name - these are different things. In this case we need to know Name user (in English terminology - Name).
7 Click Win+R.
8 Enter regedit.
9 Click Enter or OK:

10 Find the section
HKEY_LOCAL_MACHINE\SOFTWARE\Microsoft\Windows NT\CurrentVersion\Winlogon
11 Create a partition SpecialAccounts:


12 In section SpecialAccounts create a section in the same way UserList:

The path should look like this:
HKLM\SOFTWARE\Microsoft\Windows NT\CurrentVersion\Winlogon\SpecialAccounts\UserList
13 In section UserList create a new one DWORD value (32 bits):

14 For the setting name, enter the name of the account you want to hide from the Welcome screen. (In our example, we will hide the user ‘site’. Therefore, we give the same name to the DWORD parameter).
Leave it at 0 to hide the user from the welcome screen.

To check the result, restart your computer. As you can see in the picture, the specified user has been hidden from the welcome screen:

How to use a hidden account
The hidden account remains active, but you cannot log into it from the welcome screen (in other words, console access is not possible). You can log into a hidden account using a remote desktop. Also, you can run any applications and applets under a hidden account. To do this, log in under a different account and use the runas /user syntax:<имя> <приложение> ().
There is one more point. When starting operations that require elevation from an account simple user The UAC control system prompts you to enter the password for your existing administrator account. If the only administrator account on the computer was hidden as described above, then it will be impossible to enter his password.
This is what a promotion request looks like when there are no active or hidden administrator accounts in the system:

As you can see in the picture, there is no field for entering a password and there is nowhere to enter the password. Button Yes inactive.
Therefore, as we warned at the beginning of the article, if you have hidden all administrators in the system, then you will have to.
How to return a hidden user to the welcome screen
If in the future you need to display the hidden user account again on the Welcome screen, you have two ways to do this:
1. Change the parameter value from “0” to “1”:

2. Delete the parameter with the name of the corresponding account from the registry:

If you cannot make changes to the registry, read the article.